


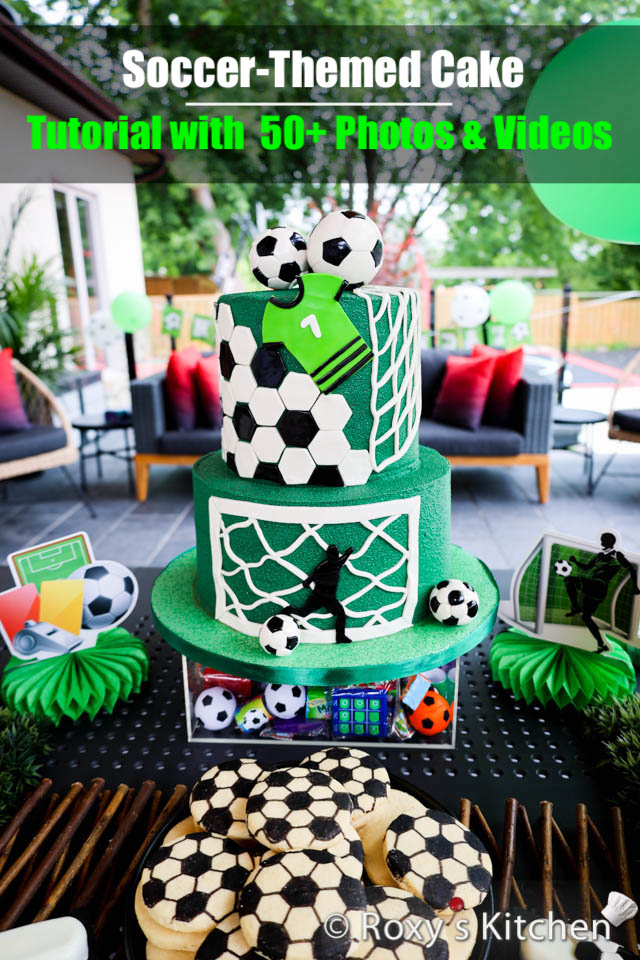
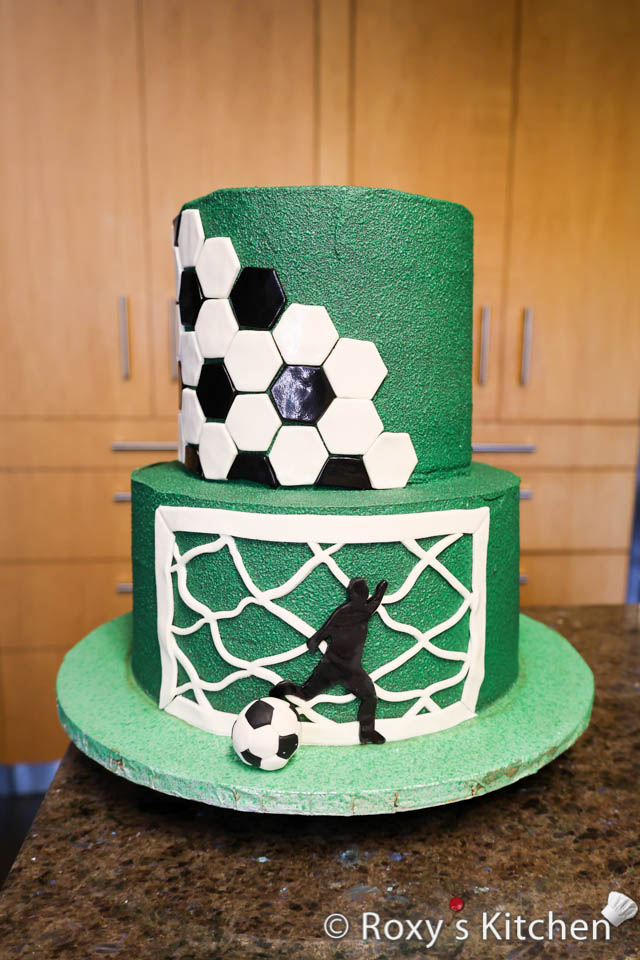
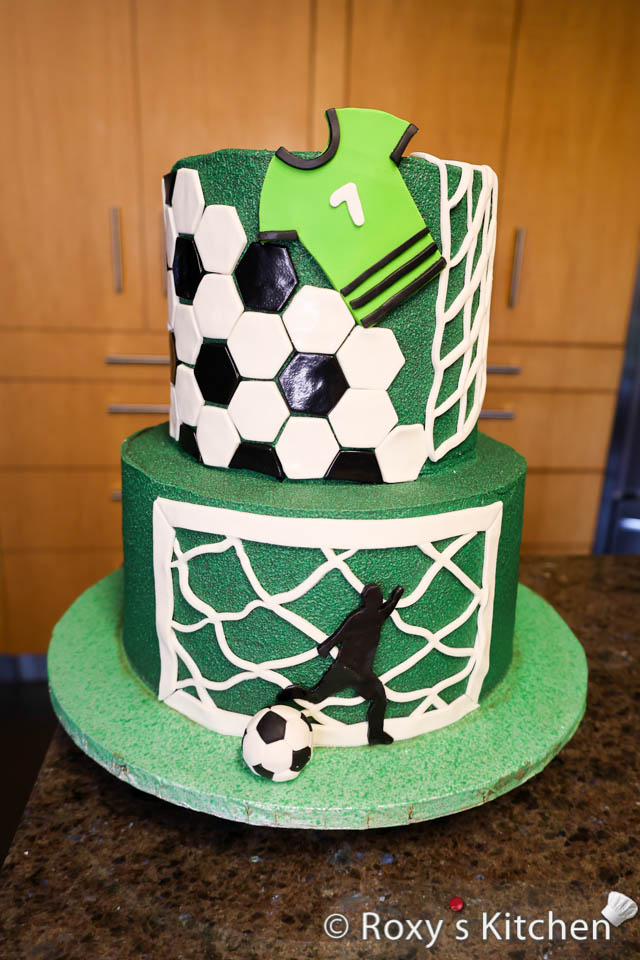
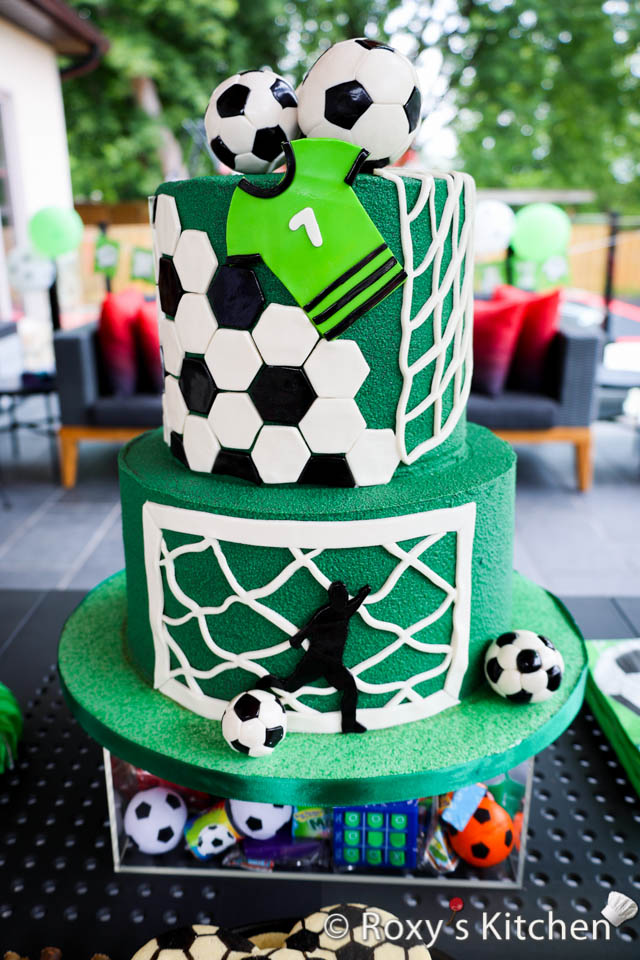
In this post I’ll show you how to make a Soccer-Themed Cake that’s as impressive as it is delicious! Whether you’re a die-hard soccer fan or planning a special birthday for your little ones or a soccer-loving friend, this tutorial is your ultimate playbook for creating a show-stopping dessert that will have everyone cheering.
I made this soccer-themed cake for one of my boy’s soccer-themed birthday party. Make sure to check out all the soccer-themed posts on my website to see lots of soccer-themed dessert ideas, party games, snacks, decorations and much more!
Alternatively, if you want to customize cakes and other desserts using printed designs, you can check out the soccer designs available in my Shop:
-
Product on sale
 Soccer Cupcake Toppers (2”) Modern Neon Collection – 12 Designs + BONUS!Original price was: $5.00.$2.50Current price is: $2.50.
 -
Product on saleSoccer Party Package Printables Watercolour CollectionOriginal price was: $15.00.$7.50Current price is: $7.50.
-
Product on saleSoccer Cake Toppers Watercolour CollectionOriginal price was: $8.16.$6.12Current price is: $6.12.
-
Product on saleSoccer Cupcake Toppers (2”) Watercolour Collection – 12 DesignsOriginal price was: $10.20.$4.42Current price is: $4.42.


Ingredients/Tools
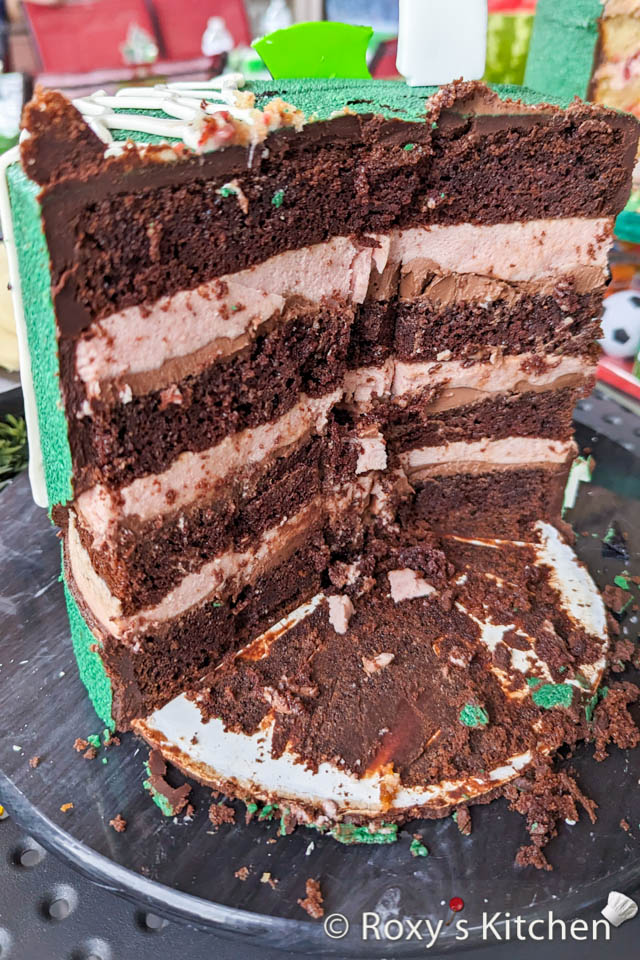
Top Cake Tier – Moist Chocolate Cake with Chocolate and Strawberry Fillings
Moist Chocolate Cake
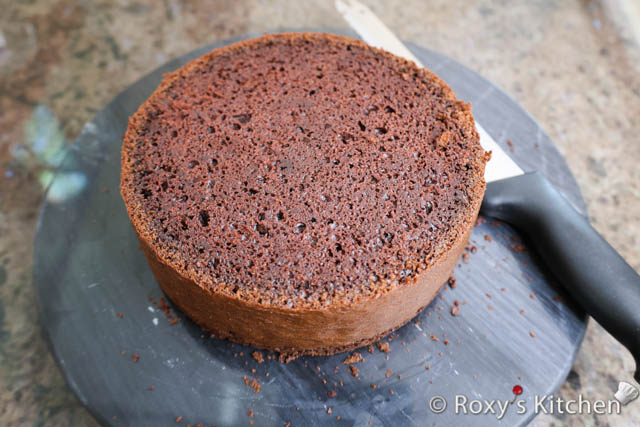
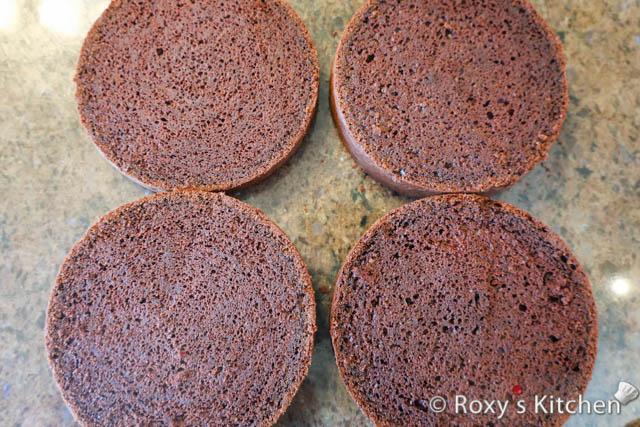
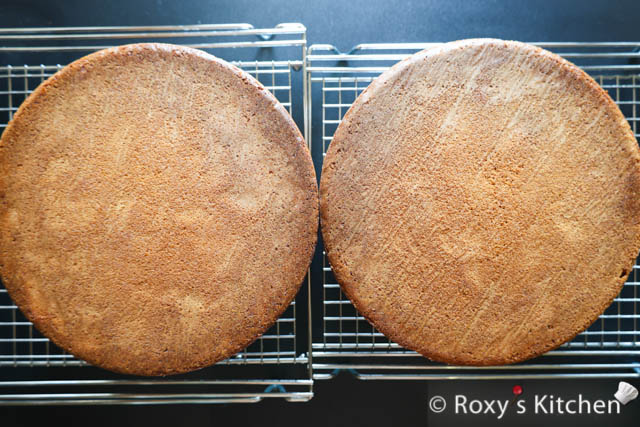
Follow the directions in this Moist Chocolate Cake recipe and the ingredients below to make four 18 cm (7 inch) cake layers. You can divide the batter between two pans. Once the cakes are baked and cooled, cut the dome of the cakes using a serrated knife. Cut each cake horizontally in two. You should have four cake layers in total.
- 6 eggs
- 415 g sugar
- 220 ml vegetable oil
- 220 ml brewed coffee, room temperature
- 380 g yogurt
- 450 g all purpose flour
- 75 g cocoa powder
- 1 Tbsp baking powder
- 1/2 Tbsp baking soda
- a pinch of salt
Chocolate Ganache
Make the Chocolate Ganache by following the instructions in this recipe and the ingredients below.
- 125 g semi-sweet chocolate + 150 g milk chocolate (baking or couverture chocolate)
- 250 ml whipping cream
Strawberry Mousse
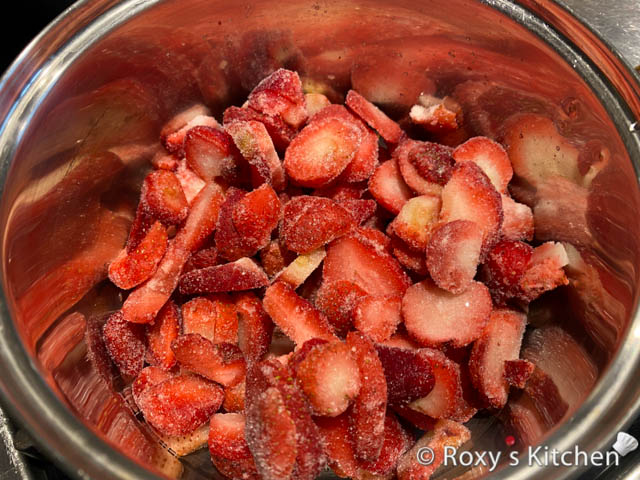
- 350 g frozen strawberries
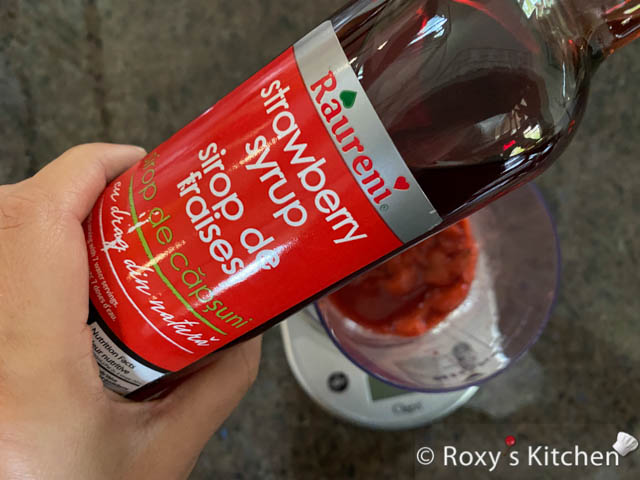
- 50 g strawberry syrup
- 350 ml whipping cream
- 100 g powdered sugar
- 14 g of unflavoured gelatine softened in 150 ml of water
Instructions on how to make this strawberry mousse are posted in the sections below.
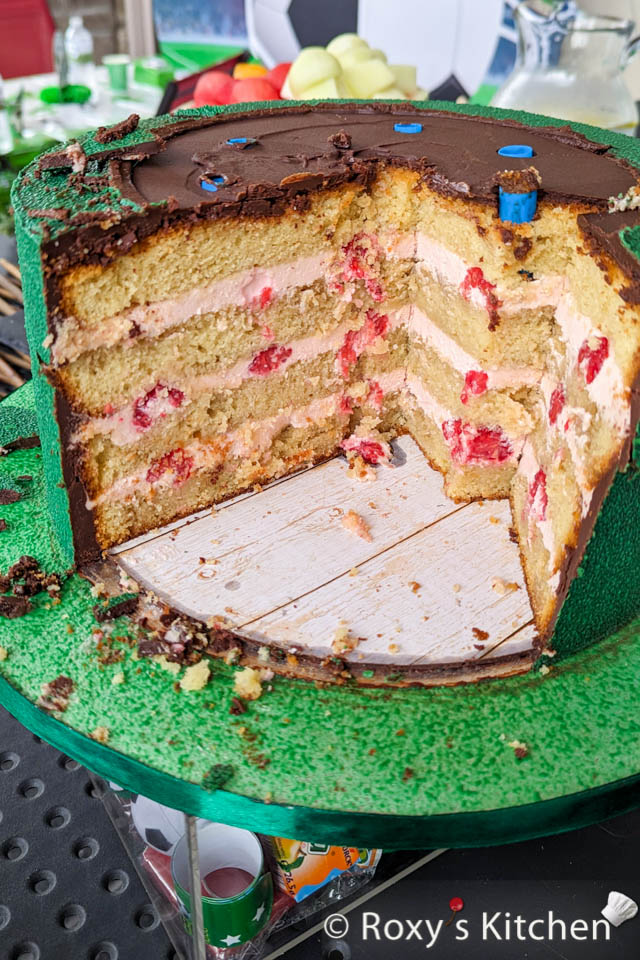
Bottom Cake Tier – Moist Vanilla Cake with Raspberry Cream Cheese Buttercream
Moist Vanilla Cake
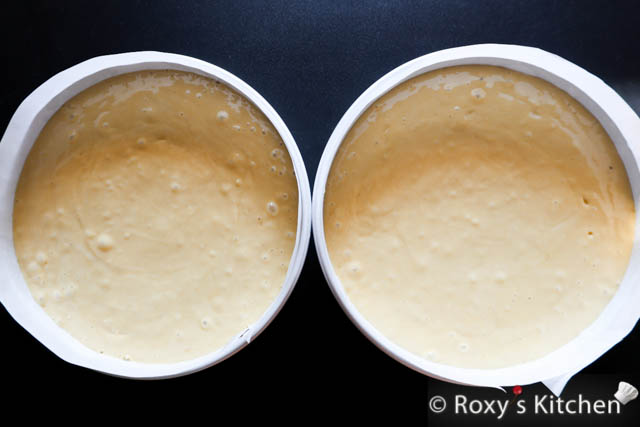
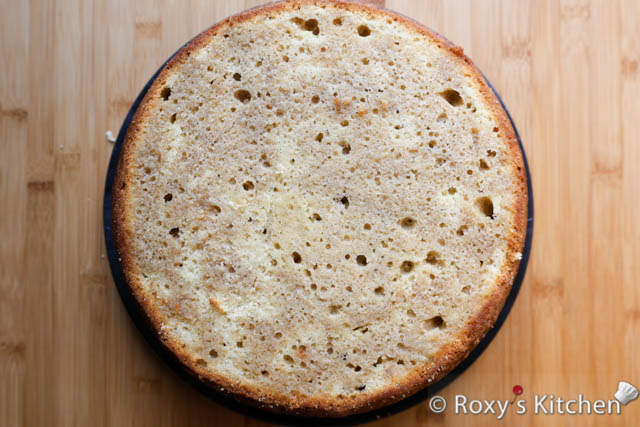
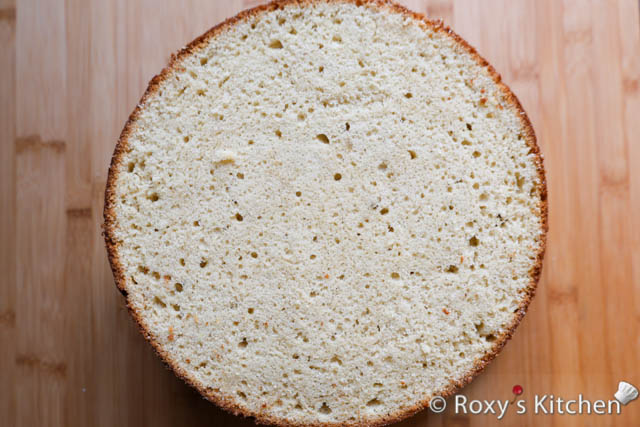
Follow the directions in this Moist Vanilla Cake recipe and the ingredients below to make four 25 cm (10 inch) cake layers. You can divide the batter between two pans. Once the cakes are baked and cooled, cut the dome of the cakes using a serrated knife. Cut each cake horizontally in two. You should have four cake layers in total.
- 9 eggs
- 620 g (3 cups) sugar
- 210 ml milk
- 600 ml vegetable oil
- 4.5 Tbsp vanilla extract or 3 Tbsp vanilla bean paste
- 780 g (6 3/4 cups) all purpose flour
- a pinch of salt
- 1.5 Tbsp baking powder
Raspberry Cream Cheese Buttercream
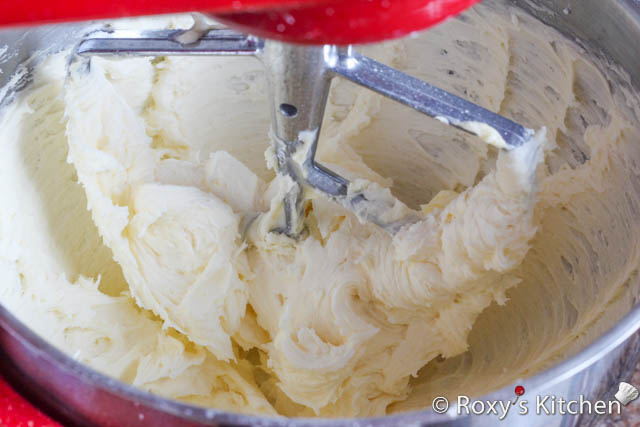

Make Raspberry Cream Cheese Buttercream by following the instructions in this recipe and the ingredients below.
- 1.5 cups (375 g) unsalted butter, at room temperature
- 4-5 cups (480-600 g) powdered sugar, depending how sweet you prefer it
- 18 oz (500 g) cream cheese, at room temperature
- 1/3 cup (100 g) seedless raspberry jam
- 2 Tbsp lukewarm water
- red food colouring paste – I use Wilton (optional)
- 1.5 cup fresh raspberries (optional)
Sugar Syrup to Moisten the Cakes (optional, used for both cake tiers)
- 400 ml water
- 10 Tbsp sugar
- 4 Tbsp vanilla extract + a few drops of strawberry or strawberry-flavoured baking oils (I use Lorann Oils)
Prepare the simple sugar syrup by boiling the water with sugar. Then, add the flavours when it starts boiling and remove from the heat. Let it cool off.
Unwhipped Chocolate Ganache / Firm Frosting for Covering the Cake
Make Unwhipped Chocolate Ganache / Firm Frosting by following the instructions in this recipe and the ingredients below.
- 1.4 kg semi-sweet chocolate (baking or couverture chocolate)
- 700 ml whipping cream
Green Turf Texture Frosting
- 200 g white chocolate
- 1 tsp powdered cocoa butter
- green oil-based food colouring
- a spray gun like the one below, fitted with a 2.6 millimetre nozzle

Soccer-Themed Cake Decorations
- for the soccer hexagon pattern: 3.8 cm (1.5’’) hexagon-shaped cutter, black and white fondant
- for the soccer net: 5 cm (2’’) square-shaped cutter, white fondant
- for the soccer pattern with hexagons: 3.8 cm (1.5’’) hexagon-shaped cutter, black & white fondant
- for the soccer player: white and black fondant, any silhouette of a soccer player that you can find online (scale the image so that it’s 3/4 as tall as the bottom cake tier and print it)
- for the soccer jersey: green & black fondant, # 7 cutter, 3.8 cm (1.5’’) round cutter
- for the soccer balls: 2.5 cm (1’’) and 3.8 cm (1.5’’) hexagon- & pentagon-shaped cutters, depending on the size of the soccer balls, black and white fondant plus 4-5 chocolate balls of various sizes – see tutorial on how to make these here; I covered the chocolate balls with the hexagon / pentagon shapes however, the soccer ball in the bottom-right corner is made purely out of fondant using an easier technique
- A fondant rolling pin
- X-Acto knife or any other sharp knife with a thin blade
- Powdered sugar or cornstarch for dusting the surface
Other Tools/Items
- 25 cm (10’’) & 18 cm (7’’) cake boards
- 30 cm (12’’) cake drum
- 10 Boba plastic straws or cake dowels
- 1 tall wooden dowel for the centre cake dowel
- a small paint brush
Directions
Watch this video tutorial or check out the step-by-step instructions with pictures below.
Filling Your Cakes
Top Tier: Chocolate Cake Filled with Chocolate Ganache and Strawberry Mousse
In order to fill the top tier, line the pan in which you baked the cake with plastic foil on the bottom. Then, use acetate sheets to create a collar and raise the sides of your pan to a height of 18 cm (7 inches). If you don’t have acetate sheets, you can use any soft plastic that bends and allows you to create a collar (e.g. plastic folders).
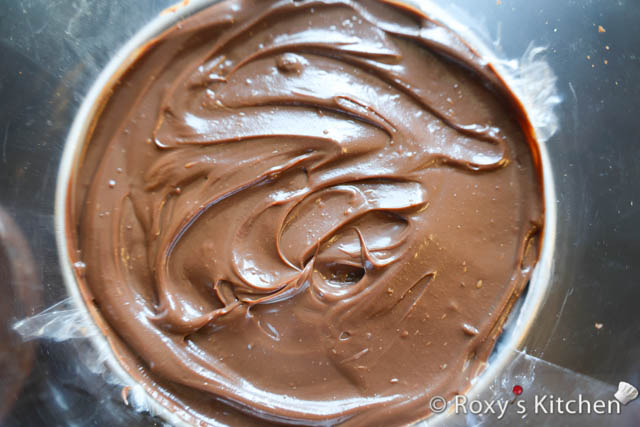
Make the unwhipped chocolate ganache by following the steps in this post. You should make this at least a few hours before you are ready to assemble the cake as it needs to cool off and have a thick pouring consistency before you use it.
To make the strawberry mousse, thaw the strawberries and bring them to a boil on the stovetop. Once boiled, some of the liquid will evaporate and you should have ~330 g left.
Puree the strawberries with a hand blender. Mix in the strawberry syrup. Let the mixture cool off, it can be warm to the touch but not hot when you mix in the gelatine and whipping cream.
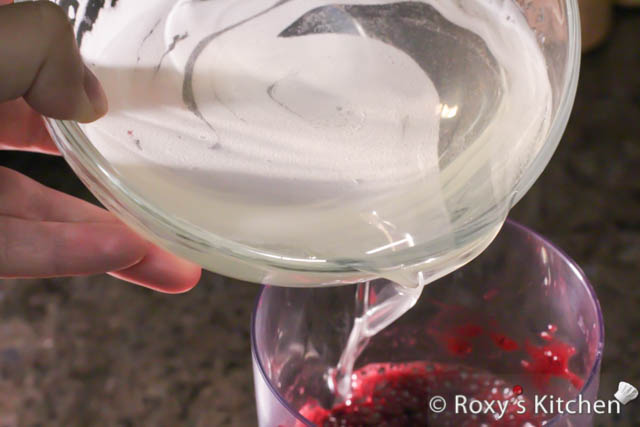
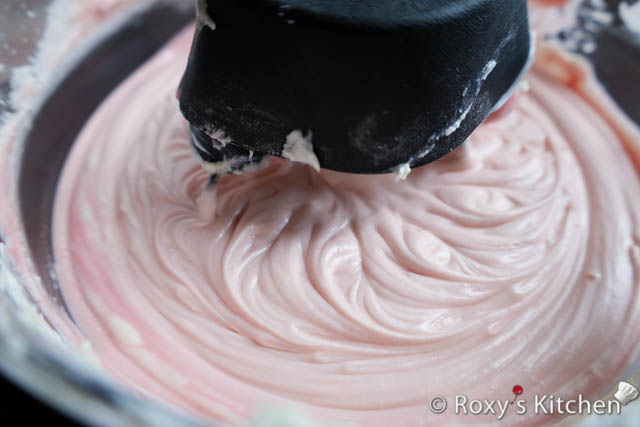
Soften the gelatine in water for 10 minutes. Melt it in the microwave a few seconds until all the granules are melted. Before you start melting your gelatine, beat the whipping cream with the powdered sugar with a mixer on high speed until soft peaks form.
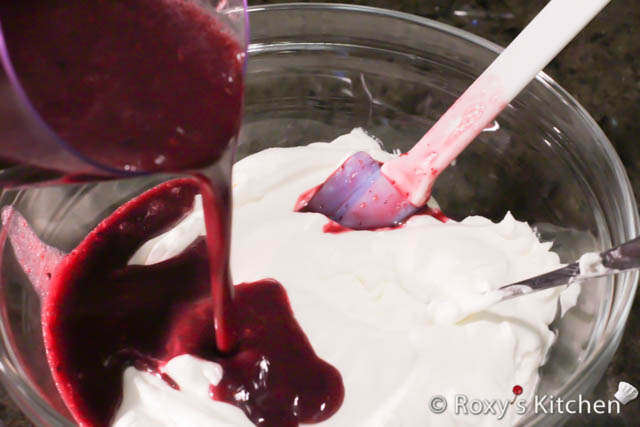
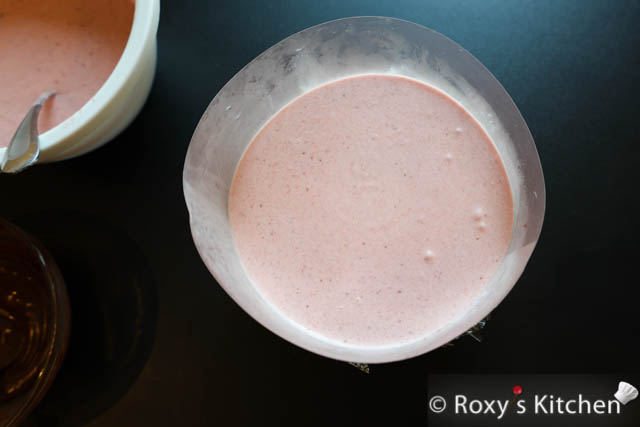
Pour the melted gelatine over the strawberries & strawberry syrup and mix it slowly until it’s well incorporated. Add this over the whipped cream and mix slowly.
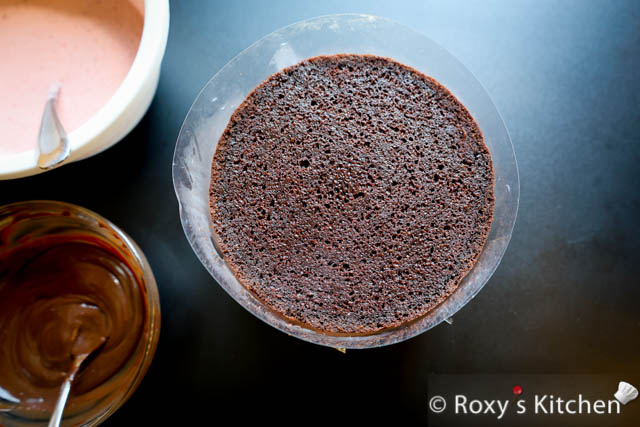
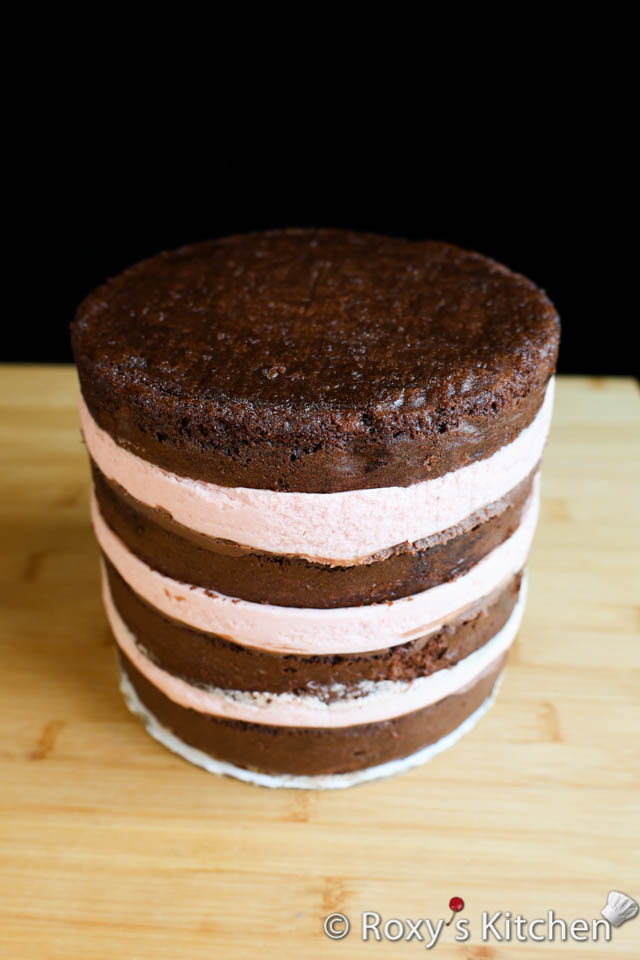
Place the first cake layer and moisten it with sugar syrup.
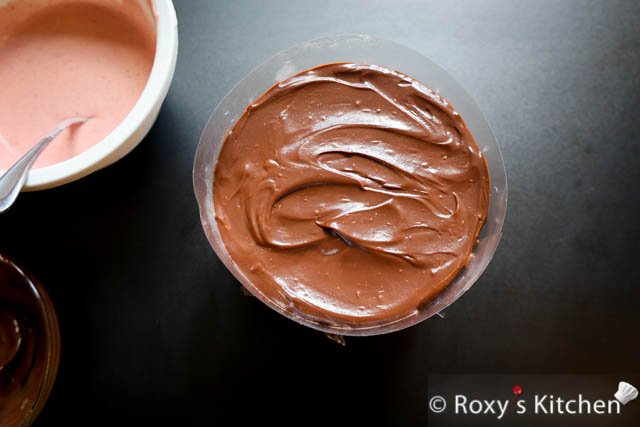
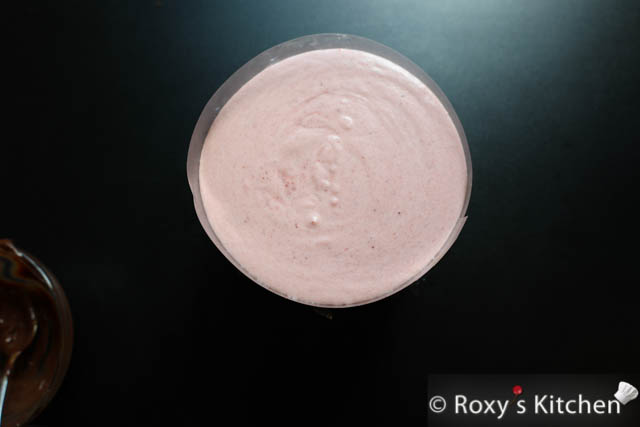
Spread 1/3 of the unwhipped chocolate ganache filling and pour 1/3 of the strawberry mousse.
Add the 2nd cake layer, moist it with sugar syrup, spread half of the remaining chocolate ganache filling and half of the remaining strawberry mousse.
Add the 3d cake layer and moist it with sugar syrup. Spread the remaining chocolate ganache filling and pour the remaining strawberry mousse.
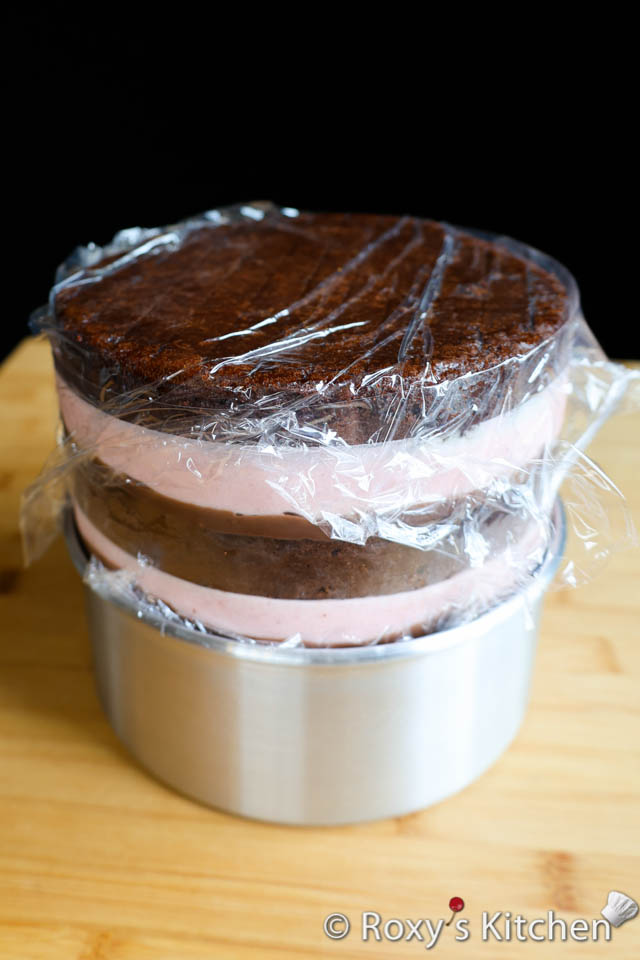
Lastly, add the 4th cake layer and moist it with sugar syrup.

Cover the cake with plastic foil and refrigerate for 8 hours or overnight.
Bottom Tier: Vanilla Cake Filled with Raspberry Cream Cheese Buttercream and Fresh Raspberries
Make the cakes and the filling based on the recipes and instructions above.
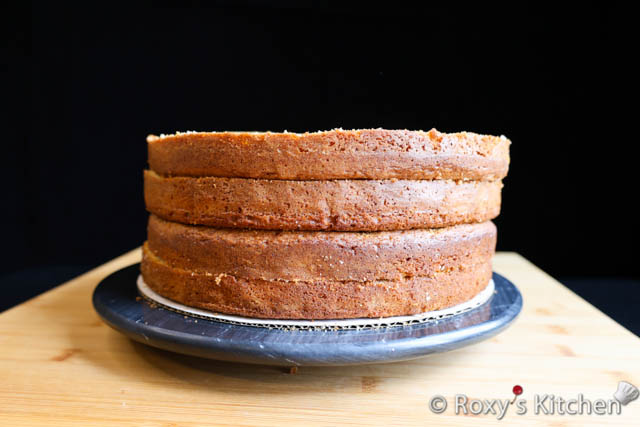
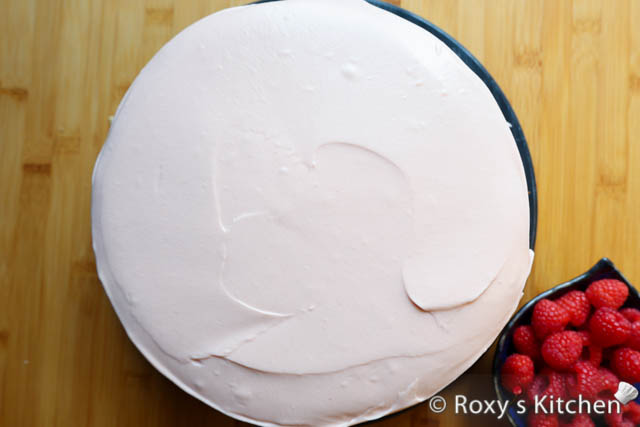
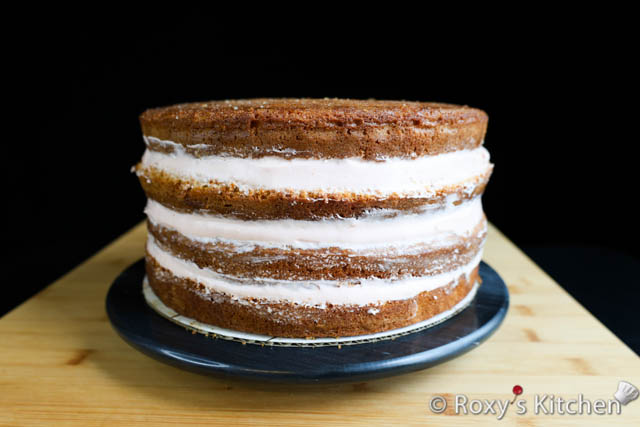
Place the first layer on your cake board or platter, moist it with sugar syrup and evenly cover the layer with 1/3 of the raspberry filling.
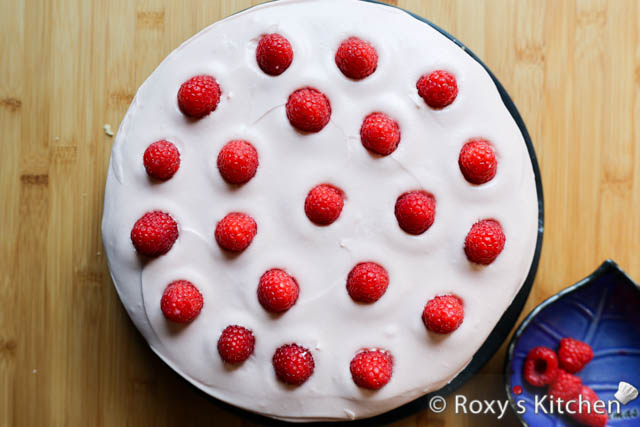
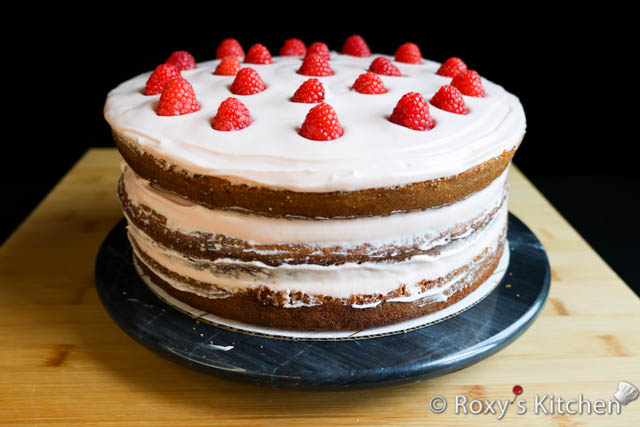
Add a layer of fresh raspberries on top. Then, repeat the process to fill and stack the rest of your cake – i.e. cake layer moister with sugar syrup, cream cheese buttercream, fresh raspberries.
Crumb Coating Your Cake Tiers
Make unwhipped chocolate ganache by following the instructions noted above. Your ganache needs to be cool to the touch and have a thick pouring consistency (like peanut butter or Nutella) before you start crumb coating the cakes.
After the strawberry mousse has set, carefully remove the cake from the pan and remove the acetate collar. Spread a bit of ganache on the 18 cm (7’’) cake board and place the cake on it.
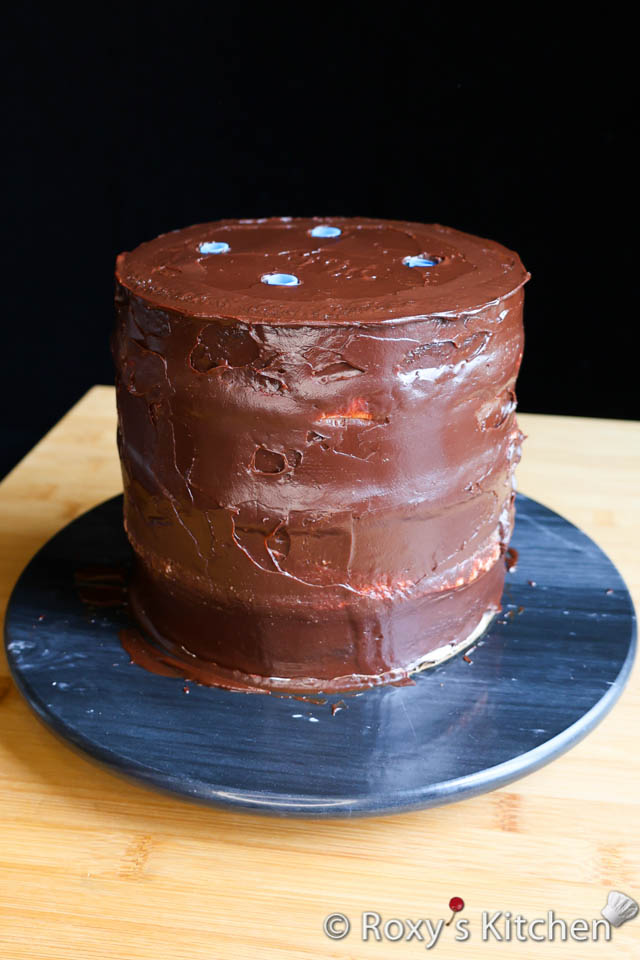
Crumb coat the cake with a thin layer of ganache. To do this, apply a thin layer of ganache all over the cake to seal in the crumbs. Use an offset spatula or a bench scraper to spread the ganache evenly and smooth out any imperfections.
Repeat the same steps to crumb coat the vanilla cake. Don’t forget to spread a bit of ganache on the 25 cm (10’’) cake board and place the cake on it.
Refrigerate the cakes for 1 hour.
Stacking the Cake & Covering it with Chocolate Ganache
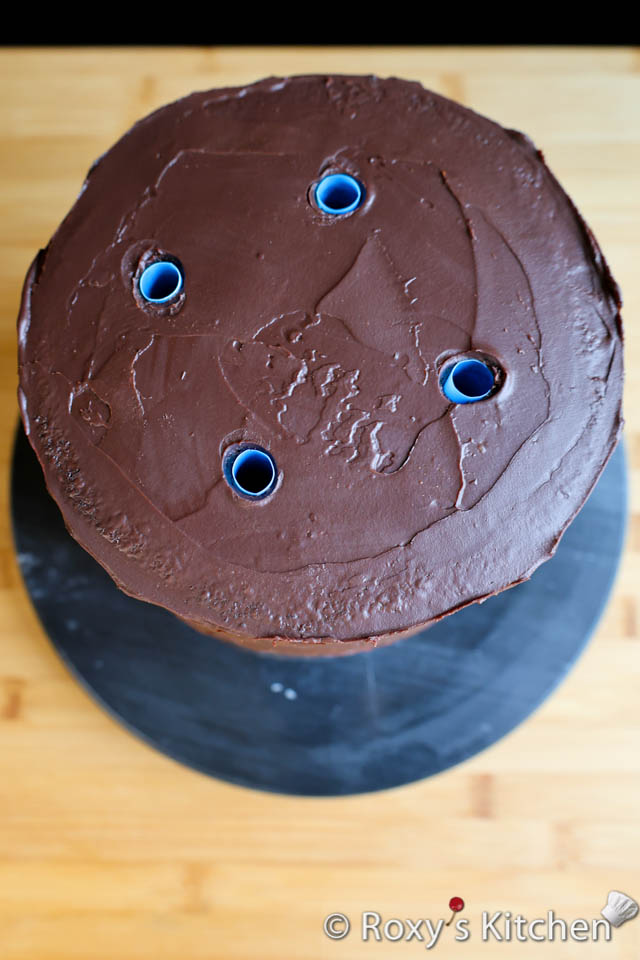
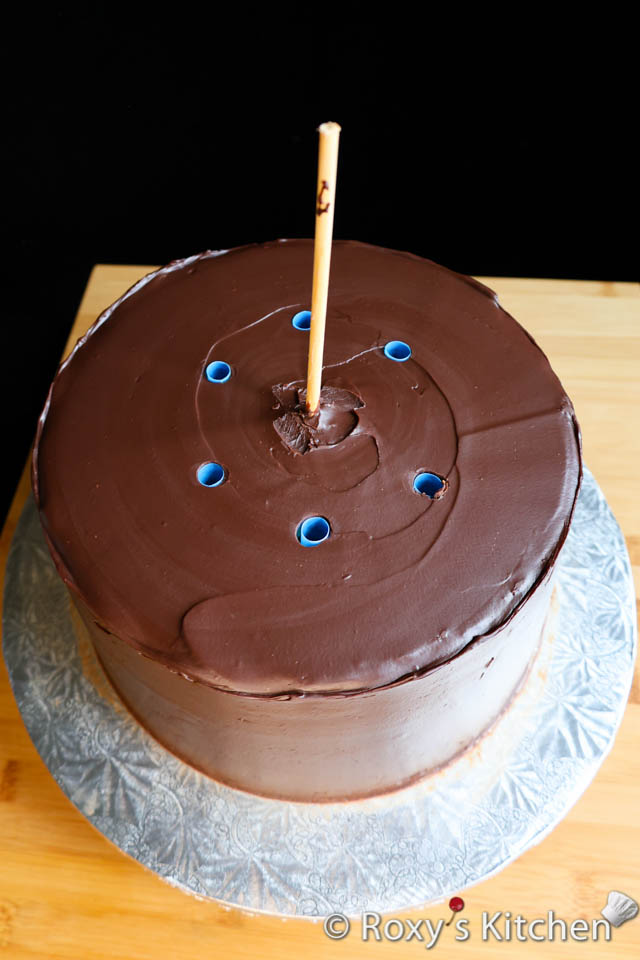
Stack the cakes. To do this, cut 6 boba straws or cake dowels to the height of the 10’’ cake and insert them into the cake, about 3.8 cm (1.5’’) away from the edge.
Cut 4 more boba straws or cake dowels to the height of the second 18 cm (7’’) cake and insert them into the cake in four corners, about 3.8 cm (1.5’’) away from the edge.
Spread a bit of chocolate ganache in the middle of your 30 cm (12’’) cake drum. Place the bottom cake tier in the centre.
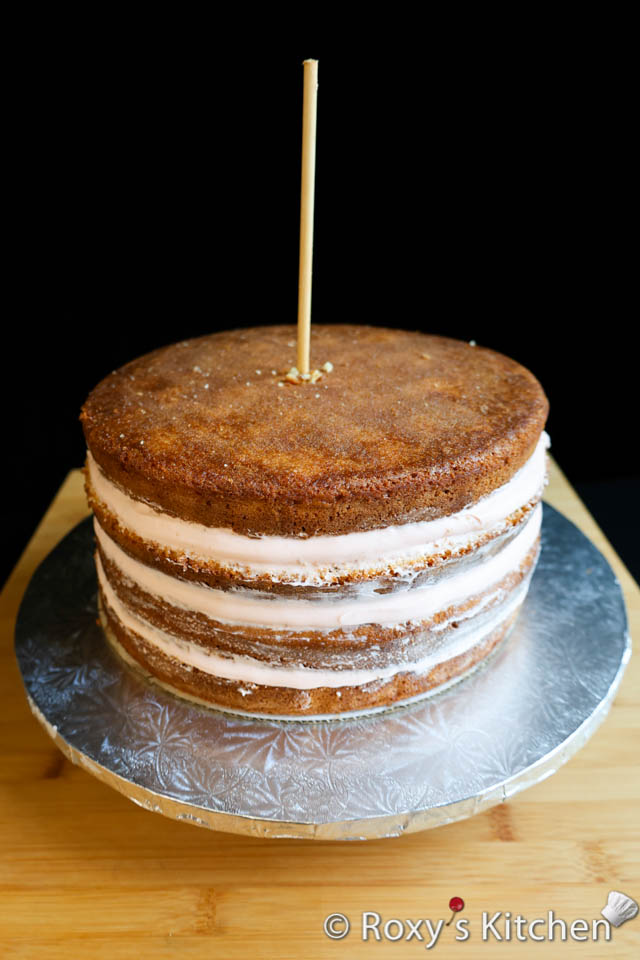
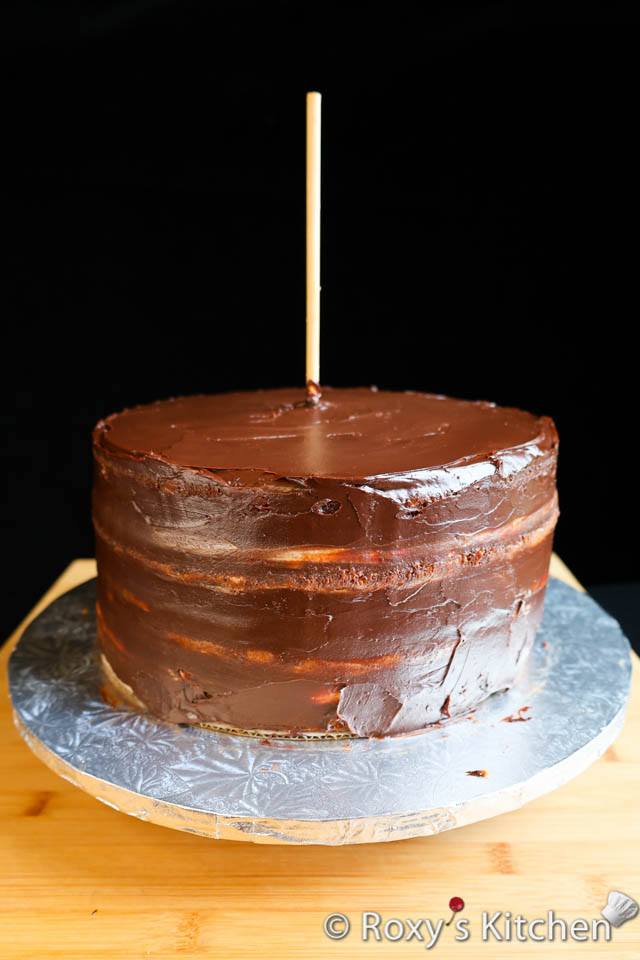
If you feel that your cake is not stable enough, you can use a centre dowel. Use a strong wooden dowel. If you don’t have pre-drilled holes in the centre of your cake boards (you can purchase cake boards that have pre-drilled holes), then sharpen one end of the dowel. That way it’s easier to pass it through the cake and cake boards.
Push your dowel through or hammer it down all the way through your cake. This works if you’re using regular/cardboard cake boards between your cakes. Laminated cake boards are not good for this as it will be difficult to push the dowel through even if it’s sharpened.
Note that I inserted the centre dowel in the bottom cake tier first and then I slowly added the top tier on top, inserting the dowel through the pre-drilled hole in the centre of the 18 cm (7’’) cake board.
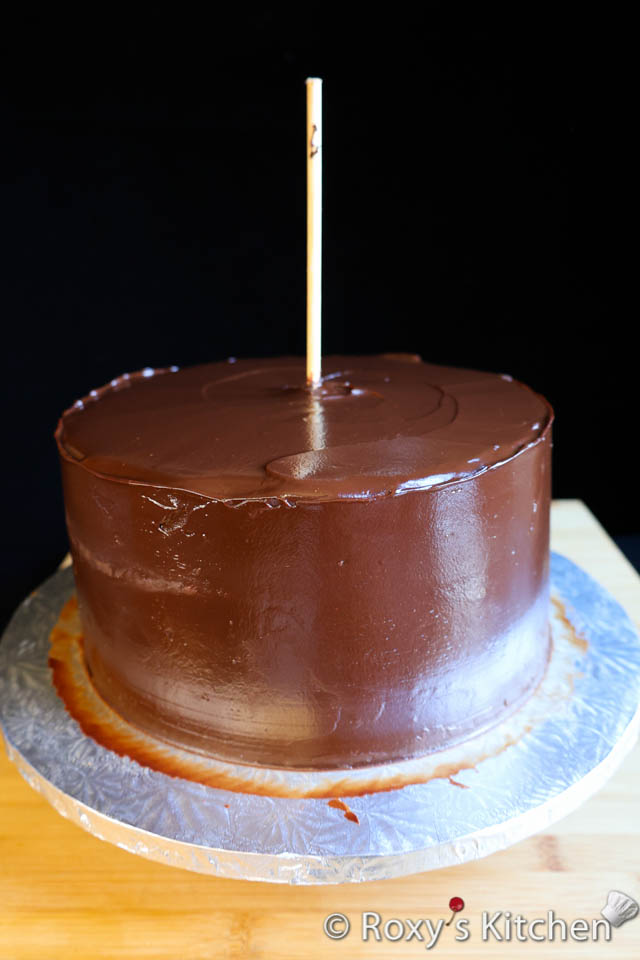
Apply another layer of chocolate ganache on each tier and refrigerate them for 1 hour.

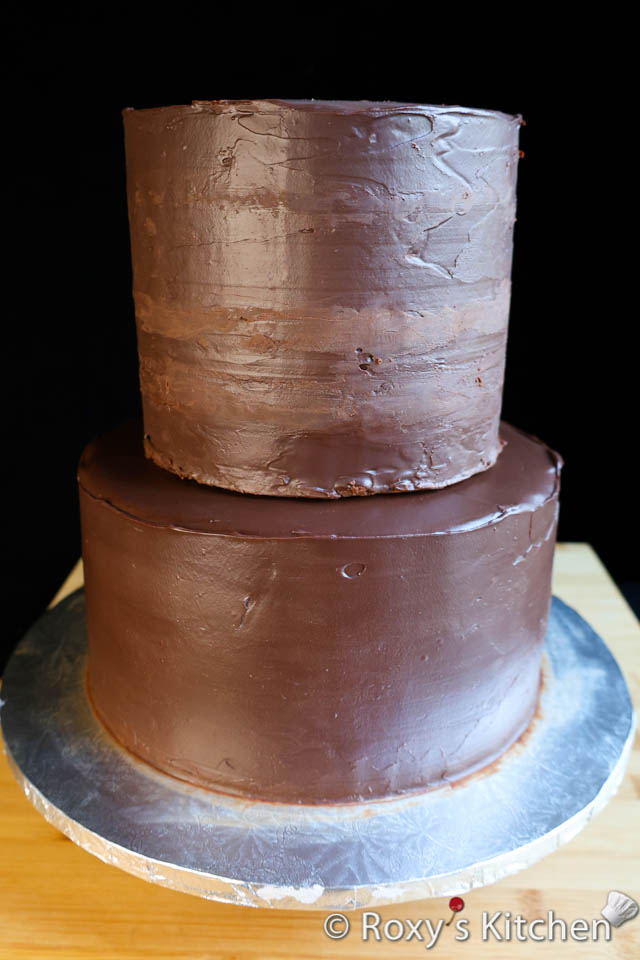
Place the top tier on top of the bottom tier.
Lastly, apply a thicker layer of semi-sweet chocolate ganache on the two tier cake and smooth it out using a spatula and a cake scraper / smoother. Use an offset spatula to smooth the top and use a cake scraper to smooth the sides.
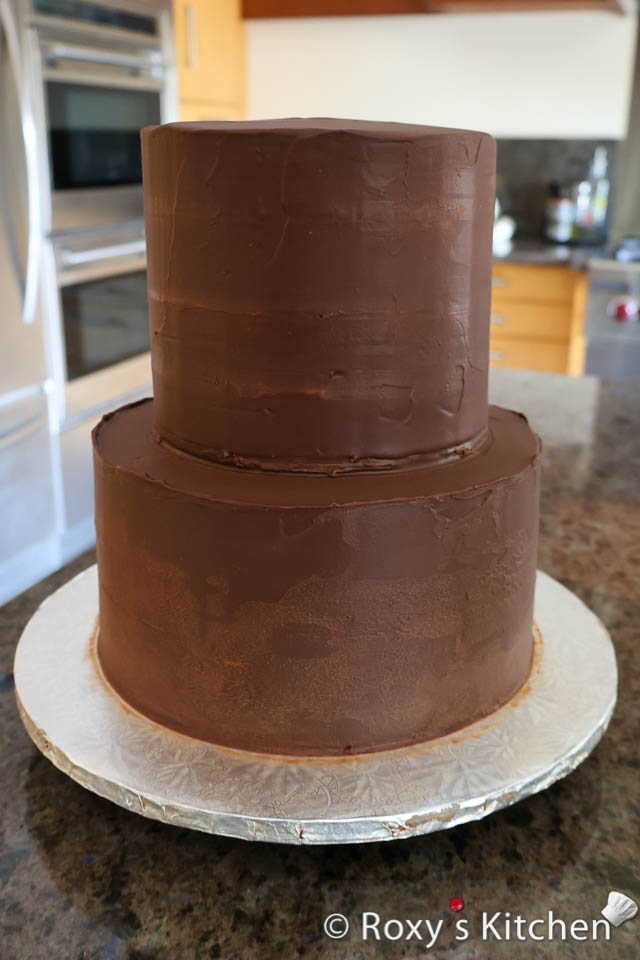
A few tips:
- once smooth, the little ganache that’s left over the edges can be taken off with a sharp knife
- if your ganache becomes too stiff, place the ganache in the microwave for 5-10 seconds and stir with a spatula
- if the ganache on your cake sides is not very smooth, you can dip the cake scraper in hot water to get smooth sides
Making the Green Turf Look on Your Soccer-Themed Cake
Refrigerate the cake for at least 6 hours before applying the chocolate velvet / green turf frosting on top.
You can read the instructions below or watch this video to see how to use a chocolate pray gun to create the green turf look using melted chocolate:
Melt the white chocolate until it reaches 42°C (107°F). You can use the microwave to melt it 5-10 seconds at a time, stirring it each time. Or you can melt it using a double boiler.
Allow the chocolate to cool at room temperature to 33°C (91°F).
Then, add cocoa butter powder and mix it in until there are no more traces of cocoa butter.
Colour the chocolate using green oil-based food colouring. The chocolate should have a temperature of 30-32°C (86-89°F) when you work with it. If it cools off too much re-heat it in the microwave for a few seconds again.
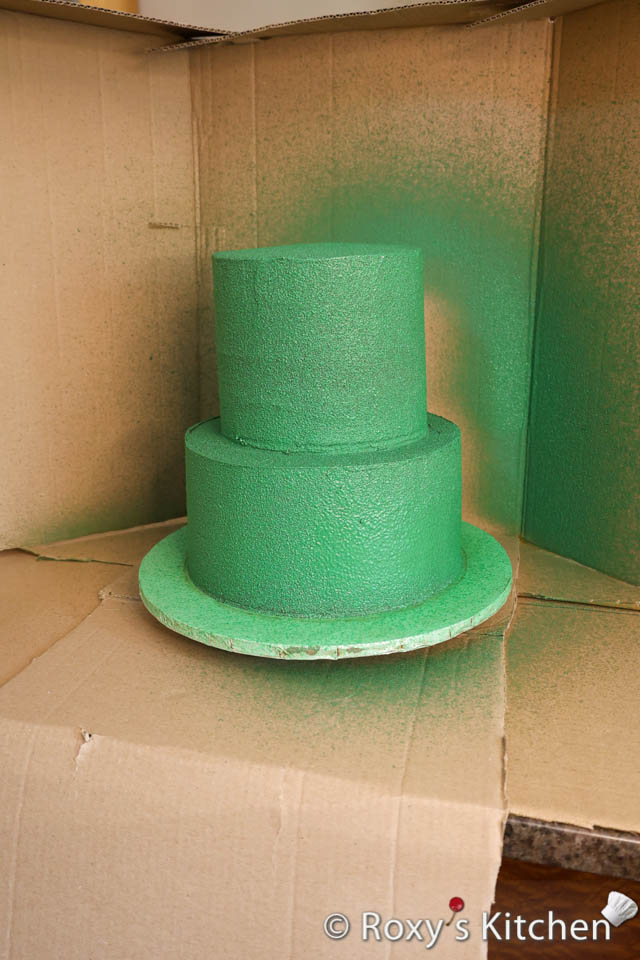
Spray the melted chocolate on your cake using a spray gun like the one below. Note that you should add the chocolate to the spray gun container when it’s 1-2 degrees warmer as, by the time you start spraying the cake, it will cool off.
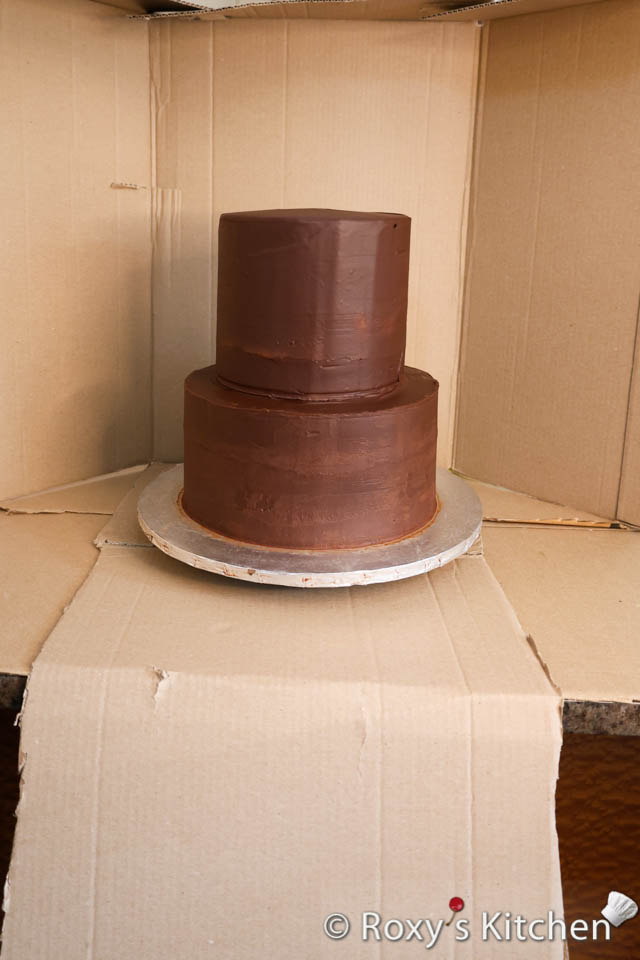
Always test the spray gun on a cardboard before you start spraying the chocolate on the cake.
Place your cake in a cardboard box as seen below, otherwise, you’ll make a mess in your kitchen.
Refrigerate the cake for at least 1 hour.
Making the Soccer-Themed Decorations out of Fondant
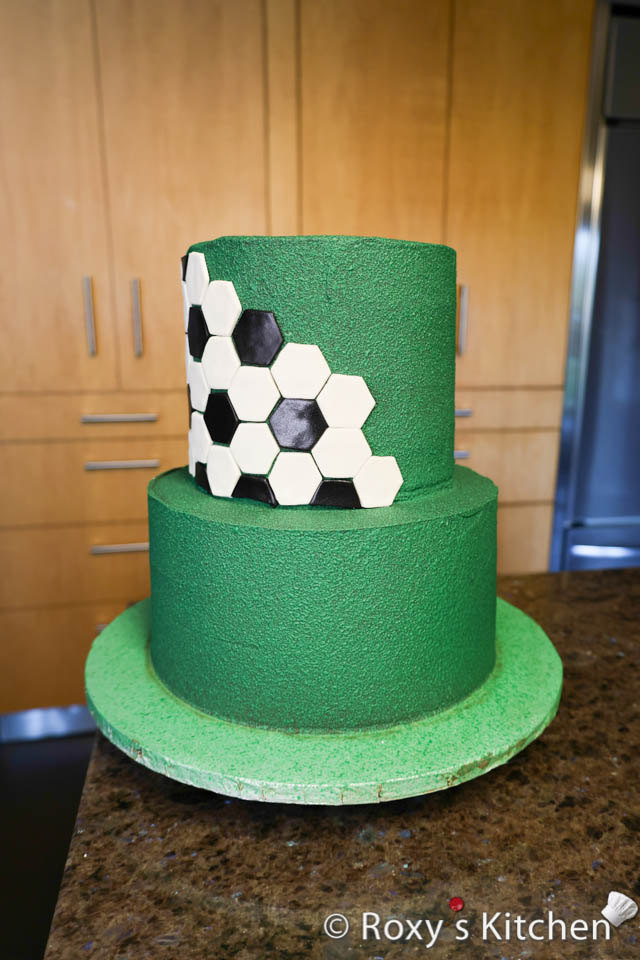
The hexagon soccer pattern
Dust your work surface with powdered sugar or cornstarch to ensure the fondant does not stick to it. Use a fondant rolling pin to roll out some of the black and white fondant about 1/3 cm (1/7’’) thick and cut out hexagons using the 3.8 cm (1.5”) hexagon cutter.
Place the fondant hexagons on the cake, using a bit of water to attach them to the cake. Oftentimes, the condensation that forms on the cake, once you take it out of the fridge, is enough for the fondant to stick to the cake.
The soccer net
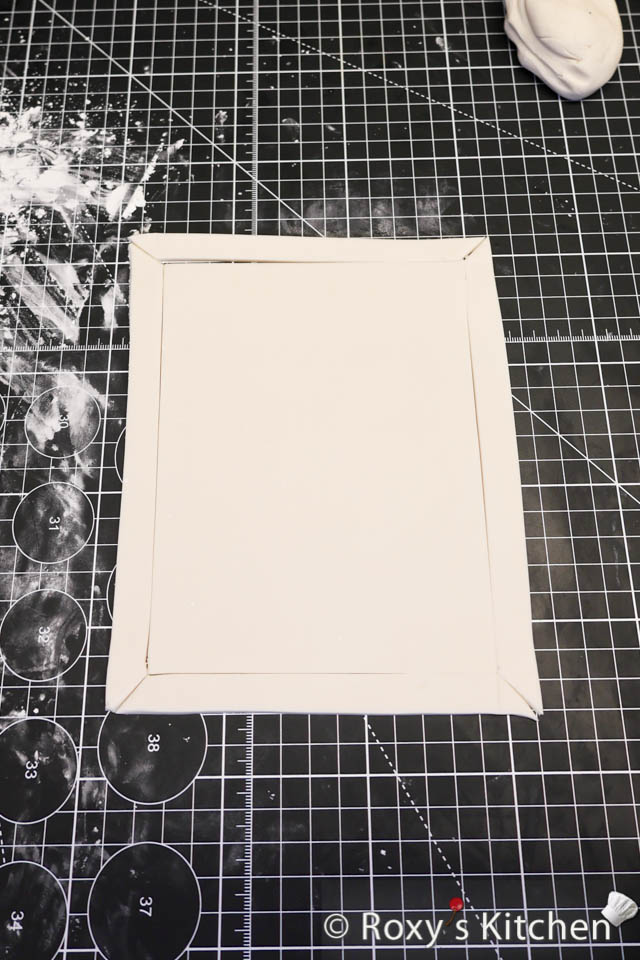
Roll out white fondant into a 18 cm (7’’) x 14 cm (5.5’’) rectangle that’s about 1/2 cm (1/5’’) thick.
Cut 1.3 cm (0.5’’) strips out of its sides as seen below. Set them aside.
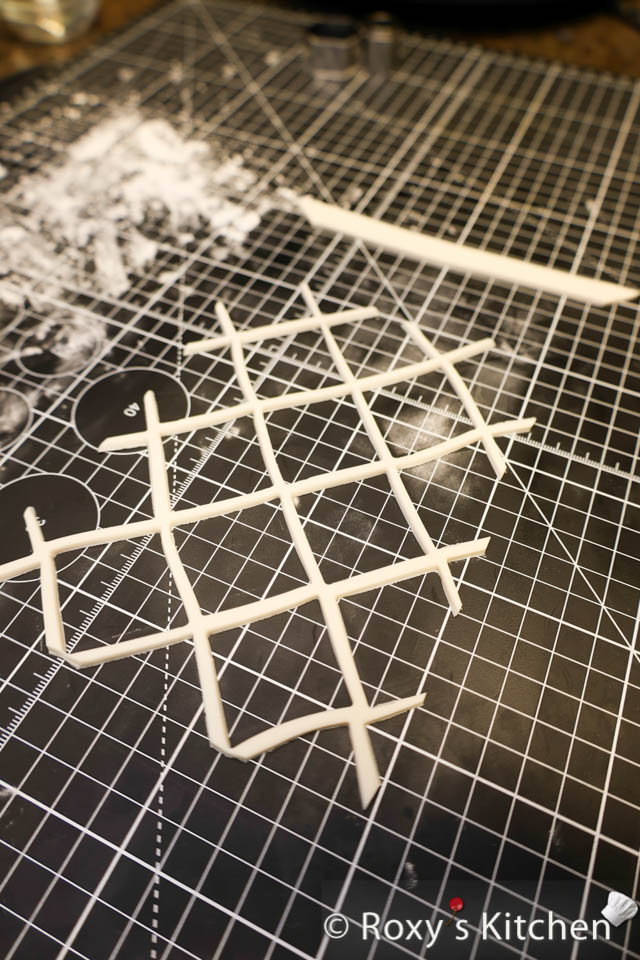
Take the remaining fondant rectangle and cut out diamond shapes using the 3.8 cm (1.5”) square cutter as seen below.
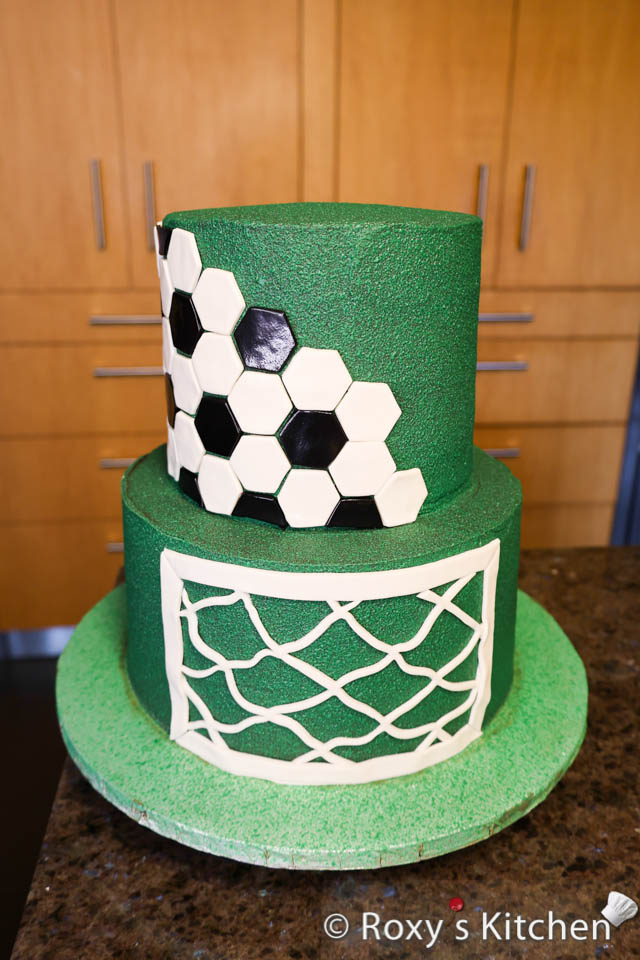
Carefully lift the net with both hands and attach it to the front of the bottom cake tier. You might need to brush a bit of water on the back of the net so that it sticks to the cake better.
Then, attach the sides of the net by brushing a bit of water on their back and slightly overlapping them over the net.

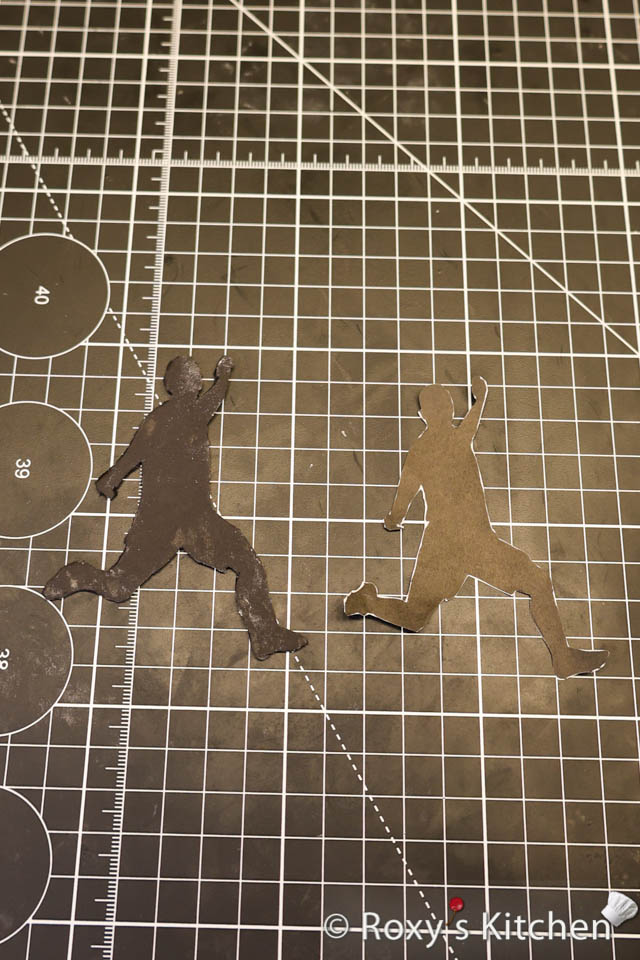
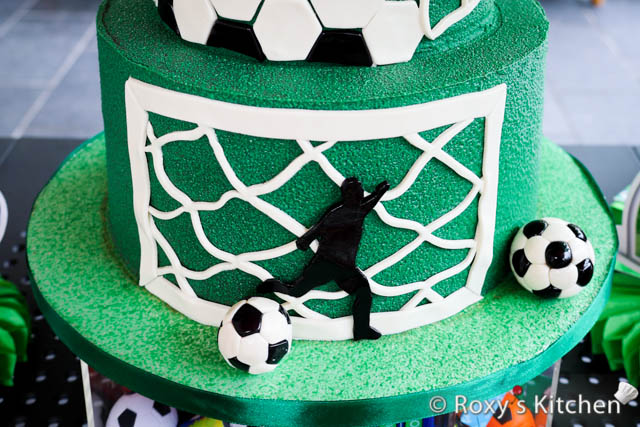
The soccer player
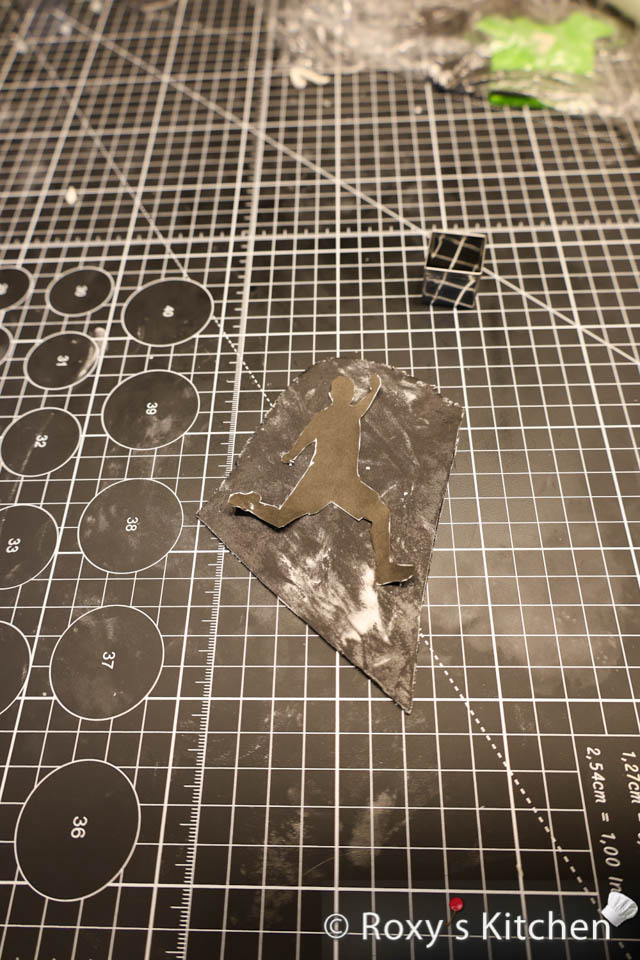
Roll out black fondant 1/2 cm (1/5’’) thick. Place the soccer player paper template on top. Using a sharp knife, cut the fondant around the template.
Brush a bit of water on the back of the fondant soccer player and attach it to the cake.
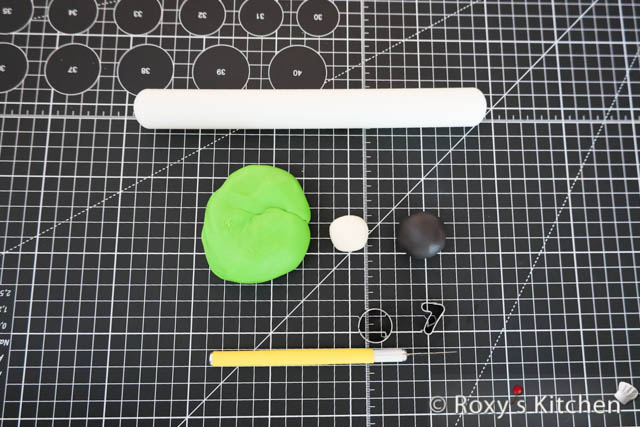
The soccer jersey
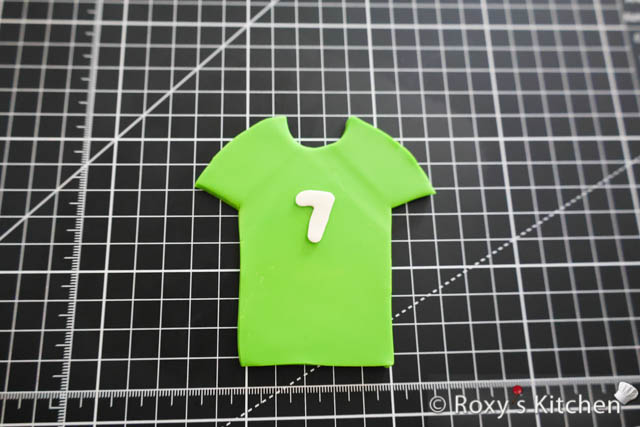
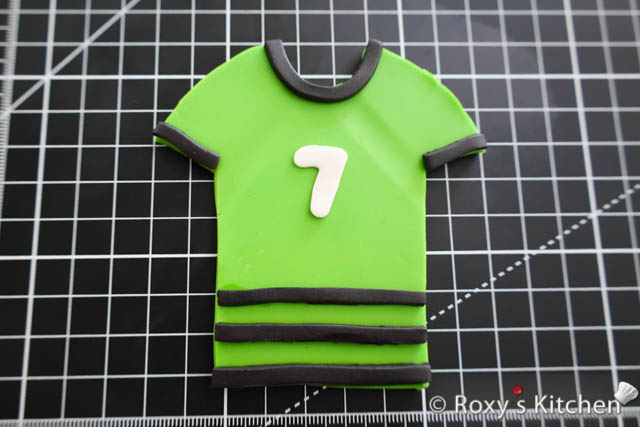
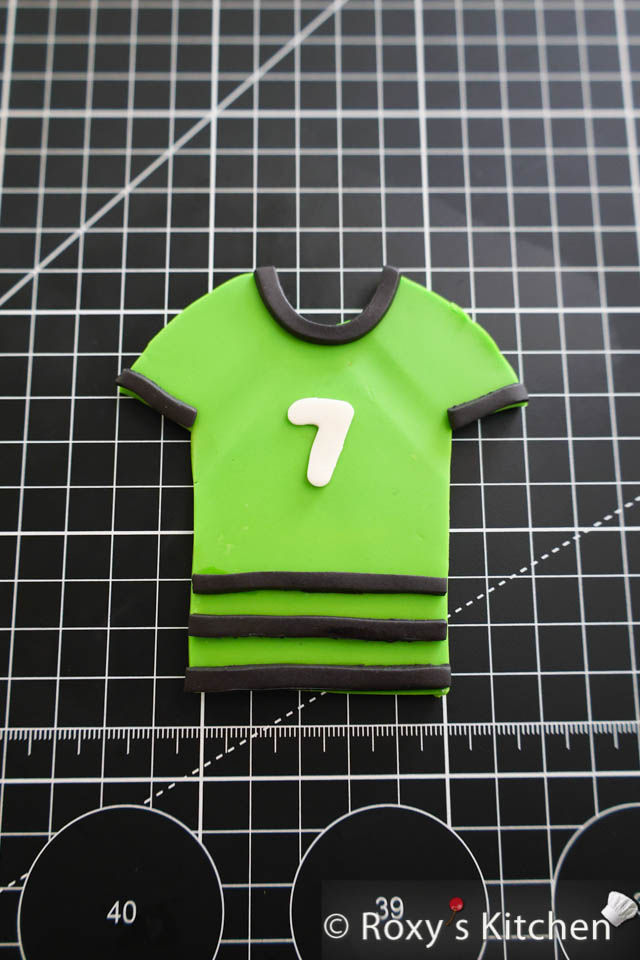
Roll out green fondant 1/2 cm (1/5’’) thick. Use a sharp knife to cut out a t-shirt shape. My jersey was ~ 7.5 cm (3’’) tall. Use the round cutter to out a semi-circle around the neck.
Roll out a bit of white fondant and cut out your little one’s age using the number cutter.
Lastly, roll out black fondant and cut out thin strips. Brush a bit of water on their back and attach them to the jersey as seen below.

You can brush a bit of water on the back of the soccer jersey and attach it to the cake. If it slides down you brushed too much water so wipe some away. If it still doesn’t stay in place, it’s better to use a bit of melted chocolate as glue to attach it to the cake.
Note that I made a second soccer net that I wrapped around the side of the top tier. Follow the same directions as for the first soccer net above; however, for this net I did not cut the edges away and I also used a smaller 2.5 cm (1’’) cutter to cut out squares side by side, leaving just thin strips of fondant in between.
The soccer ball cake toppers
Watch this video to see how to make the soccer ball cake toppers:
Slowly insert toothpicks in the soccer balls you want to place on top. Insert them halfway through as the rest of the toothpick will be inserted in the cake.
Place them on top of the cake. Place the smaller soccer balls on the cake board around the cake. One small soccer ball is positioned close to the soccer player’s right foot so that it looks like he’s shooting the ball.

I hope you found this tutorial useful. If you have any questions feel free to ask them in the comments section below or reach out to me.


[…] dessert table featured a two-tier cake covered in lush green chocolate and adorned with fondant hexagons, soccer balls, and a mini soccer […]