• Home
  • About
    • Contact
    • Terms & Conditions
  • Shop
  • Go to Cart

Roxy's Kitchen

Follow Roxy on: FacebookFollow Roxy on: PinterestFollow Roxy on: E-mailFollow Roxy on: YouTubeFollow Roxy on: Instagram
  • Holidays & Events
    • Themed Parties
      • Beach / Nautical
      • Cars
      • Characters
      • For Her
      • For Him
      • Love, Marriage & Family
      • Puppy / Dog
      • Robots
      • Soccer
      • Safari / Jungle
      • Superheros
      • Trains
    • Christmas
    • Easter
    • Halloween
    • Thanksgiving
    • Valentine’s Day
  • How To’s
    • Fondant, Chocolate & Icing Decorations
    • Cake Flavours
    • Cake Frosting & Fillings
    • Breads
    • Pie & Pasta Dough
    • Canning & Preserving
    • AI-Powered Apps & Virtual Assistants
    • Others / Tips & Tricks
  • Recipes by Category
    • 5licious
    • Appetizers & Snacks
    • Breakfast
    • Bites on Boards
    • Cakes
    • Desserts
    • Drinks
    • Kid Friendly & Funny
    • Main Course
    • Salads
    • Side Dishes
    • Soups & Stews
  • Roxy’s Cakes
  • FREE & Cheap Printables

Lady Fingers Fruit Cake – Tort Diplomat

February 20, 2011 by Roxy

Lady Fingers Fruit Cake - Tort Diplomat

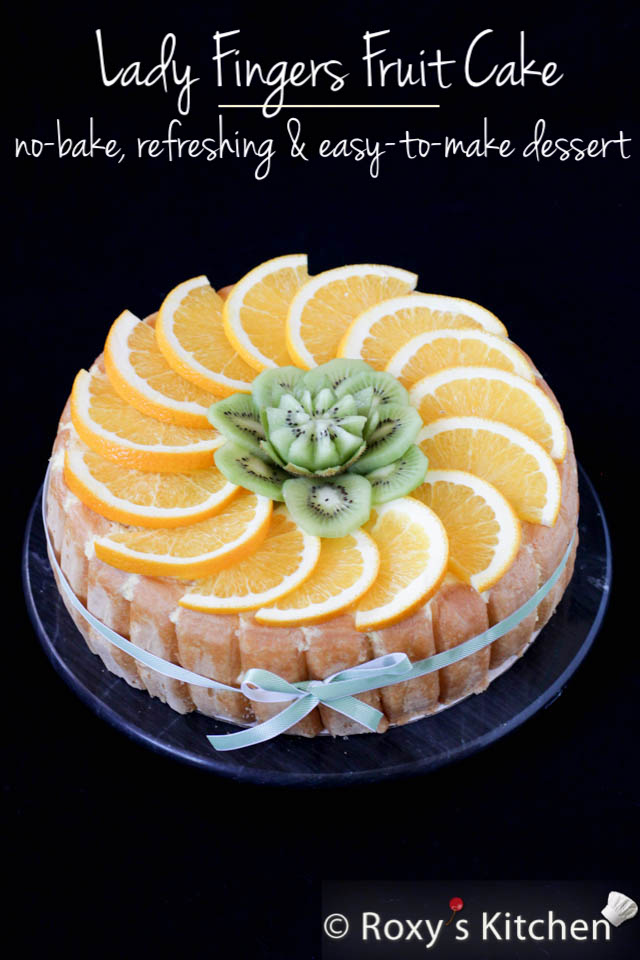
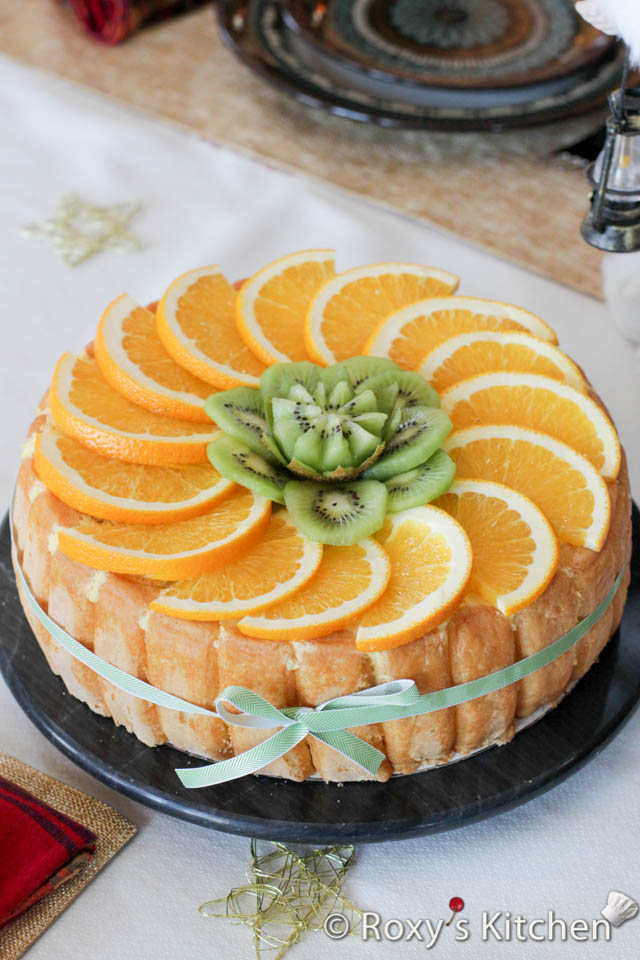
This Lady Fingers Fruit Cake is extremely easy to make and a very refreshing dessert. I love it because it’s very light, not overly sweet and perfect for any occasion! Also, it’s a no-bake cake that requires just a few ingredients: fresh or canned fruits, whipping cream, some eggs, gelatine and lady fingers. My mom used to make this cake quite often when I was a kid. In Romania it’s called “Tort Diplomat”.  There are different variations of the recipe but, most of the time, the cake filling is made using whipped cream set with gelatin and mixed with fruit pieces (pineapple, oranges, mandarins, kiwi and others).   

Ingredients (12-16 servings)

  • lady fingers (400 g)
  • 8 eggs
  • 16 Tbsp sugar
  • 40 g gelatine, softened in 350 ml water
  • 750 ml whipping cream
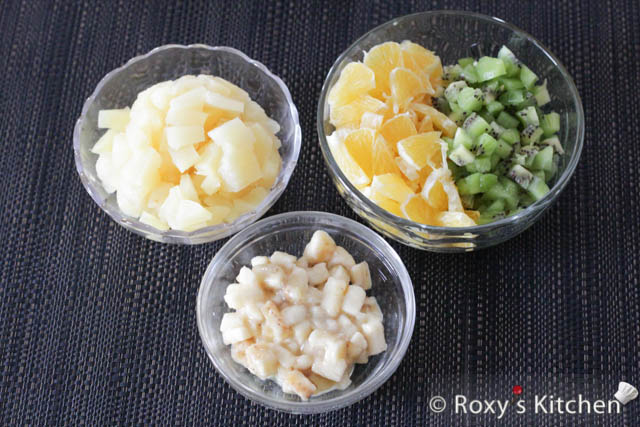
  • 1 can of pineapple chunks (350 g) – save the pineapple juice to moist the lady fingers
  • 400-500 g fruits, cut into small cubes (I used 1 orange, 2 kiwi fruits, 1 banana). Toss the banana pieces in 1-2 tablespoons of lemon juice so that they don’t oxidize / become brownish. 
  • Extra fruit slices for decorating the cake (optional)

You also need a springform pan, 26.7 cm (10.5 inch) in diameter, lined with plastic wrap. Allow wrap to extend over the edge of the pan as you’ll use this to cover the cake

Directions

Read the steps below or watch this video tutorial to see how to make this Lady Fingers Fruit Cake.

Cut your fruits into small cubes. Don’t forget to toss the banana pieces in 1-2 tablespoons of lemon juice so that they don’t oxidize / become brownish. 

Cut your fruits into small cubes.

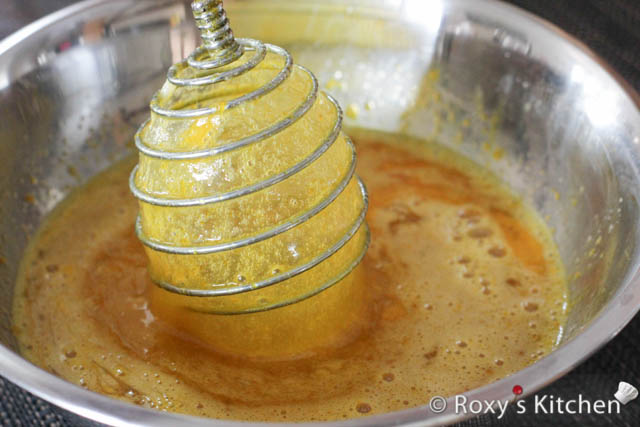
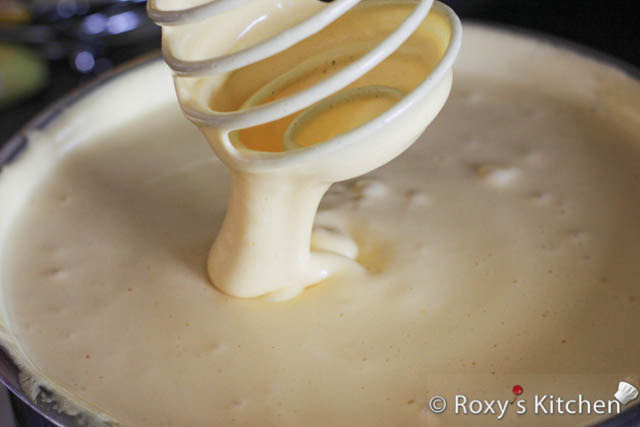
Place the eggs and sugar in a metal bowl over a pot of boiling water and beat until the mixture becomes thick and creamy. Note that once the water starts boiling, you need to turn the heat to low. Also, the water should not touch the bottom of the bowl.

At the same time, in a small bowl, soften the gelatine in 350 ml water for at least 10 minutes. Then place the bowl in pot with hot water until the gelatine is completely dissolved. The gelatine should be dissolved by the time your egg and sugar mixture becomes thick and creamy. You can also melt the gelatine in the microwave, 10-5 seconds at a time, until all the gelatine granules are dissolved. 

Place the eggs and sugar in a bowl over a pot of boiling water and beat until it becomes thick and creamy.

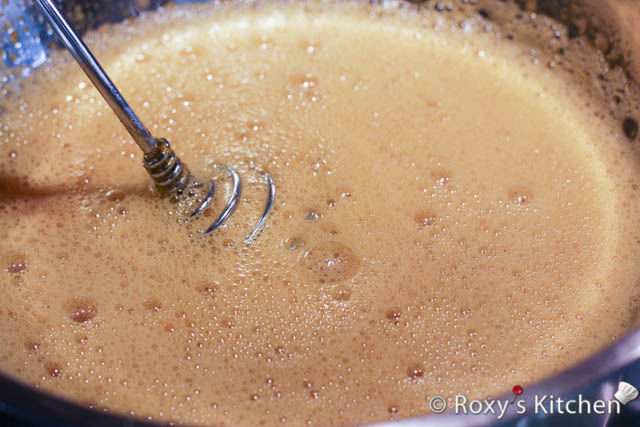
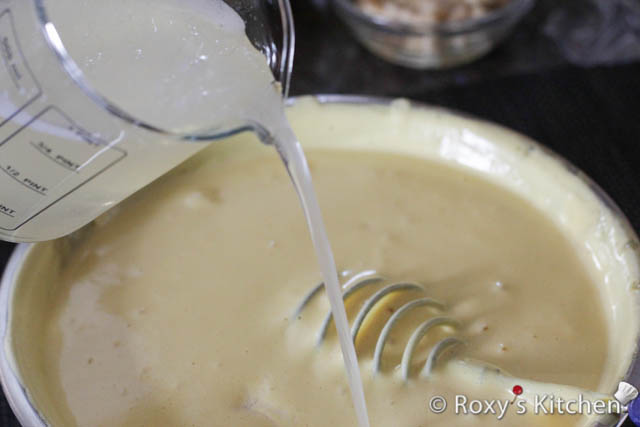
Remove the egg mixture from the heat and let it cool off just a bit. Then, add the melted gelatine. Keep stirring for half a minute or so to make sure the gelatine is incorporated into the mixture.

Remove the egg mixture from the heat .
Remove the egg mixture from the heat and add the melted gelatine

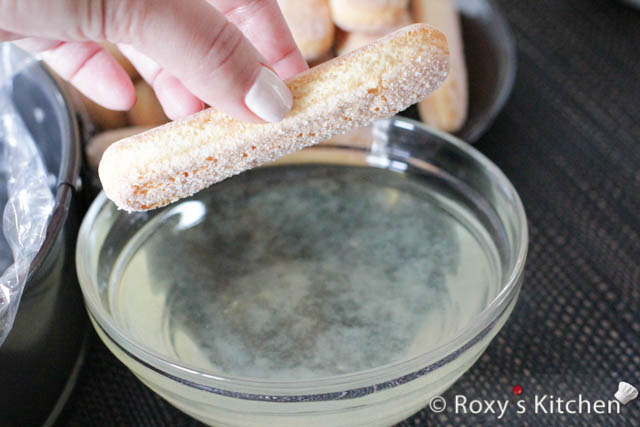
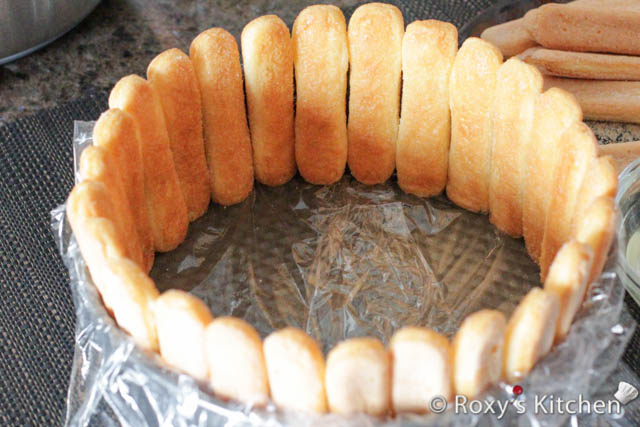
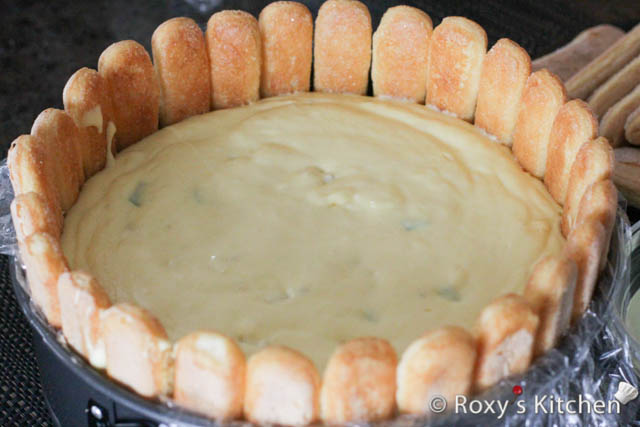
Dip one side of each lady finger in the pineapple juice (from the can). Line the sides of the springform pan with lady fingers, with the dry sides facing outwards. Lady fingers absorb moisture very rapidly so you need to dip them quickly (do not over soak). Don’t forget to line the pan with plastic wrap!

Dip one side of the lady fingers in the pineapple juice.
Line the sides of the springform pan, with the dry side facing outwards.

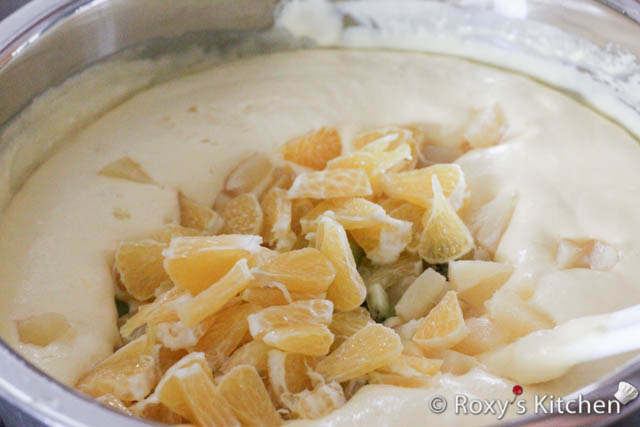
Beat the whipping cream with an electric mixer until soft peaks form. Combine the whipped cream with the warm egg mixture. If the mixture is too “soupy” let it sit for a few minutes to allow the gelatine to start setting a bit; stir once in a while. Then, add the pineapple chunks and fresh fruits and mix to combine.

Beat the whipping cream with an electric mixer until stiff peaks form.
Combine the whipped cream with the warm egg mixture. Then, add the pineapple chunks and fresh fruits and mix to combine.

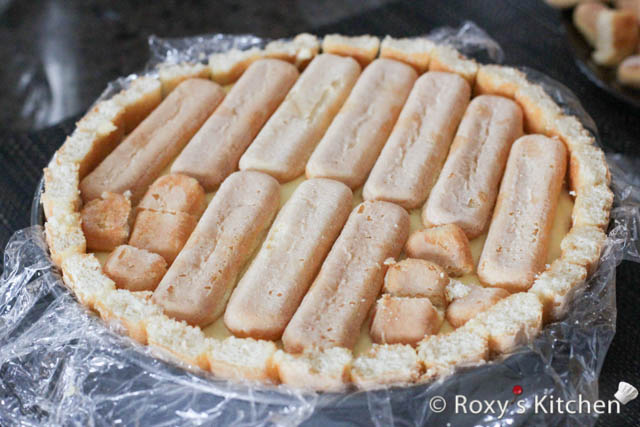
Then, pour the cake filling into the pan. Dip one side of a few lady fingers in pineapple juice and place them on top of the cake, with the moist side down. Carefully cut off the top part of the lady fingers with a sharp knife. Cover the cake with plastic wrap and refrigerate it for at least 4 hours or overnight.

Then, pour the cake filling into the pan and add a layer of lady fingers with the dipped side down.
Carefully cut off the top part of the lady fingers with a sharp knife.

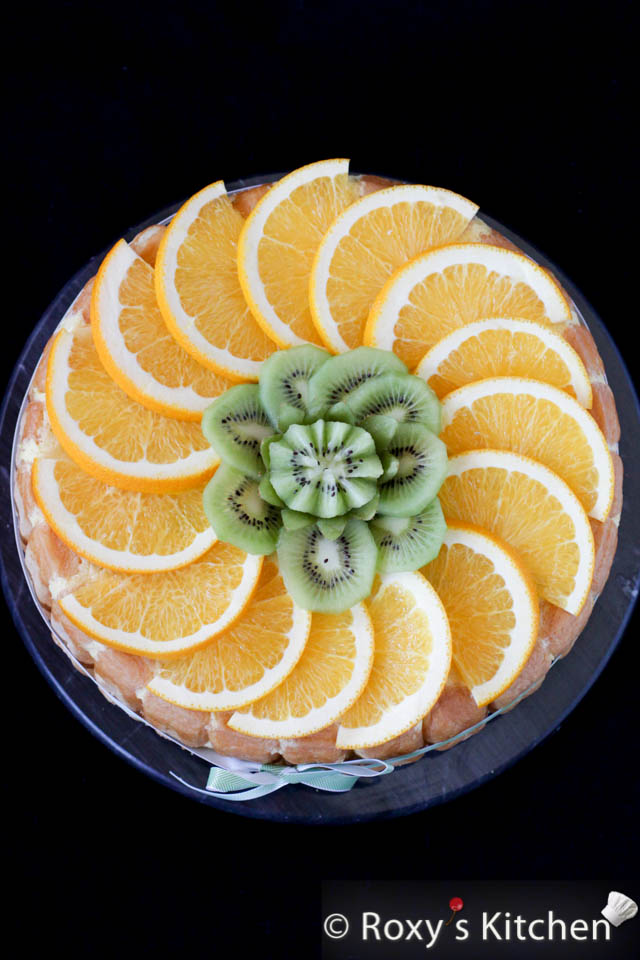
Lastly, uncover the cake and invert the pan onto a serving platter. Decorate it as desired.

Voilà!

Lady Fingers Fruit Cake - Tort Diplomat
Lady Fingers Fruit Cake - Tort Diplomat - Cut
Lady Fingers Fruit Cake - Tort Diplomat
Print Friendly, PDF & Email

YOU MAY ALSO LIKE:

15 Elegant Cakes with Peonies

Duck Noodle Soup

Biscuit Chocolate Rolls

No-Bake Summer Cake - Vanilla Mousse with Strawberry Jelly

Share this:

  • Click to print (Opens in new window) Print
  • Click to email a link to a friend (Opens in new window) Email
  • Tweet
  • Click to share on Reddit (Opens in new window) Reddit
  • Pocket
  • Share on Tumblr

Filed Under: Bananas, Kiwi, Oranges, Pineapple, Romanian, Roxy's Cakes Tagged With: fruit cake, lady fingers, no-bake cake, tort diplomat

Comments

  1. Rodicutz says

    January 6, 2016 at 10:00 PM

    Reteta iese cu lapte. Cam 500 ml. Se încheagă de la gelatina, nu îți fie frica. De asemenea, folosește numai gălbenușurile. Nu și albușurile! Acestea se gatesc și schimba textura cremei. Încearcă, va fi mult mai fina.

  2. Iulia says

    August 21, 2014 at 2:59 PM

    Hi there,

    I tried a similar recipe that didn’t come out very well. I ran across your recipe and would like to make another attempt as your recipe looks very promising.

    There are two things though that I would like to understand better.

    First, you say regarding the gelatin, “Then place the bowl in pot with hot water until the gelatin is completely dissolved”. Is the bowl with gelatin supposed to be placed in a separate pot with hot water than the one with the egg mixture? This is a bit confusing.

    Second, regarding combining the whipped cream with the warm egg mixture, and not letting the egg mixture chill too much, doesn’t the warmth of the mixture melt the whipped cream and make it more runny?

    Thanks

    • Roxy says

      August 24, 2014 at 10:28 AM

      Hi Iulia,

      1. Yes, the bowl of gelatin is supposed to be placed in a separate pot (or a bigger bowl) with hot water. Not the one with the egg mixture. The purpose of this is to melt the gelatin (should be in liquid form) before you actually add it to the egg mixture.
      2. If the egg mixture is warm (not hot) it shouldn’t make your whipped cream runny.

      I hope this helps!

  3. Lili says

    September 5, 2012 at 12:07 AM

    Cred ca in reteta initiala, dupa ce se freaca ouale cu zaharul se adauga si lapte …altfel iese o papara cu zahar pe foc.

    • Roxy says

      September 18, 2012 at 11:38 AM

      E posibil sa fie si cu lapte in alte retete dar eu fac crema numai cu zahar si oua si iese buna. Exact la fel fac si crema pt torturi la care se poate adauga unt, cacao, nuca macinata etc…. crema pe baie de aburi se poate taia daca nu o bati cum trebuie.

  4. Shannon says

    October 10, 2011 at 11:28 AM

    Honestly I have just attempted this cake and it the mixture turned out nothing like it was supposed to. I have followed your receipe exactly the way you have instructed. Not sure if you used the whole egg or just yolk. As I had to try both ways. The texture is nothing like you’ve said. The egg and gelatin started to seperate right away. Nit sire if you put two layers of lady fingers on top because you’ve only inidicated one and it looks like two. Unfortunately this is going to be a dessert for a family dinner and now it’s to late for a back up. Not sure what is wrong here just kinda frustrated now.

    • Roxy says

      October 10, 2011 at 10:06 PM

      Not quite sure what went wrong for you… I used the whole egg and there is only one layer of lady fingers on top, as indicated in the recipe. Perhaps your egg mixture was too cold when you combined it with the gelatin?! Or the gelatin was not dissolved completely or it was too cool?!

  5. Sabina says

    April 28, 2011 at 10:59 AM

    luv this recipe! this was my favorite cake growing up…haven’t had it in 13 yrs!

    • Roxy says

      April 29, 2011 at 8:37 PM

      Glad to hear you love this recipe…it’s time to get in the kitchen and make that cake. Let me know how it turns out 🙂

  6. Anca says

    April 12, 2011 at 3:56 AM

    Salut!
    Nu obisnuiam sa gatesc variatiuni pe tema data mai ales in materie de diplomat pe care pana la 35 de ani nu l-am gatit niciodata … cum sotiorul din dotare si fiica mea sunt lesinati dupa, recent am testat reteta ta – cunosti, probabil, rezultatul… MULTUMIM FRUMOS , a fost foarte foarte bun!!! Urmeaza sa trisej de ziua lui bebe care face un anisor in cateva zile, si un strat din cele doua ale tortului va fi de diplomat cu fructe, al doilea de vanlie … sa poata papa si bebeii.
    Ma mai zgaiesc pe aici, sigur gasesc ceva care se face repede si usor si e gustos … ca timp, din pacate, nu am.
    Salutari din Budapesta, relocata fiind eu de 2 ani 🙂

    • Roxy says

      April 12, 2011 at 12:10 PM

      Ma bucur ca a iesit bun si ca i-ai facut pe sotul si fiica ta fericiti :). La multi ani lui bebe si sa va aduca numai bucurii!
      Daca mai testezi retete sa-mi spui cum ti-au iesit.

      p.s. am trecut in fuga prin Budapesta anul trecut… am fii vrut sa avem mai mult timp sa vizitam orasul ca e superb… cel putin in poze 🙂

      • Anca says

        April 13, 2011 at 4:43 AM

        Stii ce…? Desi nu este chiar de reclama, am sa indraznesc sa iti arat si cum a iesit in final (dai tu singura click stanga sau dreapta, dupa caz, ca sunt 2 poze :-))) )

        Cel de bebe il fac mai ingrijit – asta a fost un test …

        Deja stiu ce mai testez, dar nu saptamana asta ca arde treaba imprejur…. Multumim frumos!

        https://picasaweb.google.com/anca.alexia/Bb912Mths#5586208844199263298

        • Roxy says

          April 13, 2011 at 7:05 AM

          Ti-a iesit fain, imi place ideea cu fundita. Am vrut sa pun si eu la tortul asta dar nu am avut nimic potrivit la indemana la mom respectiv. Merci ca mi-ai aratat pozele…. cred ca esti prima care imi incearca retetele si imi arata si rezultatul final 🙂

          Spor la bucatarit cand iti gasesti timp!

          • Anca says

            June 15, 2011 at 8:49 AM

            Hello again!
            Au trecut 2 luni aproape si nu am aratat ce a iesit … crede-ma ca bebe a fost in delis, la fel si restul beneficiarilor … singurul complaint a fost ca tortul, mare cat ditai tava, a fost prea greu de carat de la masina la locul petrecerii ….
            https://picasaweb.google.com/anca.alexia/BirthdayParty1Year#5599151849214342082
            Acum mai incerc, vineri, de ziua dragului tati inca o varianta, cu fructe prrrrroaspete si cu un strop de alcool 🙂

            Caulifloweru’, sarut mana, tocmai l-am papat … speechless 🙂

          • Roxy says

            June 15, 2011 at 7:38 PM

            Imi place cum l-ai ornat / personalizat pt ziua lui bebe si intradevar imens tortul. A fost cat bebele de mare : ))?
            La multi ani si sotului, buna ideea ta cu putin alcool…. probabil ca o sa ii incante si mai mult papilele gustative :).

  7. Ancutza says

    February 21, 2011 at 6:40 AM

    Super arata si cred ca a fost si delicios.Am si eu o reteta asemanatoare: 5 oua, 1 cana zahar, 1 cana lapte, coaja rasa de la 2 portocale si 1 plic gelatina (canile sunt din cele mari de 250 ml).Se fierb la baie de aburi si la sfarsit se adauga gelatina topita.Cand este rece se amesteca cu 1 l de frisca batuta in prealabil.Si mie mi se pare ca se aseaza mai usor dc nu amestec fructele si atunci peste stratul de piscoturi pun fructele taiate cubulete si apoi un strat de crema si tot asa. In general eu il fac intr-o tava dreptunghiulara dar o sa incerc si varianta ta.

    • Roxy says

      February 21, 2011 at 8:12 AM

      Am facut si reteta ta cand eram in Romania….. o am de la Carmen :). O sa o mai incerc cu prima ocazie.


Subscribe to Email Updates

loader

Email Address*

Name

FREE & Cheap Printables

  • Sale Product on sale
    Easter Cupcake Toppers (2'') - 12 Designs
    Easter Cupcake Toppers (2”) – 12 Designs
    $1.49 Original price was: $1.49.$1.19Current price is: $1.19.
    Add to cart
  • Sale Product on sale
    Ballerina Cake & Cupcake Toppers
    Ballerina Cake & Cupcake Toppers
    $2.99 Original price was: $2.99.$2.39Current price is: $2.39.
    Add to cart
  • Dancing Ballerina Coffee Mug
    Dancing Ballerina Coffee Mug
    $19.99
    Buy product
  • Sale Product on sale
    Soccer Party Package Printables
    Soccer Party Package Printables Watercolour Collection
    $4.99 Original price was: $4.99.$3.99Current price is: $3.99.
    Add to cart
  • Sale Product on sale
    Soccer Cake Toppers Watercolour Collection
    Soccer Cake Toppers Watercolour Collection
    $2.99 Original price was: $2.99.$2.39Current price is: $2.39.
    Add to cart
  • Soccer Cupcake Toppers (2'') Watercolour Collection - 12 Designs
    Soccer Cupcake Toppers (2”) Watercolour Collection – 12 Designs
    $1.49
    Add to cart
  • Sale Product on sale
    Ballerina Cake & Cupcake Toppers - Baby / Baby Shower Package
    Ballerina Cake & Cupcake Toppers – Baby Girl / Baby Shower Package
    $2.99 Original price was: $2.99.$2.39Current price is: $2.39.
    Add to cart
  • Sale Product on sale
    Puppy Cake Toppers – 3rd Birthday Package
    Puppy Cake Toppers – 3rd Birthday Package
    $2.99 Original price was: $2.99.$2.39Current price is: $2.39.
    Add to cart

Themed Birthday Parties

Train Themed Birthday Party Cakes – How to Make Train Cakes

Train Themed Birthday Party - How to Make Train Cakes

3D Dog Cake Tutorial

3D Dog Cake Tutorial

20 Puppy / Dog Themed Birthday Party Cakes

20 Puppy / Dog Themed Birthday Party Cakes

Baby Crib Cake Tutorial

Baby Crib Cake Tutorial

More Posts from this Category


Recent Posts

How to Naturally Dye Easter Eggs Blue

How to Naturally Dye Easter Eggs Blue

Soccer Ball Cookies

Soccer Ball Cookies

How to Make a Car Cake with Remote-Controlled Headlights

How to Make a Car Cake with Remote-Controlled Headlights

How to Use a Cake Comb on Cake Covered in Chocolate Ganache

How to Use a Cake Comb on Cake Covered in Chocolate Ganache


Popular Posts


  • Egg Snowman
    Egg Snowman

  • 4-Ingredient Creamy Pineapple Berry Smoothie | Roxy's Kitchen
    Creamy Pineapple Berry Smoothie

  • Homemade Sour Cherry Liqueur
    Homemade Sour Cherry Liqueur – Easy Old Family Recipe Reveal...

  • Mini Cheese Balls | Roxy's Kitchen #appetizer #cheese #mozarella #parmesan #fingerfood
    Mini Cheese Balls

  • Rose Cupcake Bouquet in a Pot
    Easy Rose Cupcake Bouquet in a Pot

  • Grape and Banana Dolphin Parfait | Roxy's Kitchen
    Grape and Banana Dolphin Parfait

  • Quick & Easy Nutella Peanut Butter Monkey Cupcakes | Roxy’s Kitchen – 3-ingredient cupcakes, easiest frosting ever and so easy to decorate with your kids!
    Quick and Easy Nutella Peanut Butter Monkey Cupcakes

  • Safari Jungle Themed First Birthday Party Part III – DIY Decoration Ideas + Free Printables Included! | Roxy's Kitchen
    Safari / Jungle Themed First Birthday Party Part III – DIY D...

  • Easy 3-Ingredient Blueberry Jam | Roxy's Kitchen
    Easy Blueberry Jam

  • Breakfast Egg Stuffed Sweet Potatoes | Roxy's Kitchen A super filling five-ingredient breakfast loaded with vitamins & nutrients.
    Breakfast Egg Stuffed Sweet Potatoes

Recent Pins

  • Pink Letter T / Floral Monogram for Girls  Mug

Pink Letter T / Floral Monogram for Girls features a vibrant and delicate letter 'T' beautifully formed with soft pink cherry blossoms. This design combines nature's elegance with artistic flair, making it a perfect personalized gift for girls or stylish home decor. Ideal for spring-themed merchandise or to add a touch of floral charm to any collection. Available on a range of products, including t-shirts, mugs, and home accessories.
  • Chocolate Sponge Cake (Amandine)
Follow Me on Pinterest

Popular Posts


  • Mini Cheese Balls | Roxy's Kitchen #appetizer #cheese #mozarella #parmesan #fingerfood
    Mini Cheese Balls

  • 4-Ingredient Creamy Pineapple Berry Smoothie | Roxy's Kitchen
    Creamy Pineapple Berry Smoothie

  • Egg Snowman
    Egg Snowman

  • Oven Baked Pork Sirloin Chops
    Oven-Baked Pork Sirloin Chops

  • How to Make Modeling Chocolate for decorating cakes, cupcakes and cookies
    How to Make Modeling Chocolate for Decorating Cakes, Cupcake...

  • Homemade Sour Cherry Liqueur
    Homemade Sour Cherry Liqueur – Easy Old Family Recipe Reveal...

  • 50 Great Ideas for Your Winter Holidays Menu
    50 Great Ideas for Your Winter Holiday Menu

  • Tutorial with Step by Step Photos - How To Make Safari / Jungle Animals Cupcake Toppers – Tiger, Zebra, Giraffe, Elephant, Monkey, Hippo, Bear, Lion
    How To Make Safari / Jungle Animals Fondant Cupcake Toppers...

  • Safari Jungle Themed First Birthday Party Part III – DIY Decoration Ideas + Free Printables Included! | Roxy's Kitchen
    Safari / Jungle Themed First Birthday Party Part III – DIY D...

  • Safari / Jungle Themed First Birthday Party Part II – Appetizers, Finger Foods & Snack Ideas
    Safari / Jungle Themed First Birthday Party Part II – Appeti...

Copyright © 2025 · Lifestyle Pro Theme on Genesis Framework · WordPress · Log in