


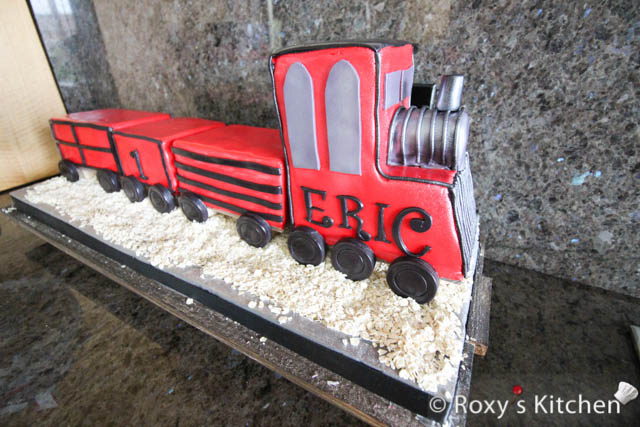
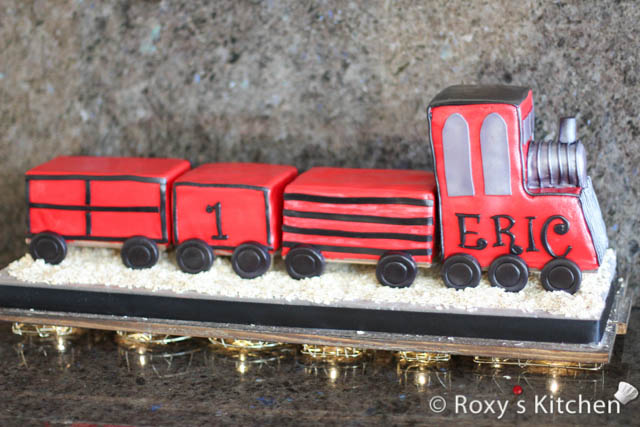
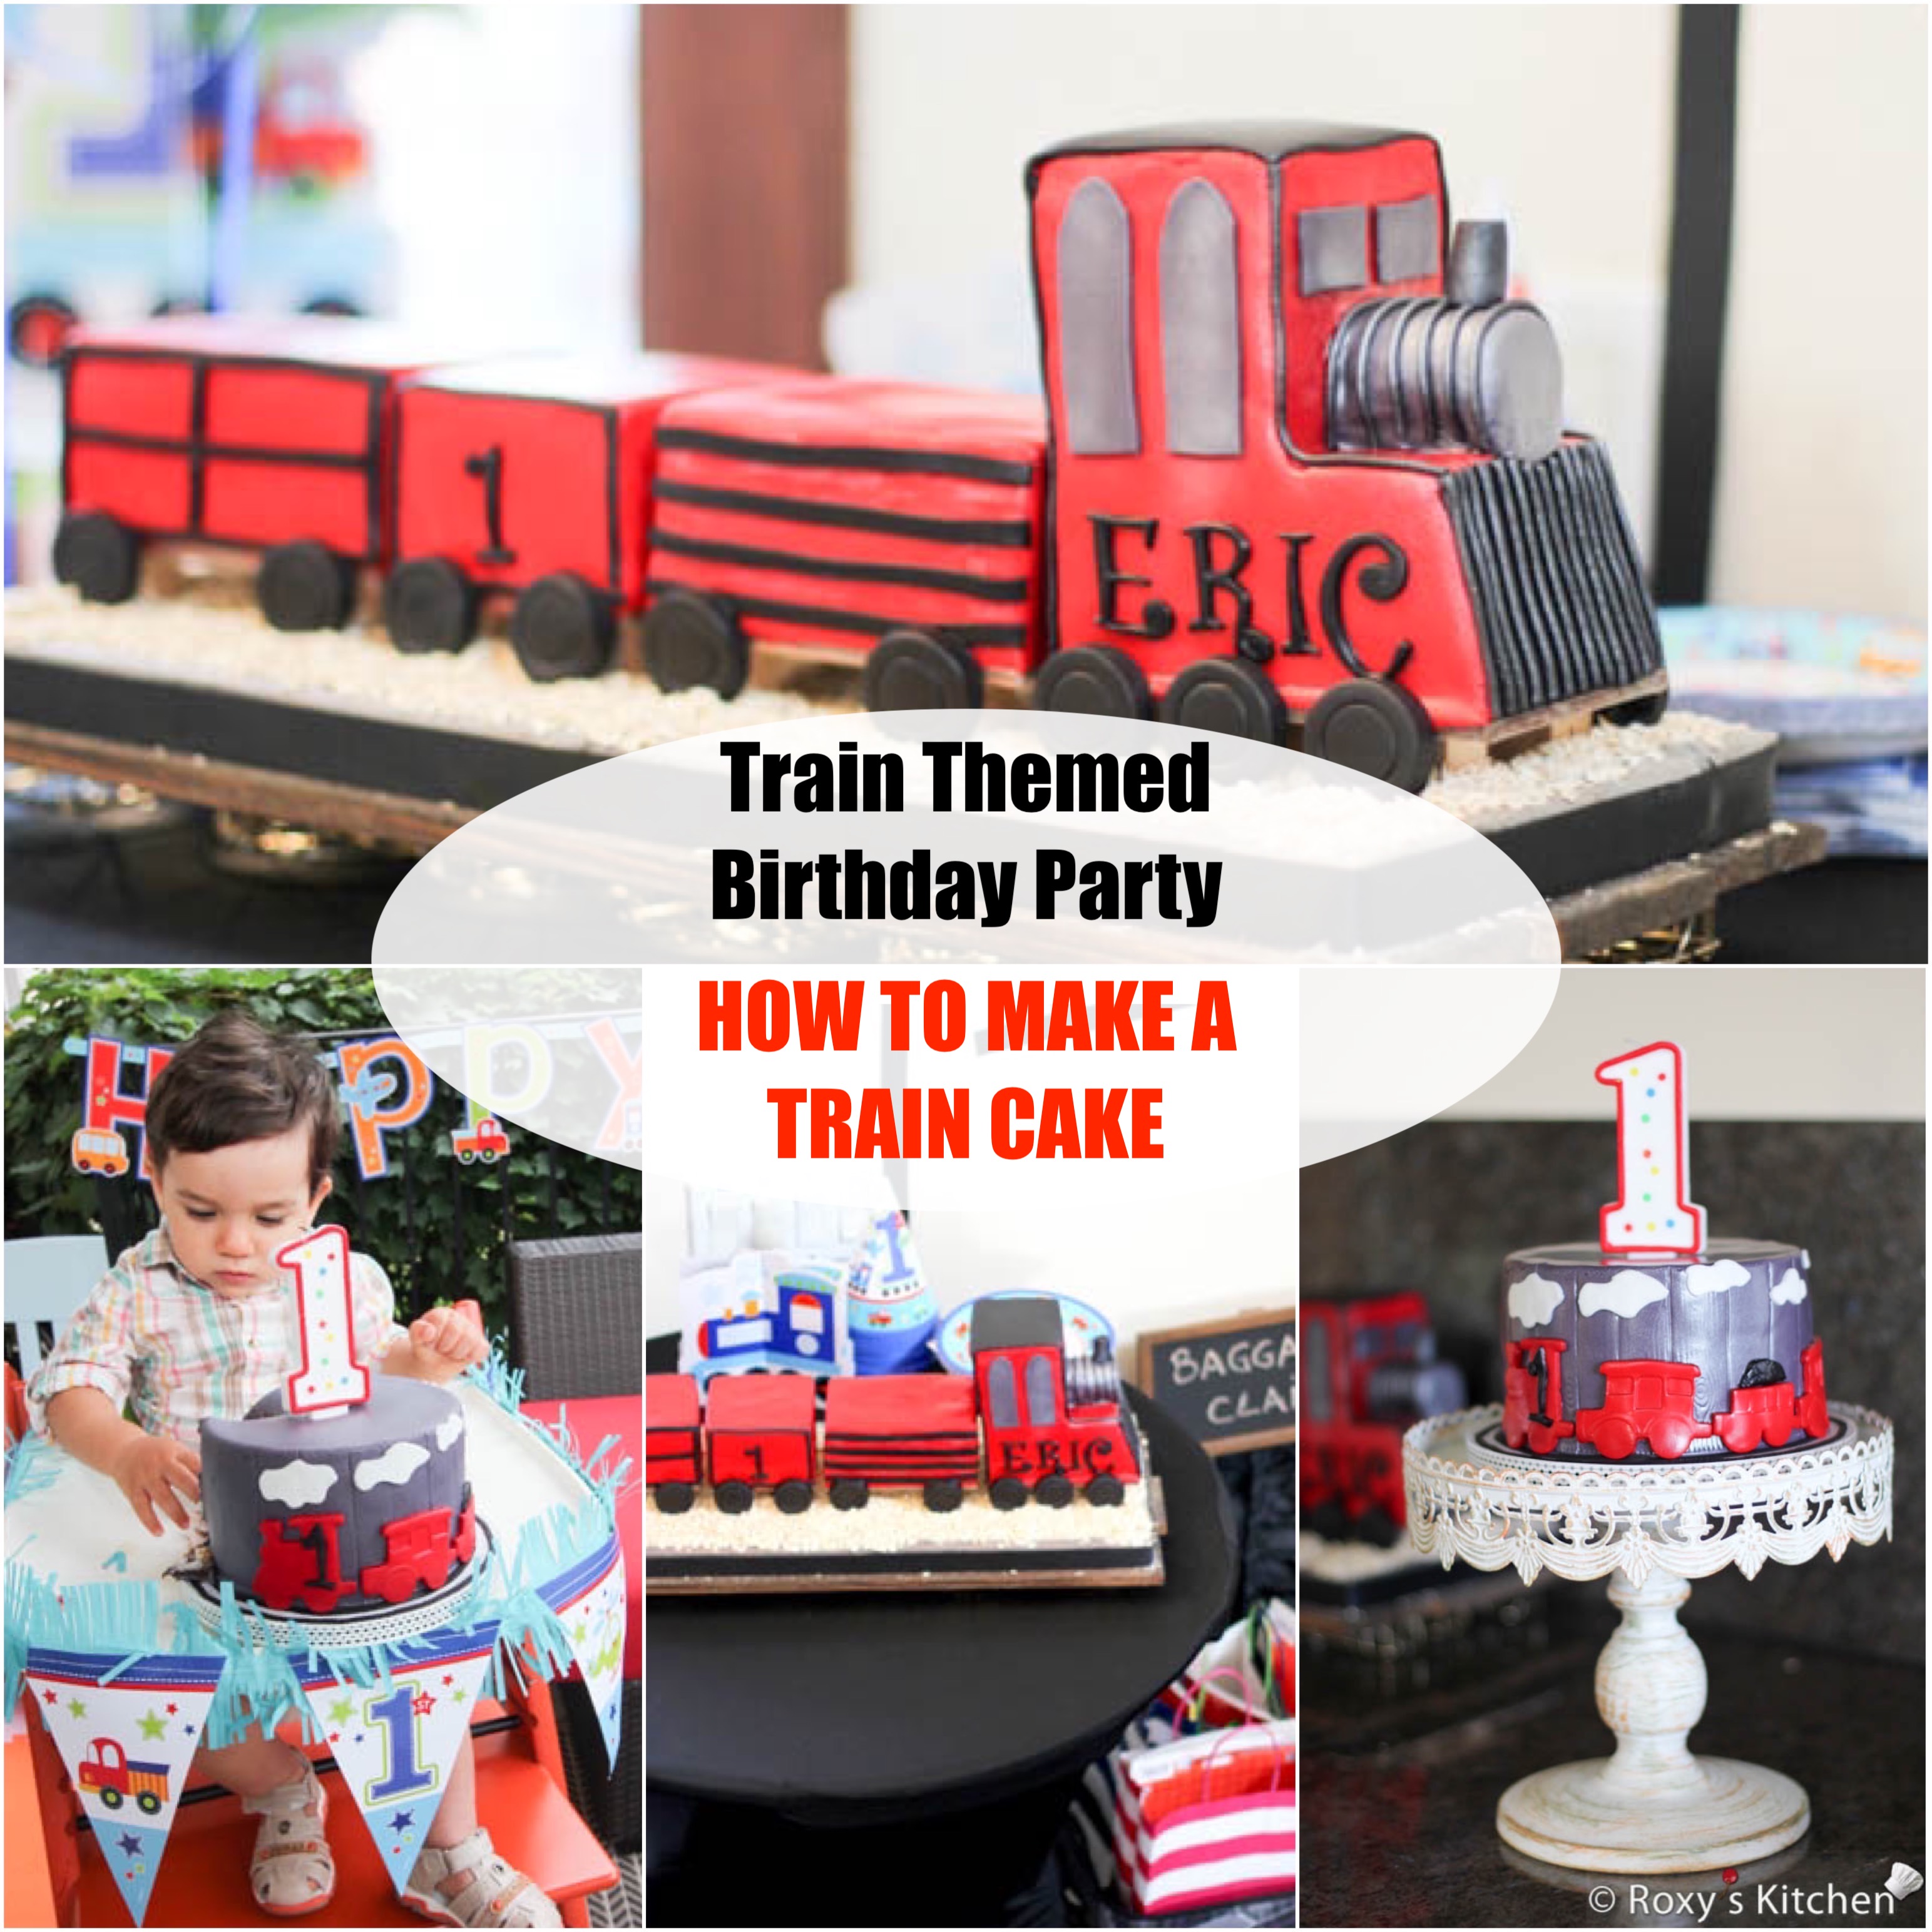
In this post I will show you how to make these Train Themed Birthday Party Cakes with step-by step instructions and photos. As mentioned in my prior posts, I organized a Train Themed Birthday Party for Eric’s first birthday. You can check out my other two posts from this series:
Train Themed Birthday Party Cakes – How to Make a Train Cake
Ingredients/Supplies
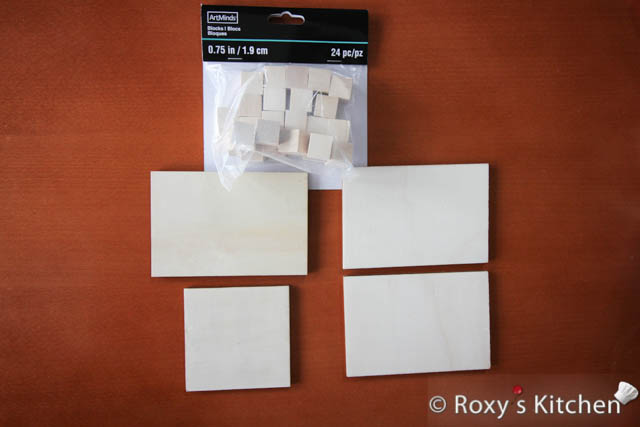
Cake Boards for the Train Cars & Locomotive:
- wood plaques:
- 3 rectangles, size: 14 cm x 9.4 cm x 0.5 cm (5.5″ x 3.7″ x 0.2”)
- 1 square, size: 9.5 cm x 9.5 cm x 0.5 cm (3.7″ x 3.7″ x 0.2”)
- square wood blocks, size: 2 cm (0.75’’)
- a glue gun
- press’n seal wrap
You can buy these supplies at any local arts & crafts store. I bought them from Michaels in Canada.
Vanilla Cake:
For a 12’’ (30 cm) x 12’’ (30 cm) square pan:
- 12 large eggs
- 4 Tbsp oil
- 400 g sugar
- 400 g cake flour, sifted
- 4 Tbsp vanilla extract
Sugar Syrup to Moisten the Cake:
- 300 ml water
- 7 Tbsp sugar
- 3-4 Tbsp vanilla extract
Raspberry Cream Cheese Buttercream Filling:
- 375 g (1.5 cups) unsalted butter, at room temperature
- 550 g (5 cups) powdered sugar
- 500 g cream cheese, at room temperature
- 100 g (1/3 cup) seedless raspberry jam
- 2 Tbsp lukewarm water
- Red food colouring paste – I use Wilton (optional)
- 1.5 cup fresh raspberries (optional)
Ganache and Fondant for Covering the Cake:
- crumb coat the cake using unwhipped chocolate ganache / firm frosting made out of 600 g semisweet chocolate and 300 ml whipping cream; if you don’t know how to make chocolate ganache, check out my Chocolate Ganache Ratios post
- 450 g (1 lb) black fondant
- 1.8 kg (4 lbs) red fondant
- a bit of white fondant, coloured in purple using red and blue gel food colouring; this will be used to make the windows and the engine’s smokebox
Other Tools/Items:
- Upper Case Funky Alphabet and Number Tappit Cutters
- Clay/fondant extruder
- 2.5 cm (1’’) circle cutter
- 3.2 cm (1.25’’) circle cutter
- A small paint brush
- Other fondant tools: fondant smoother (or palm of your hands), fondant rolling pin, X-Acto knife or any other sharp knife with a thin blade, small 9-inch fondant rolling pin for making the smaller fondant decorations
Directions
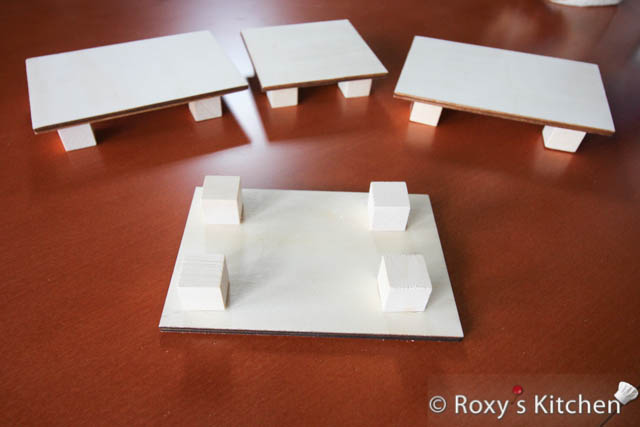
Making the Cake Boards for the Train Cars & Locomotive
Use a glue gun to attach four square wood blocks to each wood plaque as seen in the picture below.
To create a barrier between the cake and the wood plaques, cover the boards with press’n seal wrap.
Making the Cake
Use the ingredients listed above and follow the step-by-step instructions in this other post to bake the cake.
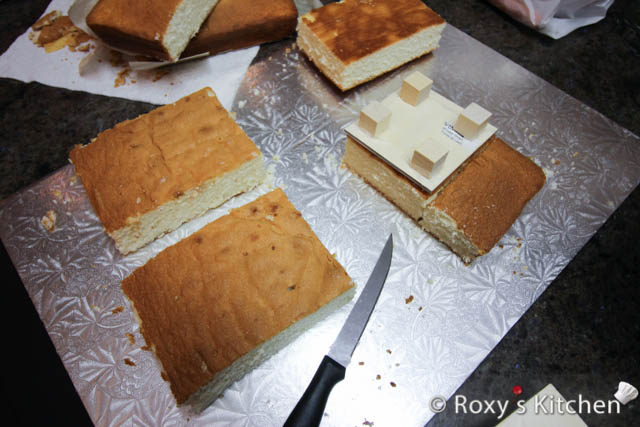
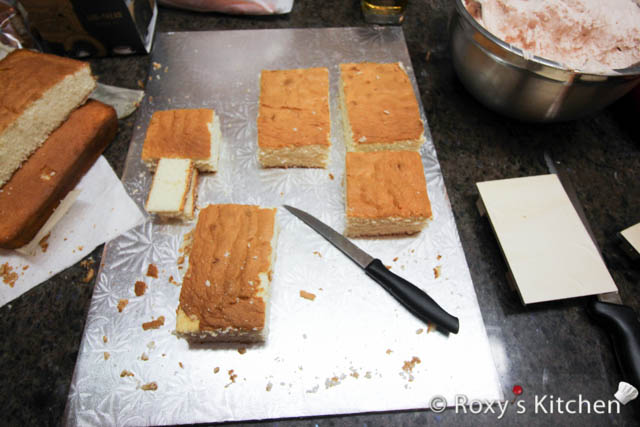
Let the cake cool off and cut it into:
- 3 rectangles, size: 14 cm x 9.4 cm (5.5″ x 3.7″)
- 1 square, size: 9.5 cm x 9.5 cm x 0.5 cm (3.7″ x 3.7”)
Cut each of them horizontally in two using a serrated knife. From the remaining cake scraps you will build the top of the locomotive with the engine, driver’s compartment and smokebox.
Make your sugar syrup by boiling the water with the sugar and adding the vanilla extract at the end. Let it cool off.
Making the Filling
Make the raspberry cream cheese buttercream following the steps in this recipe.
Making the Ganache
Make this at least 4 hours before you are ready to assemble the cake as it needs to cool off and have a thick pouring consistency before covering the cakes.
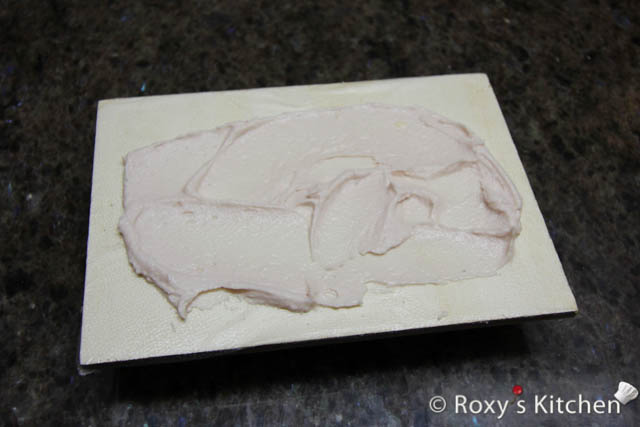
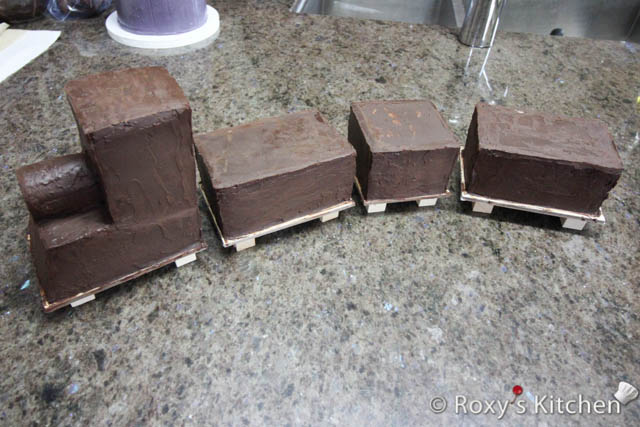
Assembling the Train Cake
Spread some filling on your wooden cake board and place the first cake layer on top. Moisten it with sugar syrup and spread raspberry cream cheese buttercream filling on top. Add a layer of fresh raspberries and place the second cake layer on top.
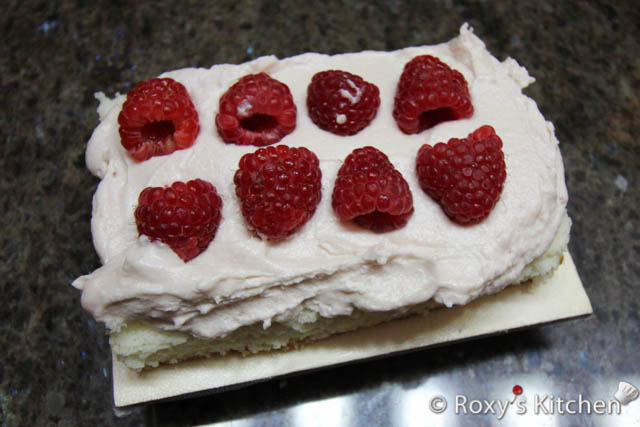
Repeat the steps to fill each cake to make the three trains cars and locomotive.
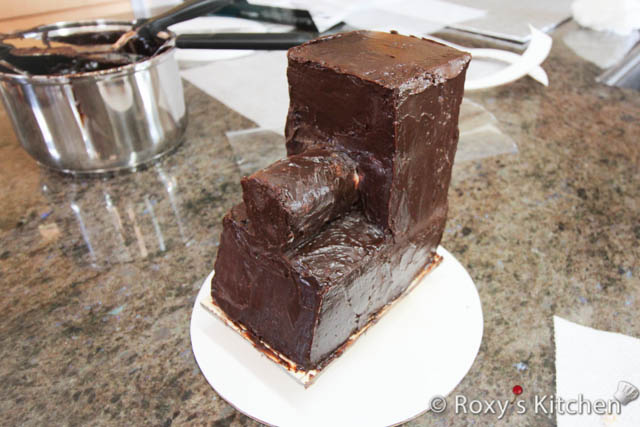
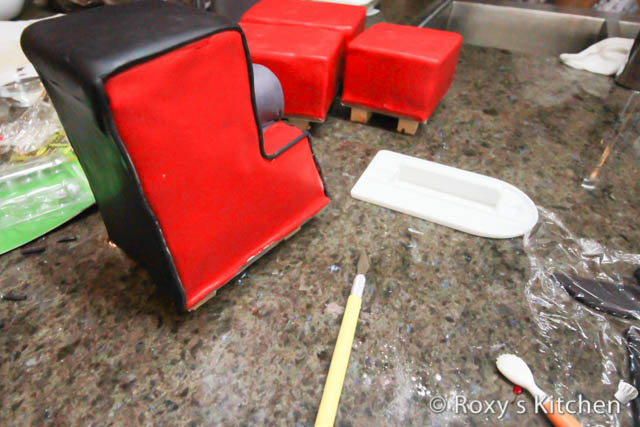
For the locomotive, start building up the engine, driver’s compartment and smokebox using the remaining cake scraps. Use a serrated knife to carve it and give it the shape below.
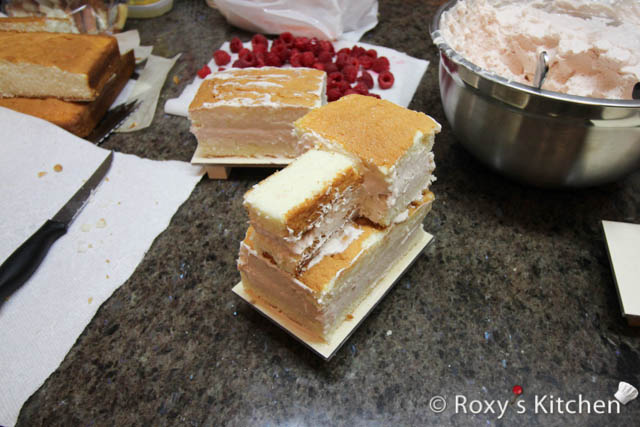

Tip: If you feel like it’s not easy to carve as the cake layers break, place the locomotive, covered with plastic wrap, in the freezer for 1-2 hours. That should harden the filling and cake layers and should make it easier to carve without it falling apart.
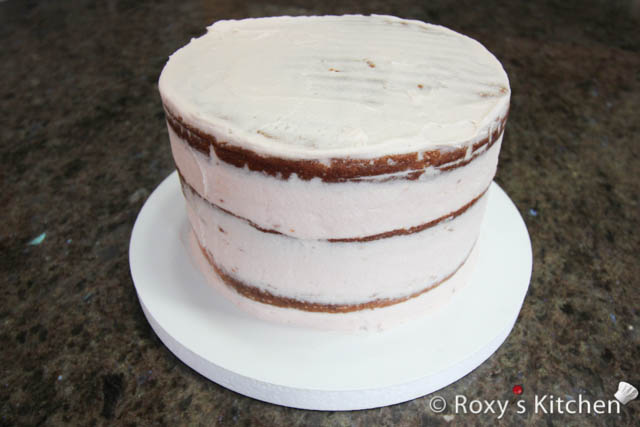
Crumb coat the cakes with a thin layer of the ganache. Refrigerate them for 1-2 hours.

Covering the Train Cake with Fondant
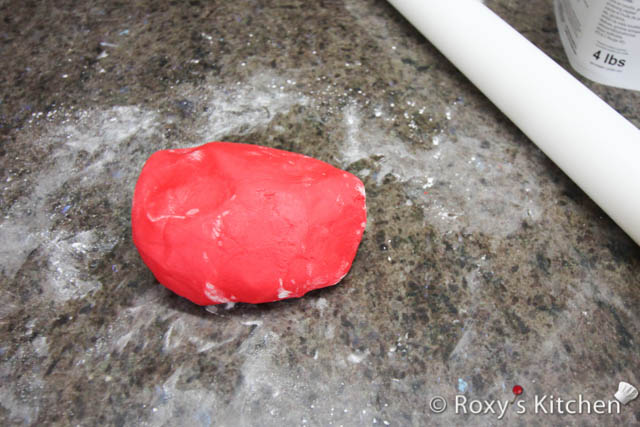
Dust your working surface with some powdered sugar or cornstarch. Knead the red fondant until it has a workable consistency and it doesn’t feel and look dry.
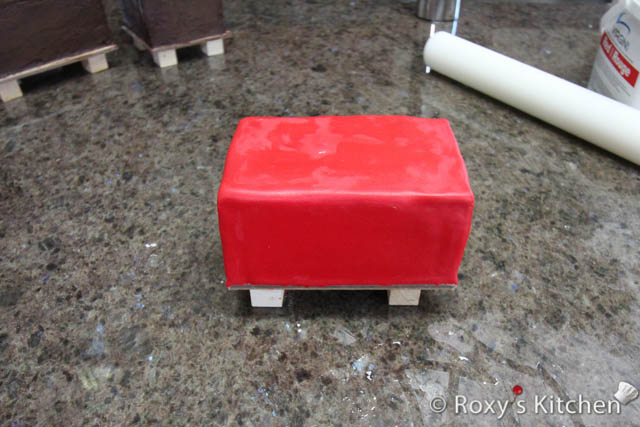
Roll the red fondant in rectangles that are about 36 cm x 30 cm (14’’ x 12’’) for the bigger train cars and 30 cm x 30 cm (12’’ x 12’’) for the small train car. The fondant should be rolled ~3.5 mm ( 1/8 inches) thick.
Gently lift fondant over rolling pin and place it on the side of the cake. Start unrolling the fondant from the side of the cake and across the top to the other side.
Smooth the fondant with a fondant smoother (or the palm of your hand) starting from the top. Start to gently pull the fondant out and down around the sides of the cake using one hand and spread the excess fondant and smooth it out using a fondant smoother (or your other hand).
Keep turning the cake and repeating these steps until the sides are smooth and without any ruffles formed towards the bottom. It’s better if you use a fondant smoother since the pressure of your hands could leave marks and the warmth from your hands might make the fondant sticky.
Use your fondant smoother to get rid of any wrinkles and air bubbles as well. If you see any air bubbles, insert a pin on an angle, release the air and smooth the area again.
Trim the edges at the bottom using an X-Acto knife, a pizza cutter or any other sharp knife you have.
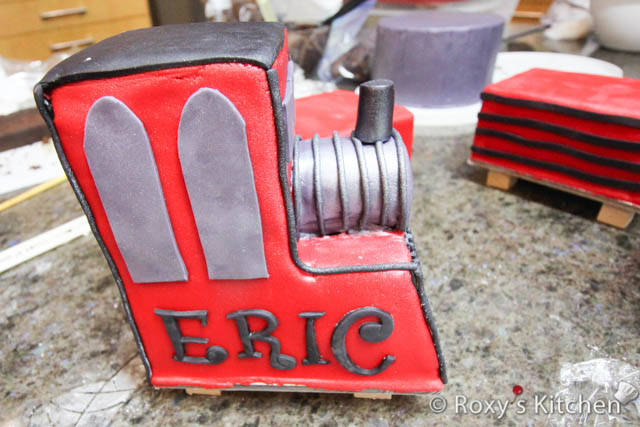
To cover the locomotive with fondant you can either roll a bigger piece of red fondant than for your bigger train car or you can make 3 panels – 2 for the sides and 1 for the front. Use the same steps above to cover the locomotive with fondant, smooth our the fondant and cut the excess.
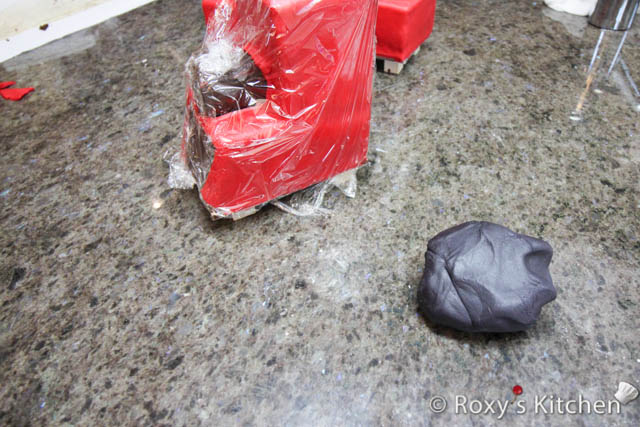
Then, roll black fondant to create a panel for the top & back and one for the front of the locomotive. Cover the cake with some plastic foil while you work on the black panels. This will prevent your red fondant from drying out in case you need to cut more of it, straighten your edges etc. when you place the black fondant on.
You can use a string or measuring tape to measure your cake sides and see exactly the size of the panels you need to make. The edges, even if they are imperfect, will be covered with a black fondant border so they won’t be visible.
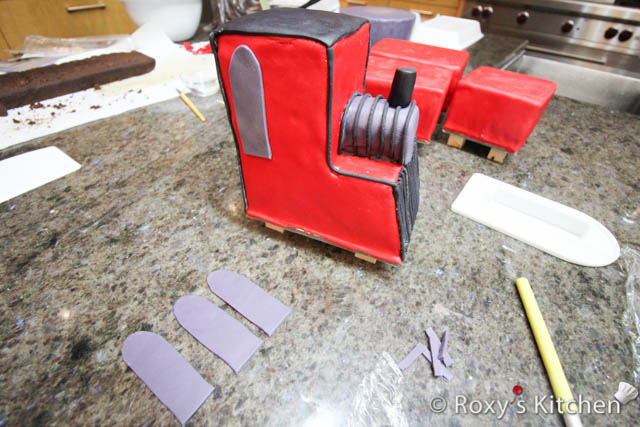
Cover the smokebox with purple fondant.
Making the Fondant Decorations
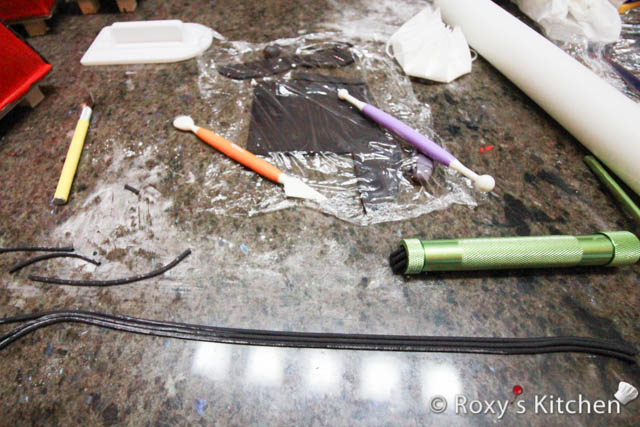
Use a clay/fondant extruder, fitted with the round disc, to make thin ropes out of black fondant. Extruders work best with soft fondant so make sure you knead it well before.
You will use these to make some edges on the locomotive as well as to decorate the smokehouse and front of the locomotive.
Brush a bit of water where you want to place the fondant ropes to ensure they stick to the cake properly.

Roll purple fondant to make the locomotive windows.
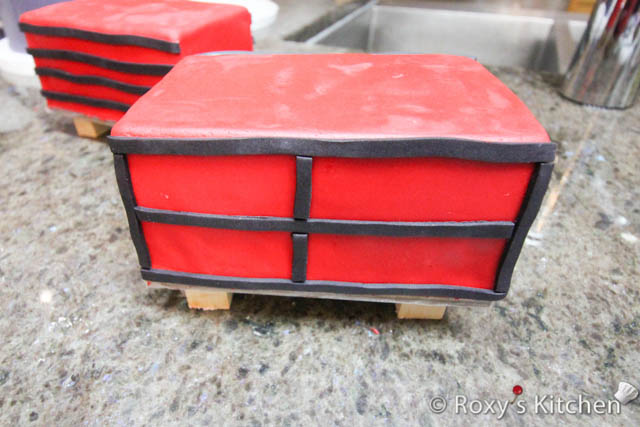
Roll black fondant and cut thin strips to make the extra decorations & edges for the train cars.
Attach all the fondant decorations to the cakes using some water.
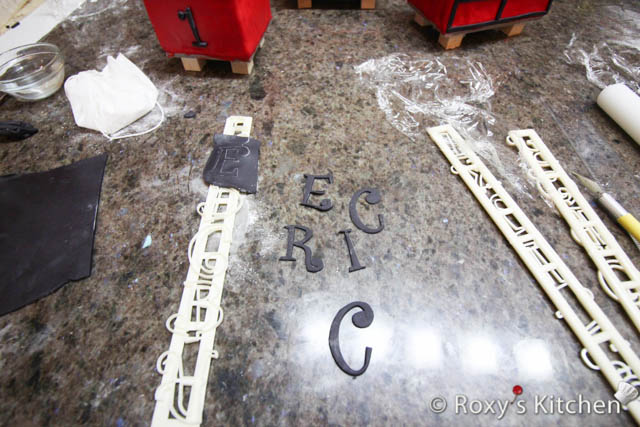
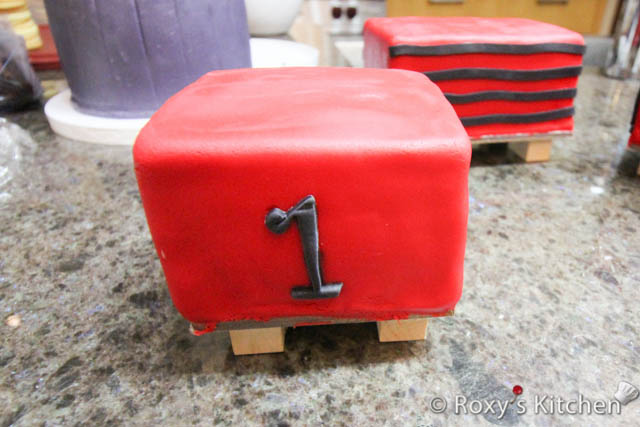
Use the Upper Case & Number Tappit Cutters to make the letters of your kid’s name (e.g. ERIC) and age (1) out of black fondant.
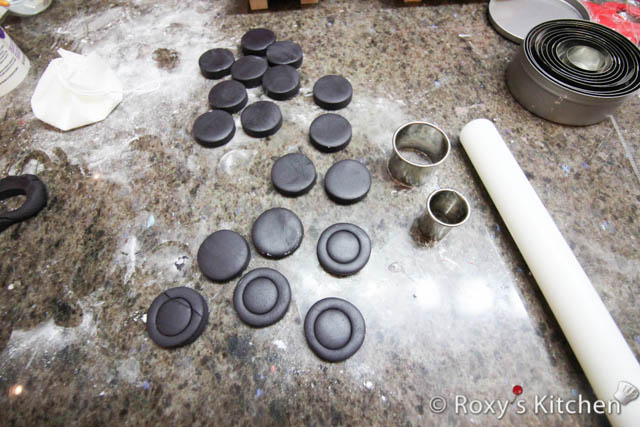
Roll out black fondant about 6 mm (1/4’’) thick to make the wheels. Cut circles using the 3.2 cm (1.25’’) circle cutter. Then, use the smaller 2.5 cm (1’’) circle cutter to mark a circle on each wheel as seen in the picture.
Place your cake on a cake board. Then, brush some water on each square wood block and attach the wheels.
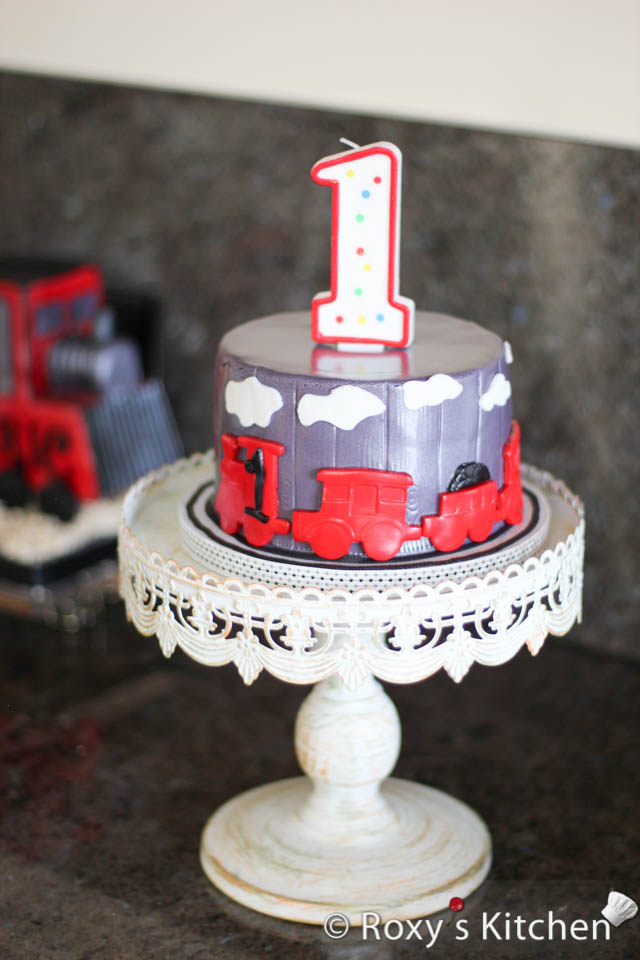
Train Themed Birthday Party Cakes – How to Make a Train Smash Cake
I made a 5’’ Smash Cake using the same vanilla cake and raspberry cream cheese buttercream recipes. You just need to reduce the ingredients – e.g. make the cake out of 4 eggs, use about 300 g of cream cheese buttercream and some fresh raspberries for the filling. Also, use about 150-200 g unwhipped chocolate ganache / firm frosting to crumb coat the cake.
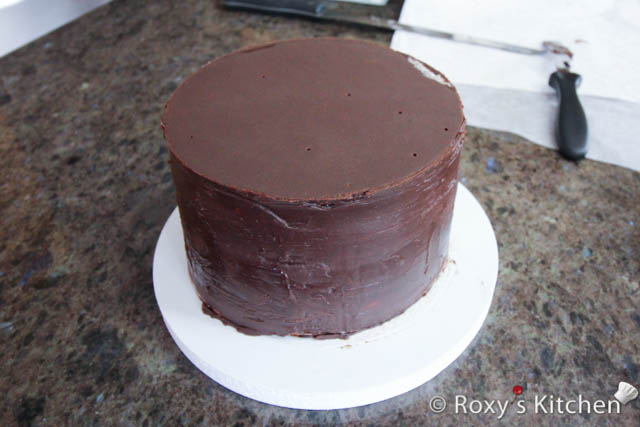
You can also watch this video tutorial to see how to stack and cover a cake with ganache and achieve perfect straight edges.
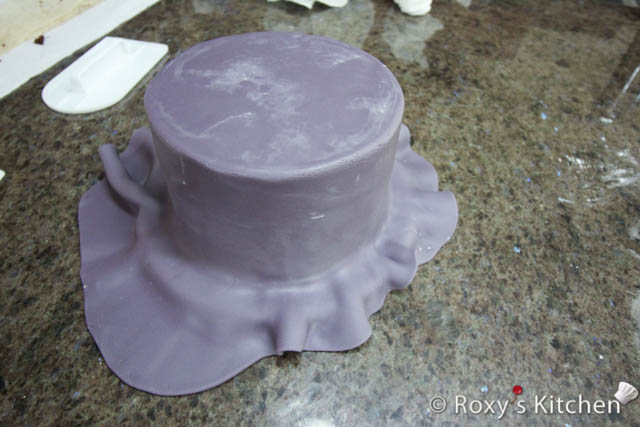
Then, cover the cake with purple fondant.

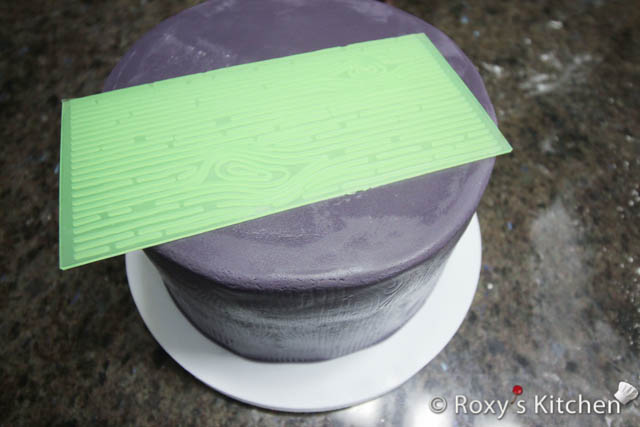
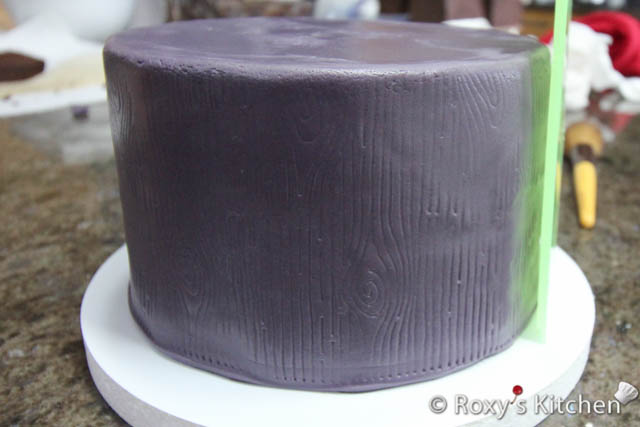
To achieve the wood look on the cake you need a tree bark fondant impression mat. After you covered the cake with fondant, gently press the tree bark fondant impression mat onto the fondant to give it the wood effect.
I used train-shaped cookie cutters to make the train on the cake, cloud-shaped cookie cutters for the clouds and the Number Tappit Cutters to make the number 1.
Attach all the fondant decorations to the cakes using some water.
I hope you found this Train Themed Birthday Party Cakes post useful. Leave a comment below if you have any questions.
This post contains Amazon.com affiliate links.


[…] Train-shaped cake: Bake a cake in the shape of a train, using round and rectangular pans. Decorate it with frosting in different colors to resemble a train. […]