


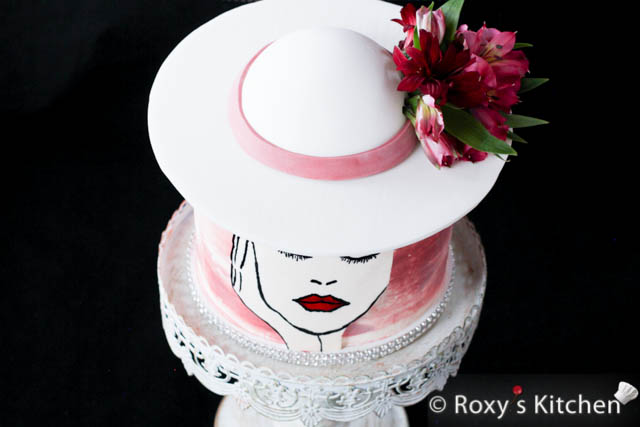
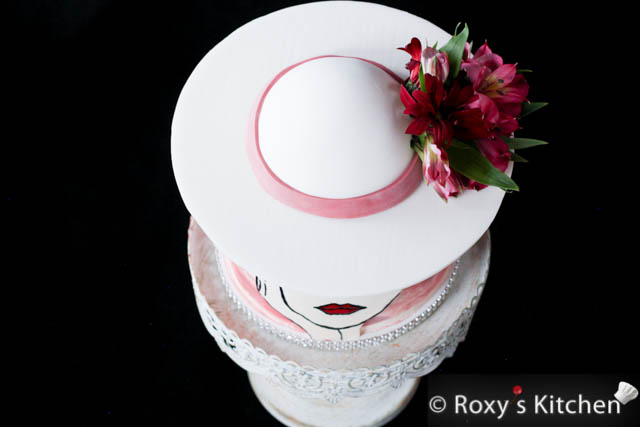
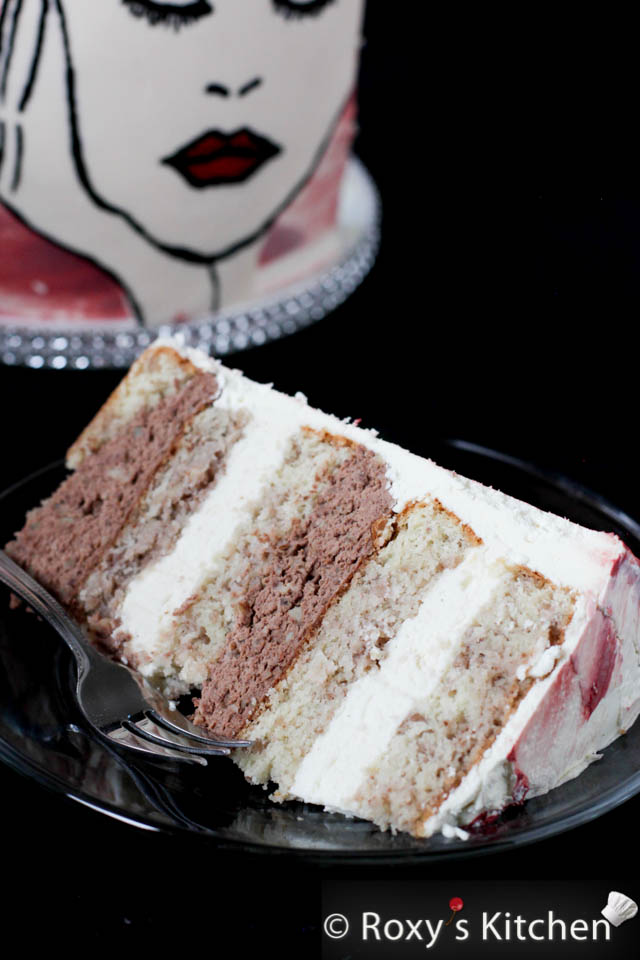
I made this Lady with a Hat Cake for my birthday. It was a walnut cake filled with mascarpone mousse and whipped chocolate ganache with walnuts. This is one of my favourite cakes so far, with five layers of moist cake and four layers of decadent filling. Each bite is a perfect balance of crunchy walnuts, rich chocolate, and creamy mascarpone mousse. Trust me, you won’t regret it if you make this for you next special occasion!
Because I posted the walnut cake and the recipes for the two fillings before, I will provide the links to those other posts and only the list of ingredients in this post. I’ll also provide some directions and tips below that are specific to this cake.
The hat on top is made out of cake and gum paste and decorated with fresh flowers. For the face, I transferred an image to gum paste and painted the details.
Ingredients
- 9 eggs
- 50 ml (9 Tbsp) water
- 270 g (1 1/3 cups) sugar
- 5 Tbsp ground walnuts
- 1 pouch vanilla sugar
- 250 g (2 cups + 1 Tbsp) all-purpose flour, sifted
Sugar Syrup to Moisten the Cake
- 200 ml water
- 5 Tbsp sugar
- 3 Tbsp rum or vanilla extract
- 250 ml (1 cup) whipping cream
- 120 g (1 cup) powdered sugar
- 250 g (1 cup / 8.8 oz) mascarpone cheese
- 2 Tbsp vanilla extract or 2 tsp vanilla bean paste
- 10 g unflavoured gelatine powder softened in 120 ml (1/2 cup) water
Whipped Chocolate Ganache with Walnuts
- 200 g (1 1/4 cups) of semi-sweet chocolate callets/chips (you can also use 260 g milk chocolate only or a mix of 100 g of semi-sweet chocolate + 130 g of milk chocolate)
- 400 ml (1 3/4 cups) whipping cream
- 100-150 g (1-1.5 cups) ground walnuts
Note: All chocolate should be a good-quality baking or couverture chocolate.
Chocolate Ganache Buttercream Frosting:
- 400 g (2.5 cups) white chocolate callets/chips
- 400 ml (1 3/4 cups) whipping cream
- 400 g (3.5 butter sticks / 14.1 oz) butter, at room temperature
For the fondant decorations and the hat on top check these other two posts:
- Lady Face Transferred to Gum Paste – Make this once your cake is assembled and frosted if you want to wrap it a bit around your cake.
- Lady Hat Cake Topper – Make this at least 4-5 days in advance so that the gum paste / fondant has time to dry out. If it’s still a bit soft, it will bend or crack once you place the hat on the cake.
Other Tools/Items:
- one 18 cm (7’’) cake board
- one 13 cm (5’’) cake board
- 3 bubble tea/boba plastic straws or cake dowels
- a turntable or lazy susan
- blue and red oil-based food colouring
Directions
Making the Cake
Prepare the batter as per the instructions in this Walnut Cake post.
You will need an 18 cm (7’’) round cake pan greased and lined with parchment paper.
Save a bit of batter to make a small dome cake for the hat. Check this Lady Hat Cake Topper post for more details. https://roxyskitchen.com/lady-hat-cake-topper-or-cake.html.
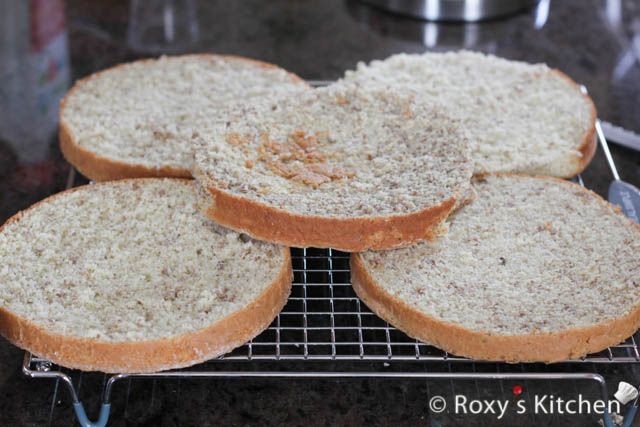
If your pans are the typical ones that are 5 cm (2’’) or 7.6 cm (3’’) tall, then you will need two of these pans; you can add 3/5 of the batter in one pan and 2/5 of the batter in the other one. Once baked, the first cake will be cut horizontally in three and the second cake will be cut in two.
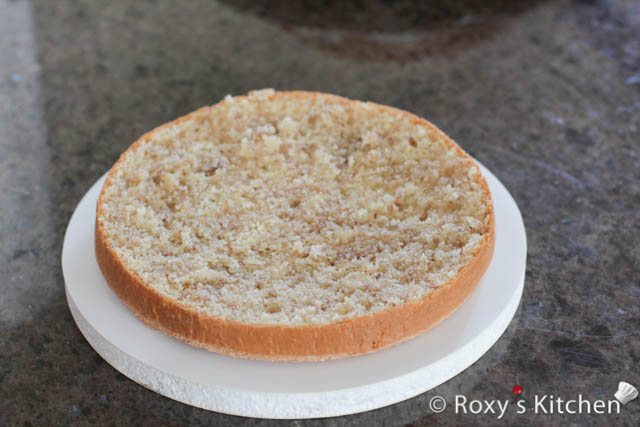
Bake the cakes and let them cool off before cutting them. You need to end up with 5 cake layers.
Prepare a simple sugar syrup by boiling 200 ml water with 5 tablespoons of sugar. Add 2-3 tablespoons of rum or vanilla extract when it starts boiling and remove from the heat. Let it cool off.
Making the Mascarpone Mousse Filling & Assembling the Cake
Make the Mascarpone Mousse using this recipe and the ingredients listed above.
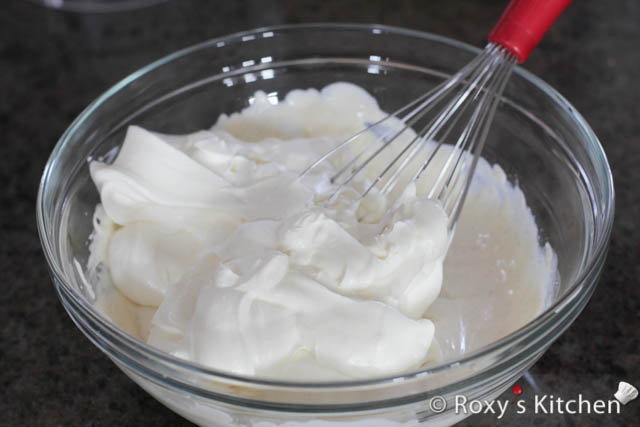
You need to have the cake layers and sugar syrup ready before making the mousse. That’s because you need to work quite fast with the mousse, otherwise, the gelatine will start setting and your mousse won’t be smooth and creamy anymore.
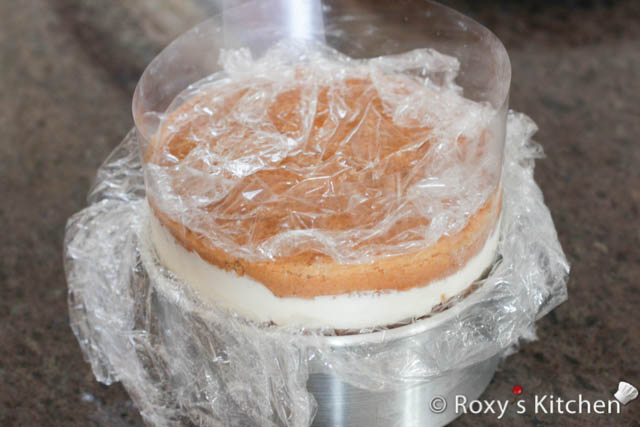
Also, line the pan in which you baked the cake with plastic foil on the bottom and sides. Then, use acetate sheets to create a collar and raise the sides of your pan to a height of 18 cm (7 inches). If you don’t have acetate sheets, you can use any soft plastic that bends and allows you to create a collar (e.g. plastic folders).
If you have two 18 cm (7 inches) cake pans, you can use both and just line them with plastic foil. There is no need to create the acetate collar as each pan will have just one layer of cake, one of mousse and another one of cake.
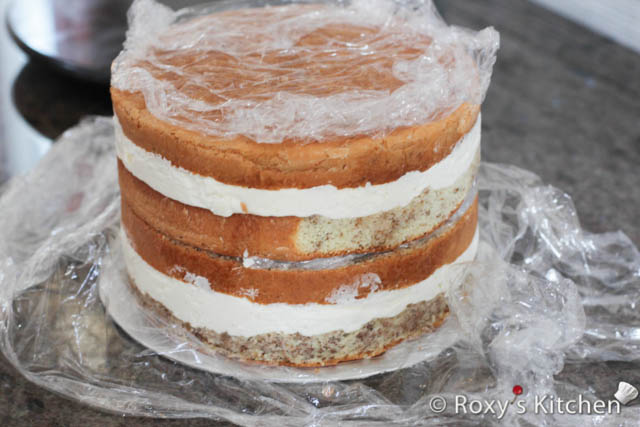
Place the first cake layer on the bottom of the pan and moisten it with sugar syrup. Spread half of the mascarpone mousse and place the 2nd cake layer on top. Moisten it with sugar syrup.
You will need to assemble another cake like this with one layer of cake, one of mousse and another one of cake. I used one pan only so after I assembled the first cake, I just placed some plastic foil on top to separate the first assembled cake from the second.
Note that so far you’ve only used four cake layers and there is still one remaining. Save this 5th one for later.
Cover the cake(s) with plastic foil and refrigerate them for at least 6 hours or overnight so that the gelatine sets properly.
Making the Whipped Chocolate Ganache and Continuing to Assemble the Cake
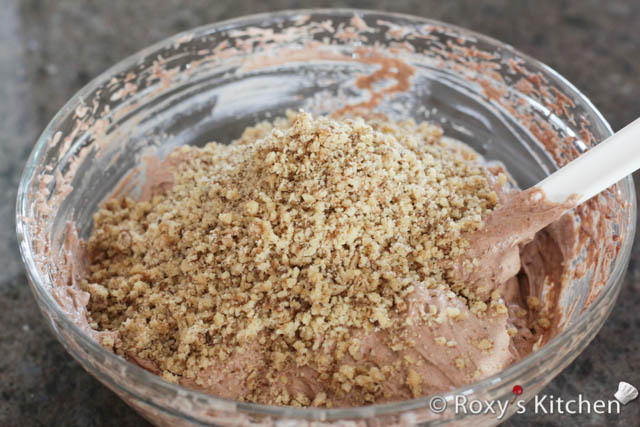
Make the Whipped Chocolate Ganache with Walnuts by following the instructions in this recipe.
I usually make the ganache the day before and whip it the next day when I’m ready to fill my cakes. It takes just 2 minutes to whip it and mix it with the ground walnuts.
Take your cakes out of the fridge and remove them from the pan.
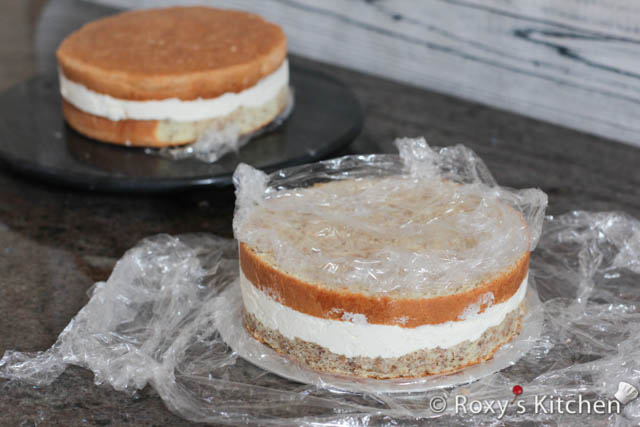
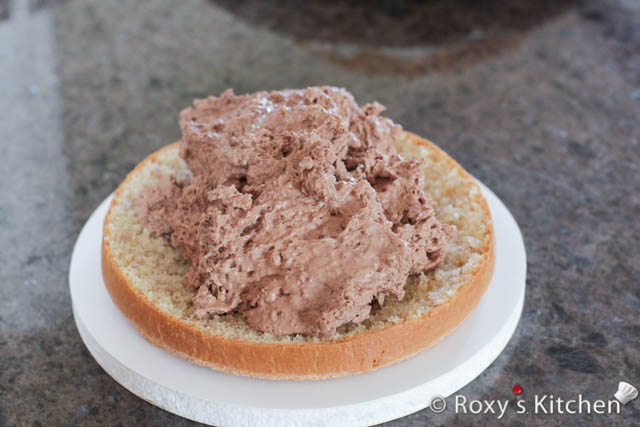
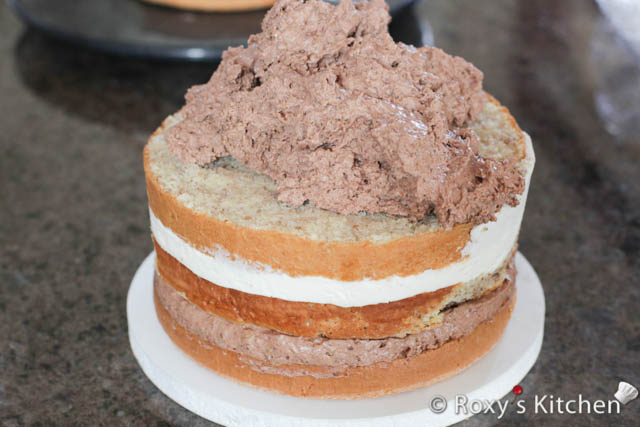
Spread some ganache on a 18 cm (7’’) cake board and place the 5th layer of cake (the one I mentioned above that’s still left over). Moisten it with sugar syrup and spread half of the whipped chocolate ganache on top.
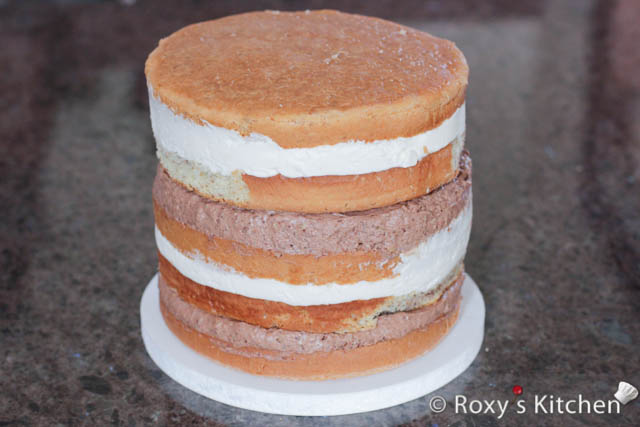
Place on top one of the cakes you filled with mascarpone mousse before. Spread the remaining whipped chocolate ganache on top. Lastly, add on top the second cake you filled with mascarpone mousse.
Frosting and Decorating the Cake
To make the Chocolate Ganache Buttercream Frosting, use the ingredients listed above and follow the steps in this post.
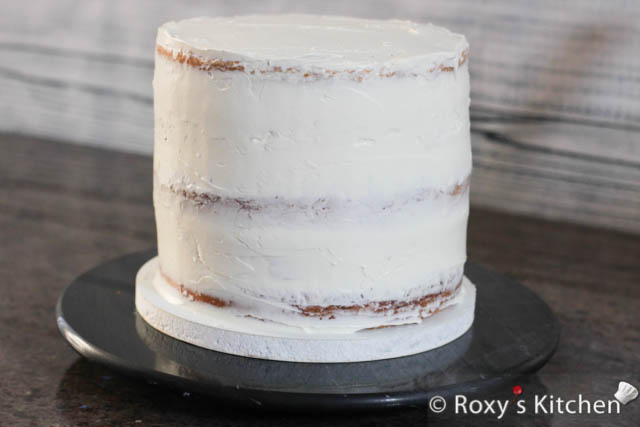
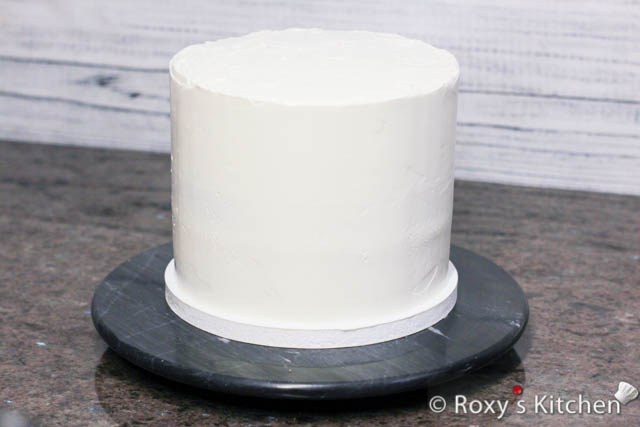
Apply a thin layer of frosting to crumb coat the cake. Smooth it out using a spatula. Refrigerate the cake for at least 1 hour before applying the next coat of frosting.
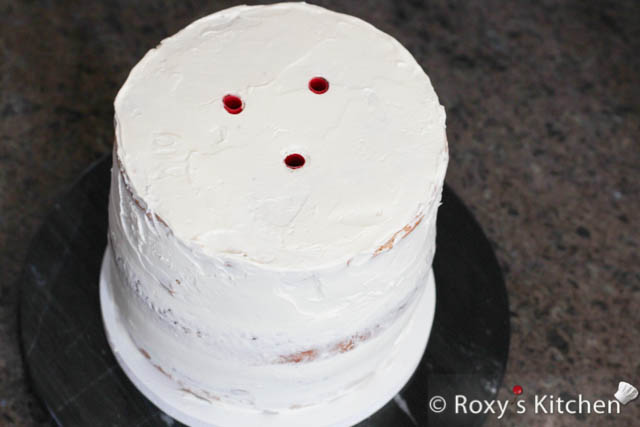
Because the hat that’s placed on top is not super light, I created support for my cake using bubble tea straws. Cut three bubble tea straws to the height of the cake and then insert them into the cake to form a triangle. Insert each of them about 3.8 cm (1.5’’) away from the edge.
Apply the remaining frosting and smooth it out using a spatula and a cake scraper/smoother or a bench scraper. When the sides are fully covered with frosting, hold the cake scraper at a 90 degree angle, parallel with the cake, as you rotate the turntable. Use the spatula to swipe the outer edges of the frosting on the top of the cake toward the centre of the cake. The top doesn’t have to be perfectly smooth as you will place the hat on top.
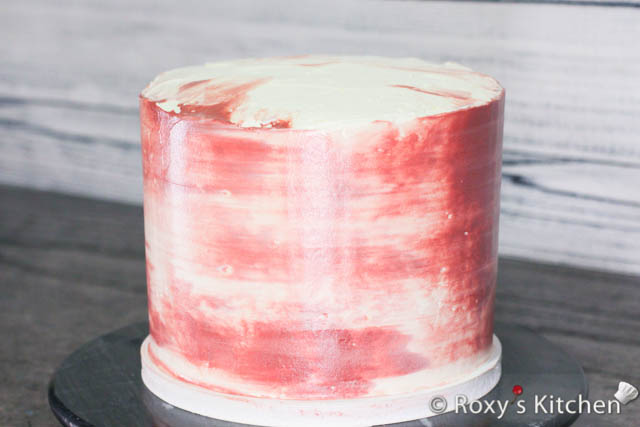
I saved a bit of frosting and coloured it in burgundy, a deep reddish-brown colour. To achieve this colour you need to mix in oil-based food colouring – two parts red and one part blue.
I applied dots of burgundy frosting with a spatula on the sides of the cake. Then, I just used a cake scraper to smooth the frosting on the sides and give it this effect.
I made the lady face out of gum paste after my cake was assembled and frosted. This is because I wanted my gum paste image to be wrapped a bit around the cake so I had to place it right away on the cold cake. If you wait for too long, the gum paste hardens so it will be impossible to do this.
I made the lady hat 4 days in advance. This is needed so that the gum paste / fondant has time to dry out. If it’s still a bit soft, it will bend or crack once you place the hat on the cake.
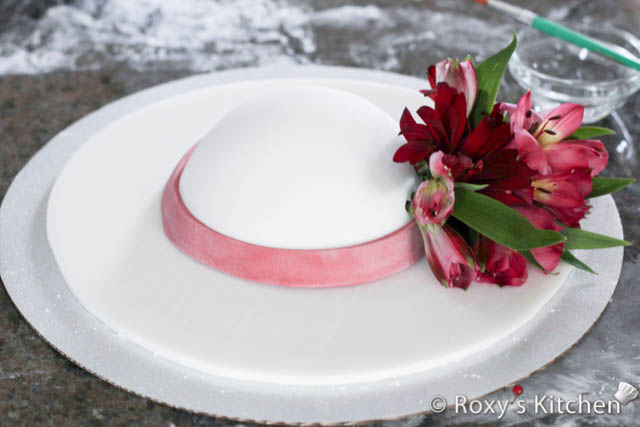
Spread a bit of frosting on top of your cake. Place a 13 cm – 15 cm ( 5’’-6’’) cake board on top. Then, place the hat on top.
Video – Lady with a Hat Tutorial

