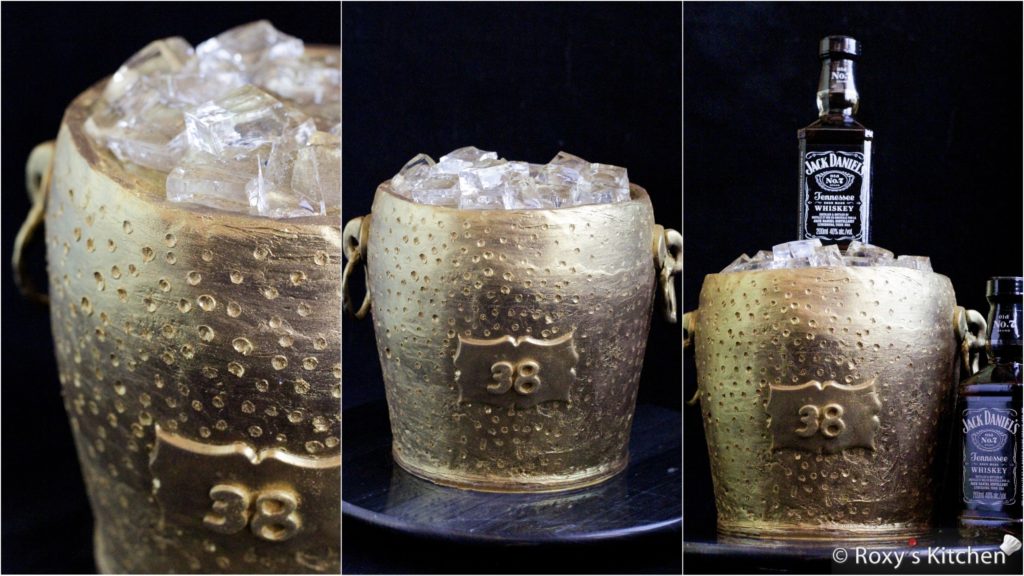
Want to impress your husband or guests with a unique Golden Ice Bucket Cake with a hammered metal look? Then, in this post I’ll dive into the details of how I made this cake for my husband’s birthday. You will realize it’s easier to make than you might think!
This unique and sophisticated cake is sure to be the talk of the party and will leave a lasting impression on all those who see it. The combination of the golden colour and the hammered metal look gives the cake a bold and masculine aesthetic that is perfect for any man’s birthday celebration.
Top the cake with small whiskey bottles and realistic-looking ice cubes to fully transform it into the centrepiece of the party!
Ingredients/Tools
- baked round cakes of your choice – I made my Walnut Cake recipe in 18 cm (7’’) round cake pans
- fillings of your choice – I used two fillings: Chocolate Walnut Filling and Whipped Chocolate Ganache with Irish Cream
- 1-2 cake boards (I used a 15 cm / 6’’ one on the bottom and a 18 cm / 7’’ one in the middle of the cake) & a few Boba plastic straws or cake dowels if you need to add extra stability to your cake
- unwhipped chocolate ganache / firm frosting for covering the cake – for a 18 cm (7’’) round cake that’s 20 cm (8’’) tall you will need approx. 1 kg (2.2 lbs) of ganache made using a 2:1 ratio of semi-sweet chocolate (e.g. 700 g) to whipping cream (350 ml); check out this post to see how to make the ganache
- a bit of chocolate fondant for the bucket handles and the vintage tag with the age
- a fondant rolling pin
- 2.5 cm (1’’) oval cutter
- 2 cm (3/4’’) hexagonal cutter
- 4 toothpicks and 2 gum paste / fondant flower wires for the bucket handles
- edible gold luster dust
- a big fluffy brush, like the makeup powder brushes
- fondant modelling tools: the ball tool and the pointy veining/frilling tool or something similar
- a rectangle vintage-shaped cookie or fondant cutter & number cutters for your man’s age
- small whiskey bottles and fake ice cubes for decorating – see this post to learn how to make them
Directions
Watch this video to see how I made the cake:
Start by filling and stacking your cake and covering it with a thin layer of chocolate ganache / firm frosting. The ganache needs to have a thick pouring consistency when you use it.
Cover the cake with plastic wrap and freeze it for 1-2 hours. Freezing the cake for a few hours will make it easier to carve the cake without crumbling… and there is a bit of carving involved as you will see in the video. You can also just refrigerate it if freezing is not an option.
Carve the cake using a serrated knife so that the base is 2.5 cm (1’’) smaller in diameter than the top of the cake.
Cover it with another layer of chocolate ganache.
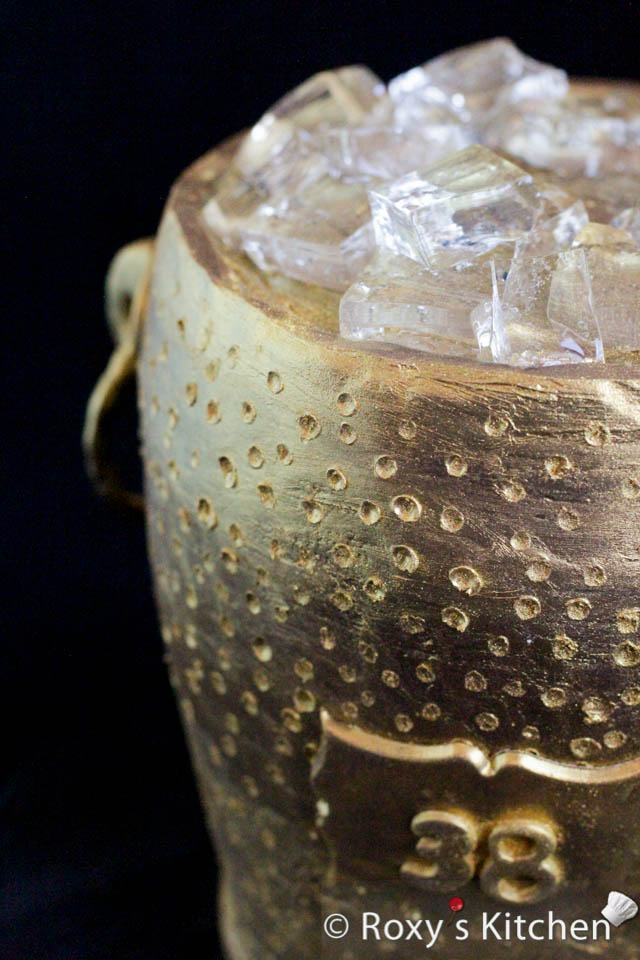
Refrigerate the cake for one hour. Then, apply the last layer of ganache and smooth it out using a spatula and a cake scraper/smoother or a bench scraper. Note that I created a bit of an edge out of ganache, at the top of the cake. This is to make it look like the ice is inside the bucket once placed on top.
Refrigerate the cake for 1-2 hours.
In the meantime, make the bucket handles using chocolate fondant and using the fondant flower wires for support. Leave 4cm (1.5’’) of the wire out at each end so that you can insert those into the cake to secure the handles in place. Watch the video tutorial to see how I shaped the handles.
Attach the handles to the bucket.
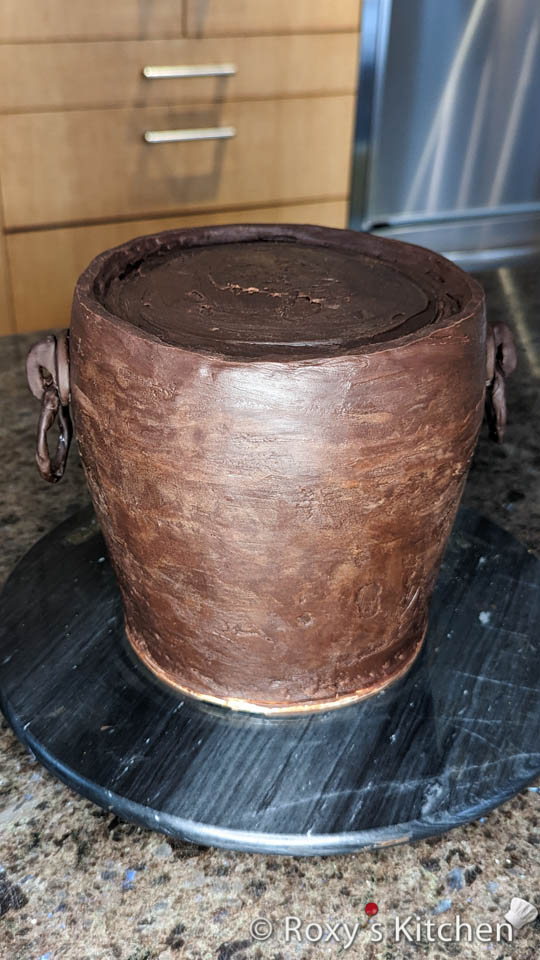
Apply a thin layer of gold luster dust using the fluffy brush.
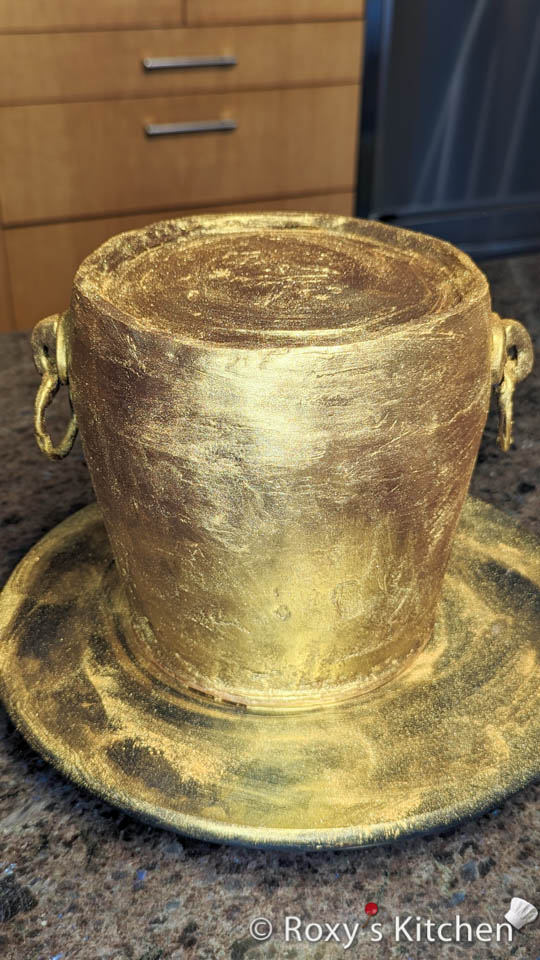
Then, using the fondant ball tool make small round dents / dots around the sides of the cake, as close to each other as you would like. For the look I created, it took me about 10 minutes to do this, so it’s not as tedious as it might look.
Then, brush another layer of gold luster dust on the cake.
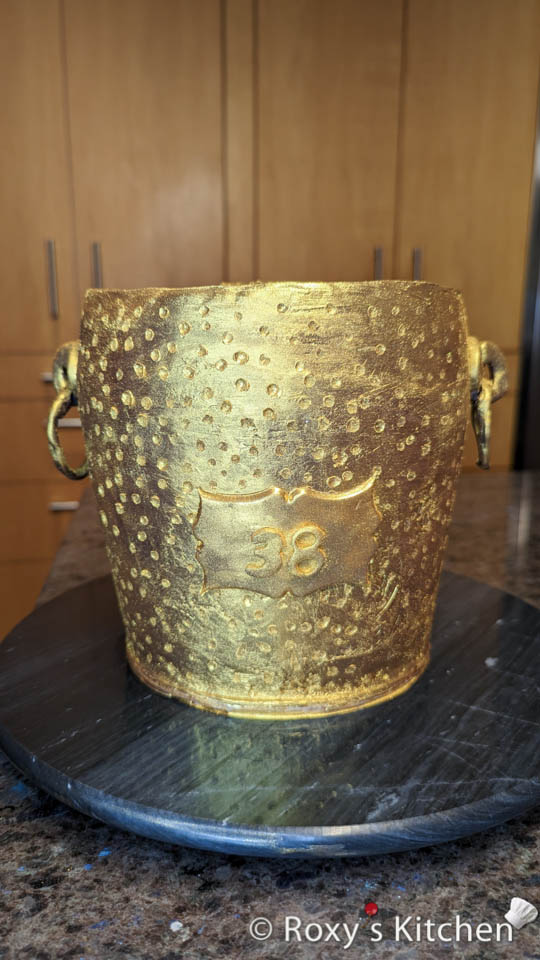
Lastly, roll some chocolate fondant to make the vintage label/tag using the rectangular vintage cutter. Also use the number cutters to make the birthday boy’s age. Brush a bit of water on them and attach them to the cake. Brush these with gold luster dust as well.
Carefully arrange the fake ice cubes on top of the cake and the tiny whiskey bottles on top of the cake.
If you give it a try, I’d love to see your cakes!
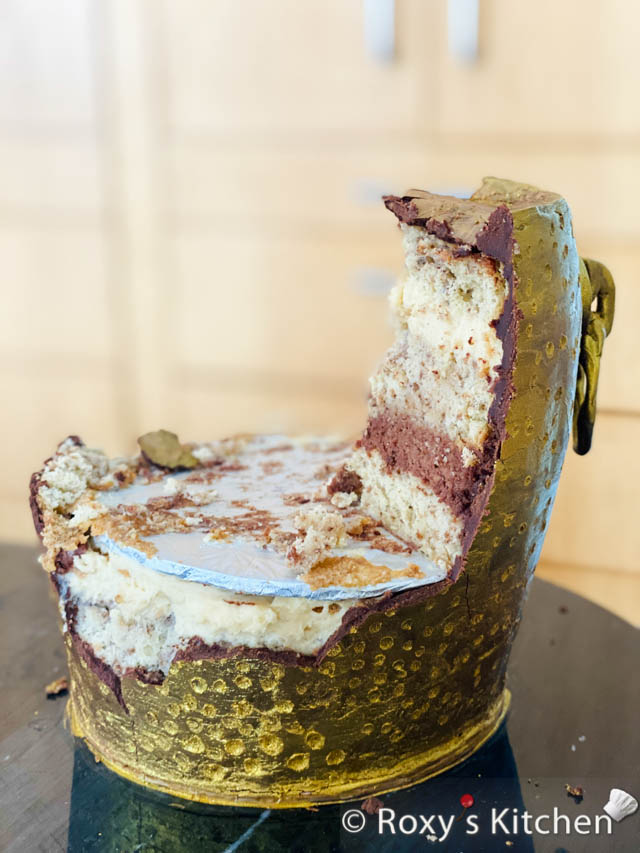
I don’t have a pretty picture of a slice, but here’s how it looked inside.
