• Home
  • About
    • Contact
    • Terms & Conditions
  • Shop
  • Go to Cart

Roxy's Kitchen

Follow Roxy on: FacebookFollow Roxy on: PinterestFollow Roxy on: E-mailFollow Roxy on: YouTubeFollow Roxy on: Instagram
  • Holidays & Events
    • Themed Parties
      • Beach / Nautical
      • Cars
      • Characters
      • For Her
      • For Him
      • Love, Marriage & Family
      • Puppy / Dog
      • Robots
      • Soccer
      • Safari / Jungle
      • Superheros
      • Trains
    • Christmas
    • Easter
    • Halloween
    • Thanksgiving
    • Valentine’s Day
  • How To’s
    • Fondant, Chocolate & Icing Decorations
    • Cake Flavours
    • Cake Frosting & Fillings
    • Breads
    • Pie & Pasta Dough
    • Canning & Preserving
    • AI-Powered Apps & Virtual Assistants
    • Others / Tips & Tricks
  • Recipes by Category
    • 5licious
    • Appetizers & Snacks
    • Breakfast
    • Bites on Boards
    • Cakes
    • Desserts
    • Drinks
    • Kid Friendly & Funny
    • Main Course
    • Salads
    • Side Dishes
    • Soups & Stews
  • Roxy’s Cakes
  • FREE & Cheap Printables

Chocolate Hazelnut Heart-Shaped Cake – 2013 Wedding Anniversary

November 10, 2013 by Roxy

Heart-Shaped Cake Covered with Roses - Wedding Anniversary 2013 / Tort in Forma de Inima - Aniversare Nunta

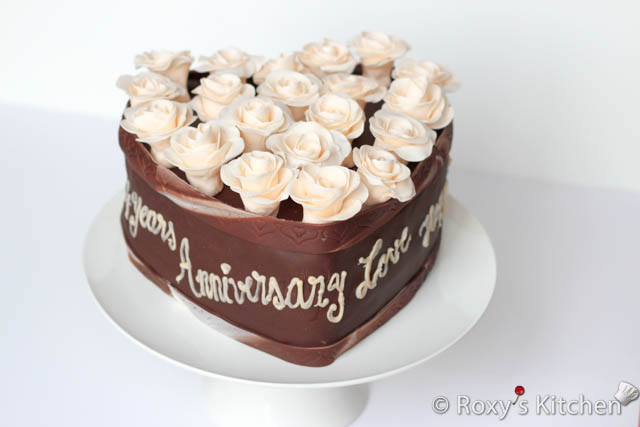
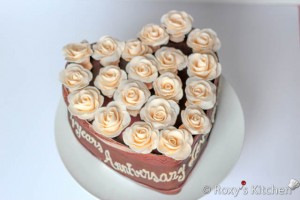
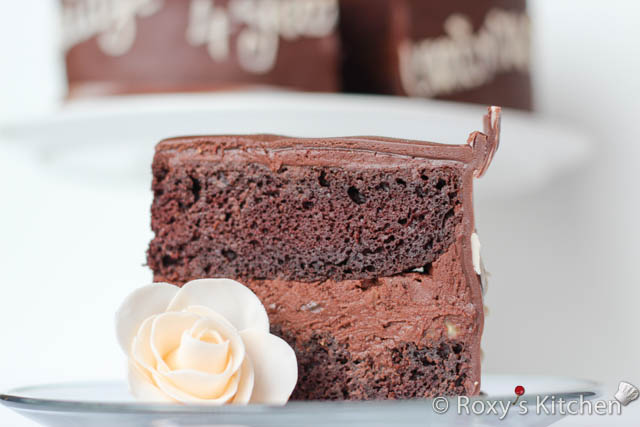
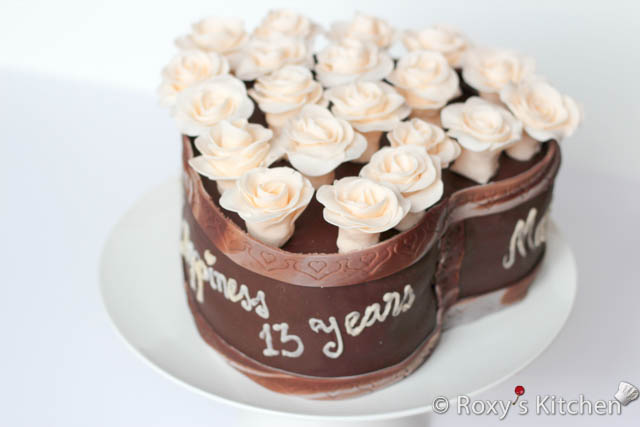
Last month hubby and I celebrated our 4-year wedding anniversary and 13 years since we’ve been together. So I thought a special occasion deserved a special cake and decided to make a lovely heart-shaped cake covered in fondant roses :). The cake batter is similar to the red velvet cake from my cake pops recipe except I replaced ¼ cup flour with cocoa powder and I didn’t add the red food colouring. I just doubled the ingredients to make two cakes. You will need a heart-shaped pan, greased with butter and floured or lined with parchment paper. If you don’t have a heart-shaped pan it’s very easy to make the cake using two basic pans – an 8-inch round and an 8-inch square baking pans. Cut the round cake in half and place each half to two adjacent sides of the square cake. Easy breezy! Not even sure how I ended up buying the heart-shaped pan :-O!

For the filling I was inspired by the cake we ordered for our baby’s baptism. It had a chocolate-hazelnut filling with a rich flavour and a great crunchy texture. I decided to use something similar for this cake so I made a delicious chocolate ganache filling with caramelized hazelnuts.                    

You can cover the cake with fondant and decorate it with fondant roses as I did or keep it simple and use the chocolate ganache (without the hazelnuts for a smoother texture) to frost the cake. Another idea is to place homemade or store-bought chocolate truffles to make it look more like a heart-shaped chocolate box.

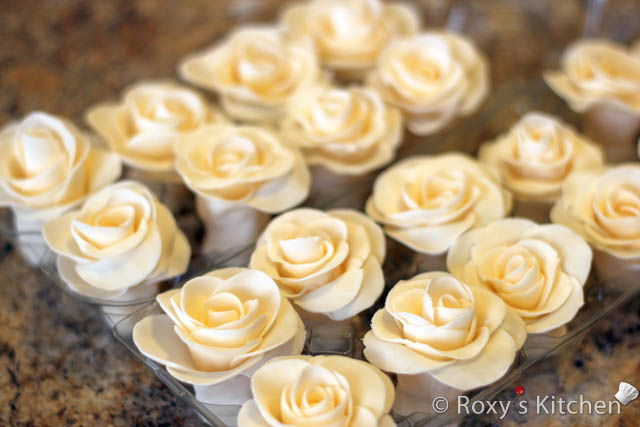
If you want to make the fondant roses at home check out my tutorial on How to Make Fondant Roses. Make the roses ahead of time to allow them to dry properly.

Time:  120 min, Prep: 30 min. or more depending on how you want to decorate the cake  Cook: 60 min.
Servings: 16-18

Ingredients:

For cake:

  • See ingredients and step by step instructions here. Don’t forget to replace ¼ cup flour with cocoa powder and don’t add the red food colouring.

For filling:

  • 500 ml (2 cups) whipping cream
  • 500 g semi-sweet chocolate
  • 100 g hazelnuts
  • 220 (1 cup) g sugar
  • 2 Tbsp hazelnut liqueur

For decorating cake:

  • Chocolate Fondant ( 1.5 pounds)
  • Ivory Fondant – for the roses and to make the marbled edges; I made 22 roses using the steps in this tutorial – How to Make Fondant Roses
  • Fondant tools: smoother (or palm of your hands), roller, cutter (or a regular knife)
  • Frill cutters to emboss the tiny hearts on the fondant strips at the top and bottom of the cake


Directions:

Make your roses a few days ahead.

Fondant roses

The base recipe for the filling is chocolate ganache. You just need to heat the whipping cream over medium heat, remove from heat, add the chocolate and stir until completely mixed and glossy.

Add the hazelnut liqueur (forgot to add it, oops!) and set aside to cool. Then refrigerate for at least 3 hours or overnight.

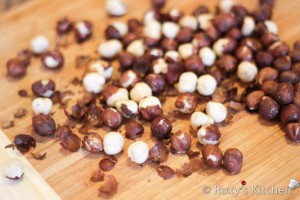
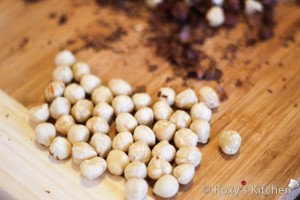
To make the caramelized hazelnuts, roast them in the oven for 6 minutes. Allow them to cool and then rub them until the skins come off.

Raw hazelnuts Roasted hazelnuts Roast hazelnuts in the oven for 6 minutes Allow them to cool and then rub them until the skins come off

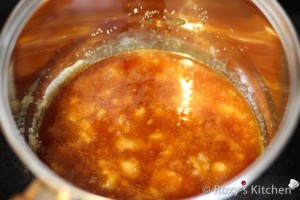
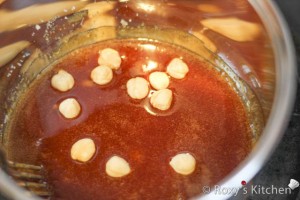
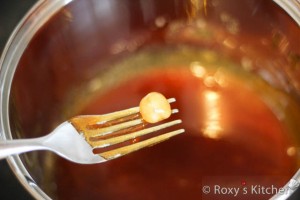
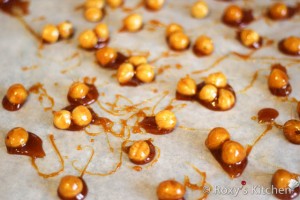
Melt the sugar in a heavy-bottom saucepan over low-medium heat. Stir constantly with a spoon until sugar reaches a golden-brown colour. Remove from heat, stir the hazelnuts in and coat them with sugar. Take the nuts out with a fork and place them on parchment paper.

Melt the sugar in a heavy-bottom saucepan over low-medium heat. Stir constantly with a spoon until sugar reaches a golden-brown colour. Remove from heat, stir the hazelnuts in and coat them with sugar. Take the nuts out with a fork and place them on parchment paper. Take the nuts out with a fork and place them on parchment paper.

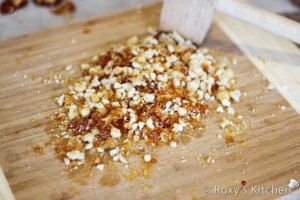
When they have cooled off, use a meat tenderizer mallet to “chop” the nuts.

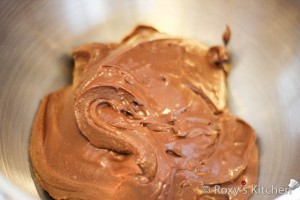
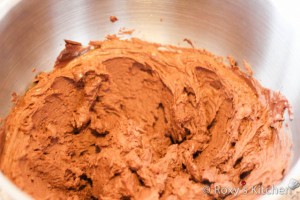
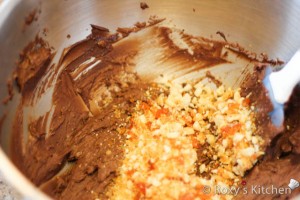
Whip the chilled chocolate mixture until light and fluffy. If it’s too thick you can mix in a few tablespoons of whipped cream. Mix in the chopped hazelnuts in 2/3 of the mixture. You will use the remaining to crumb coat the cake.

When they have cooled off, use a meat tenderizer mallet to “chop” the nuts. Whip the chilled chocolate mixture until light and fluffy. Whip the chilled chocolate mixture until light and fluffy. Mix in the chopped hazelnuts in 2/3 of the mixture. You will use the remaining to crumb coat the cake.

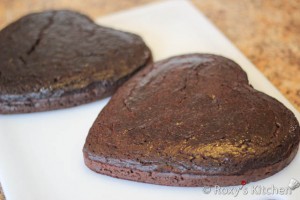
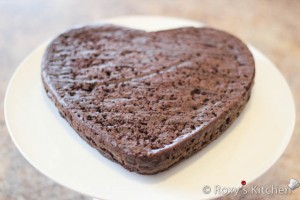
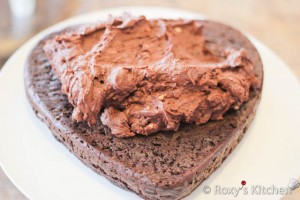
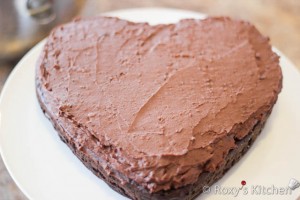
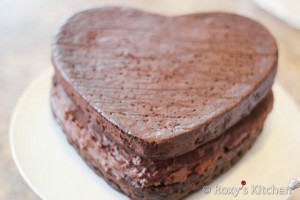
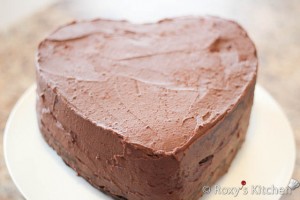
Place one of the cake layers on your cake platter and using a spatula evenly cover the top of the first layer with chocolate-hazelnut filling. Place the second layer on top and crumb coat the cake before covering it in fondant.

Heart-shaped chocolate cakes Place one of the cake layers on your cake platter. Using a spatula evenly cover the top of the first layer with chocolate-hazelnut filling. Using a spatula evenly cover the top of the first layer with chocolate-hazelnut filling. Place the second layer on top and crumb coat the cake before covering it in fondant. Place the second layer on top and crumb coat the cake before covering it in fondant.

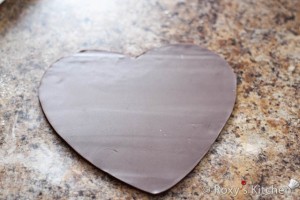
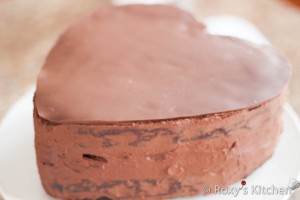
Trace the outline of your heart pan onto a piece of paper. Sprinkle some powdered sugar onto your work surface and roll out fondant with a rolling pin. Cut out the heart shape and place it on top of the cake. Smooth the fondant out with the palm of your hand or a fondant smoother.

 Trace the outline of your heart pan onto a piece of paper. Sprinkle some powdered sugar onto your work surface and roll out fondant with a rolling pin. Cut out the heart shape. Place it on top of the cake.

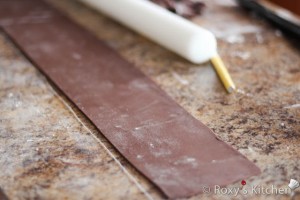
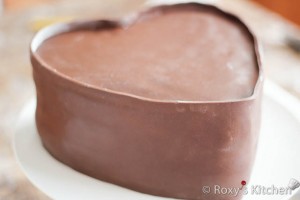
Next you’ll cover the sides. Use a piece of string to measure the cake around and another one to measure the side of the cake. Also, you want the cake strip to be a little taller than the cake so take that into account when you cut your fondant strip. I did this to hide the bottom of the roses. If you pinch off all the excess fondant on the bottom of the rose to make the roses shorter you might not have to make your fondant strip taller. Carefully place the fondant strip around the sides of the cake, flattening with your hand as you go. Smooth the fondant and trim the edges at the bottom if necessary.

 Use a piece of string to measure the cake around and another one to measure the side of the cake. Also, you want the cake strip to be a little taller than the cake so take that into account when you cut your fondant strip. Carefully place the fondant strip around the sides of the cake, flattening with your hand as you go. Smooth the fondant and trim the edges at the bottom if necessary.

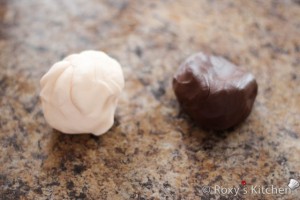
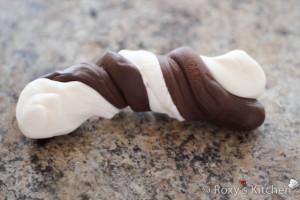
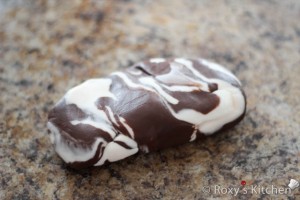
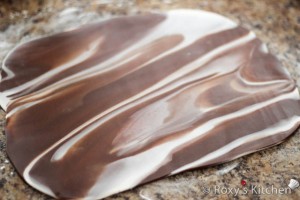
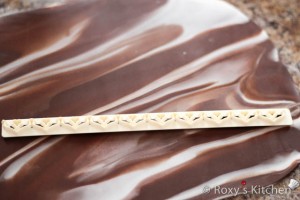
I also made some marbled fondant using ivory and chocolate fondant. Roll out each colour into a log, place them side by side and twist the colours together like a breadstick. Twist and fold it a few times and until you have the marbling effect desired. Roll it out.

Chcolate & ivory fondant Roll out each colour into a log, place them side by side and twist the colours together like a breadstick. Twist and fold it a few times and until you have the marbling effect desired. Roll out marbled fondant

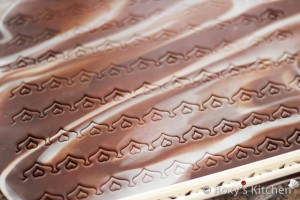
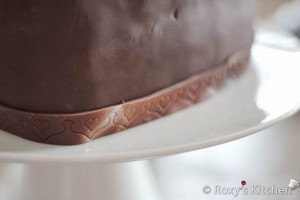
I used a frill cutter to emboss the tiny hearts and cut 1/3 inch tall strips. I brushed the strips with some water on the back and glued them to the cake at the top and bottom as seen in the pictures.

Arrange the fondant roses on the cake and you’re done :)!

I used a frill cutter to emboss the tiny hearts and cut 1/3 inch tall strips. I used a frill cutter to emboss the tiny hearts and cut 1/3 inch tall strips. I brushed the strips with some water on the back and glued them to the cake at the top and bottom as seen in the pictures. Arrange the fondant roses on the cake Heart-Shaped Cake Covered with Roses - Wedding Anniversary 2013 / Tort in Forma de Inima - Aniversare Nunta Heart-Shaped Cake Covered with Roses - Wedding Anniversary 2013 / Tort in Forma de Inima - Aniversare Nunta Chocolate Cake Slice

Print Friendly, PDF & Email

YOU MAY ALSO LIKE:

Pregnant Belly Cake - Gender Reveal Party

First Communion Open Book Cake (Chocolate Ganache & Mascarpone Filling)

Catalina’s Bachelorette Party

Stylish Girl Cake - How to Make the Easiest Doll Cake

Share this:

  • Click to print (Opens in new window) Print
  • Click to email a link to a friend (Opens in new window) Email
  • Tweet
  • Click to share on Reddit (Opens in new window) Reddit
  • Pocket
  • Share on Tumblr

Filed Under: Chocolate, Hazelnuts, Roxy's Cakes, Valentine's Day Tagged With: aniversare, cake covered with fondant roses, chocolate-hazelnut cake, fondant roses, fondant roses tutorial, heart-shaped cake, marbled fondant, tort in forma de inima, trandafiri din pasta de zahar, wedding anniversary

Comments

  1. Will says

    December 8, 2013 at 5:40 AM

    OMG! It looks so delicious! Thank you! 😉


Subscribe to Email Updates

loader

Email Address*

Name

FREE & Cheap Printables

  • Sale Product on sale
    Easter Cupcake Toppers (2'') - 12 Designs
    Easter Cupcake Toppers (2”) – 12 Designs
    $1.49 Original price was: $1.49.$1.19Current price is: $1.19.
    Add to cart
  • Sale Product on sale
    Ballerina Cake & Cupcake Toppers
    Ballerina Cake & Cupcake Toppers
    $2.99 Original price was: $2.99.$2.39Current price is: $2.39.
    Add to cart
  • Dancing Ballerina Coffee Mug
    Dancing Ballerina Coffee Mug
    $19.99
    Buy product
  • Sale Product on sale
    Soccer Party Package Printables
    Soccer Party Package Printables Watercolour Collection
    $4.99 Original price was: $4.99.$3.99Current price is: $3.99.
    Add to cart
  • Sale Product on sale
    Soccer Cake Toppers Watercolour Collection
    Soccer Cake Toppers Watercolour Collection
    $2.99 Original price was: $2.99.$2.39Current price is: $2.39.
    Add to cart
  • Soccer Cupcake Toppers (2'') Watercolour Collection - 12 Designs
    Soccer Cupcake Toppers (2”) Watercolour Collection – 12 Designs
    $1.49
    Add to cart
  • Sale Product on sale
    Ballerina Cake & Cupcake Toppers - Baby / Baby Shower Package
    Ballerina Cake & Cupcake Toppers – Baby Girl / Baby Shower Package
    $2.99 Original price was: $2.99.$2.39Current price is: $2.39.
    Add to cart
  • Sale Product on sale
    Puppy Cake Toppers – 3rd Birthday Package
    Puppy Cake Toppers – 3rd Birthday Package
    $2.99 Original price was: $2.99.$2.39Current price is: $2.39.
    Add to cart

Themed Birthday Parties

Soccer-Themed Birthday Party Desserts I 

Soccer Themed Birthday Party Desserts

Safari / Jungle Themed First Birthday Party Part IV – Cheap Party Supplies and Decorations

Safari / Jungle Themed First Birthday Party Part - Cheap Party Supplies & Decorations

Lady with a Hat Cake Tutorial

Lady with a Hat Cake Tutorial

1st of July Dessert – Canadian Flag No-Bake Fruit Cake

1st of July Dessert - Canadian Flag No Bake Fruit Cake | Roxy's Kitchen

More Posts from this Category


Recent Posts

How to Naturally Dye Easter Eggs Blue

How to Naturally Dye Easter Eggs Blue

Soccer Ball Cookies

Soccer Ball Cookies

How to Make a Car Cake with Remote-Controlled Headlights

How to Make a Car Cake with Remote-Controlled Headlights

How to Use a Cake Comb on Cake Covered in Chocolate Ganache

How to Use a Cake Comb on Cake Covered in Chocolate Ganache


Popular Posts


  • Egg Snowman
    Egg Snowman

  • 4-Ingredient Creamy Pineapple Berry Smoothie | Roxy's Kitchen
    Creamy Pineapple Berry Smoothie

  • Homemade Sour Cherry Liqueur
    Homemade Sour Cherry Liqueur – Easy Old Family Recipe Reveal...

  • Mini Cheese Balls | Roxy's Kitchen #appetizer #cheese #mozarella #parmesan #fingerfood
    Mini Cheese Balls

  • Rose Cupcake Bouquet in a Pot
    Easy Rose Cupcake Bouquet in a Pot

  • Grape and Banana Dolphin Parfait | Roxy's Kitchen
    Grape and Banana Dolphin Parfait

  • Quick & Easy Nutella Peanut Butter Monkey Cupcakes | Roxy’s Kitchen – 3-ingredient cupcakes, easiest frosting ever and so easy to decorate with your kids!
    Quick and Easy Nutella Peanut Butter Monkey Cupcakes

  • Safari Jungle Themed First Birthday Party Part III – DIY Decoration Ideas + Free Printables Included! | Roxy's Kitchen
    Safari / Jungle Themed First Birthday Party Part III – DIY D...

  • Easy 3-Ingredient Blueberry Jam | Roxy's Kitchen
    Easy Blueberry Jam

  • Breakfast Egg Stuffed Sweet Potatoes | Roxy's Kitchen A super filling five-ingredient breakfast loaded with vitamins & nutrients.
    Breakfast Egg Stuffed Sweet Potatoes

Recent Pins

  • Pink Letter T / Floral Monogram for Girls  Mug

Pink Letter T / Floral Monogram for Girls features a vibrant and delicate letter 'T' beautifully formed with soft pink cherry blossoms. This design combines nature's elegance with artistic flair, making it a perfect personalized gift for girls or stylish home decor. Ideal for spring-themed merchandise or to add a touch of floral charm to any collection. Available on a range of products, including t-shirts, mugs, and home accessories.
  • Chocolate Sponge Cake (Amandine)
Follow Me on Pinterest

Popular Posts


  • Mini Cheese Balls | Roxy's Kitchen #appetizer #cheese #mozarella #parmesan #fingerfood
    Mini Cheese Balls

  • 4-Ingredient Creamy Pineapple Berry Smoothie | Roxy's Kitchen
    Creamy Pineapple Berry Smoothie

  • Egg Snowman
    Egg Snowman

  • Oven Baked Pork Sirloin Chops
    Oven-Baked Pork Sirloin Chops

  • How to Make Modeling Chocolate for decorating cakes, cupcakes and cookies
    How to Make Modeling Chocolate for Decorating Cakes, Cupcake...

  • Homemade Sour Cherry Liqueur
    Homemade Sour Cherry Liqueur – Easy Old Family Recipe Reveal...

  • 50 Great Ideas for Your Winter Holidays Menu
    50 Great Ideas for Your Winter Holiday Menu

  • Tutorial with Step by Step Photos - How To Make Safari / Jungle Animals Cupcake Toppers – Tiger, Zebra, Giraffe, Elephant, Monkey, Hippo, Bear, Lion
    How To Make Safari / Jungle Animals Fondant Cupcake Toppers...

  • Safari Jungle Themed First Birthday Party Part III – DIY Decoration Ideas + Free Printables Included! | Roxy's Kitchen
    Safari / Jungle Themed First Birthday Party Part III – DIY D...

  • Safari / Jungle Themed First Birthday Party Part II – Appetizers, Finger Foods & Snack Ideas
    Safari / Jungle Themed First Birthday Party Part II – Appeti...

Copyright © 2025 · Lifestyle Pro Theme on Genesis Framework · WordPress · Log in