


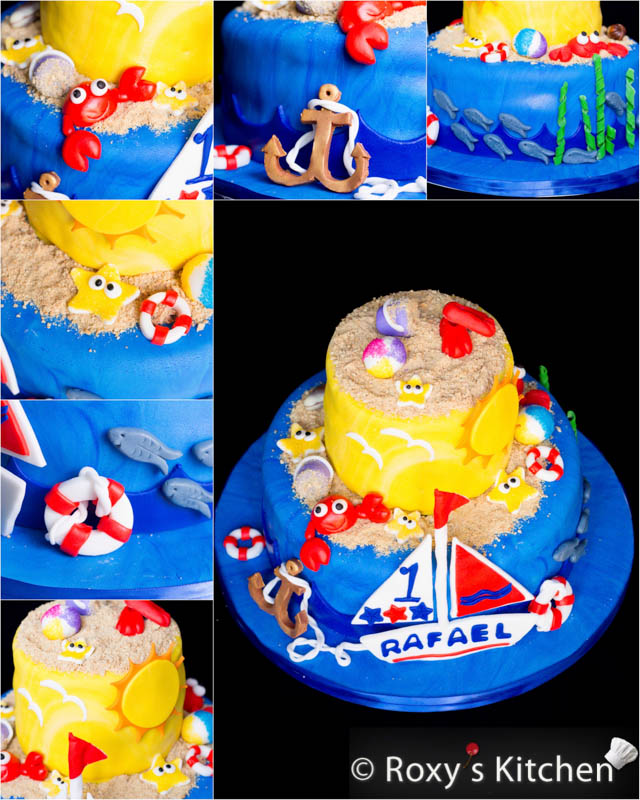
In this step-by-step tutorial, we will embark on a delightful journey to create all the fondant decorations for a two-tier beach/nautical cake. This includes detailed instructions and close up photos that show how to make fondant waves, a shiny sun, a sailing boat, crabs, starfish, fish, beach balls, snorkelling fins, sand buckets, boat life rings and a boat anchor & rope.
The full beach/nautical cake tutorial has 130 step-by-step pictures and it’s split into two parts:
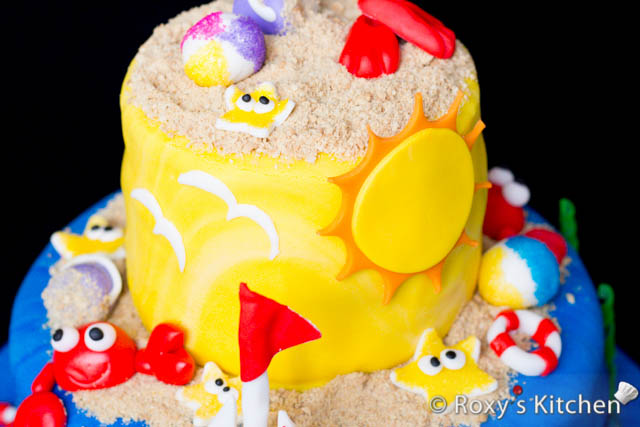
The Sun and Birds
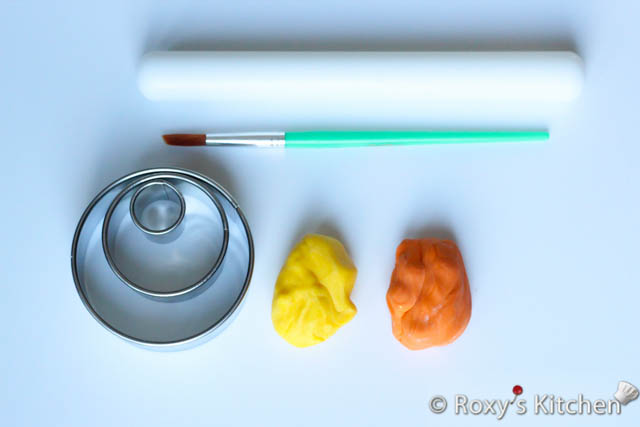
Ingredients/Tools
- Small fondant rolling pin
- Orange, yellow and white fondant
- 8 cm (3.15’’), 5 cm (2’’), 2.5 cm (1’’) round cutters – you can use the 9th, 5th and 1st cutters (smallest to largest) of the Ateco Plain Round Cutter Set of 11
- Paint brush
- X-Acto knife or any other sharp knife with a thin blade
- Powdered sugar or cornstarch for dusting your work surface
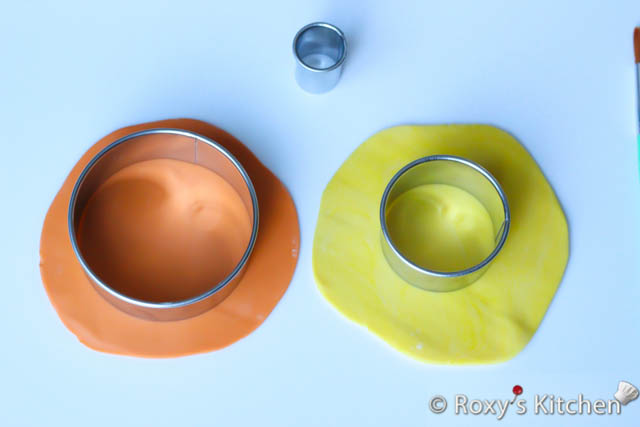
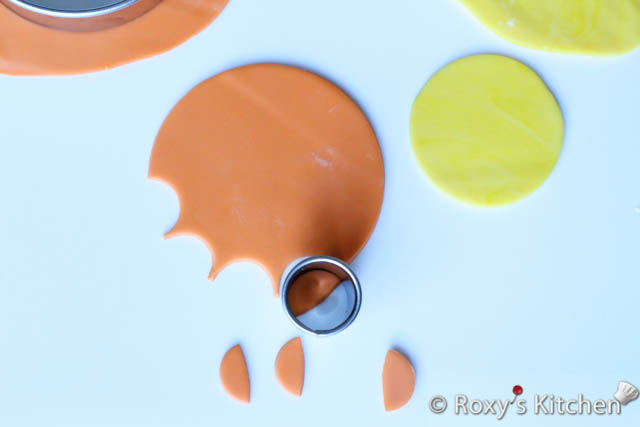
Step 1: Dust your work surface with powdered sugar or cornstarch to ensure the fondant does not stick to it. Use the fondant rolling pin to roll out some of the orange and yellow fondant about 1/3 cm thick and cut out a circle out of the orange fondant using the 8 cm (3.15”) cutter and another one out of the yellow fondant using the 5 cm (2’’) cutter.
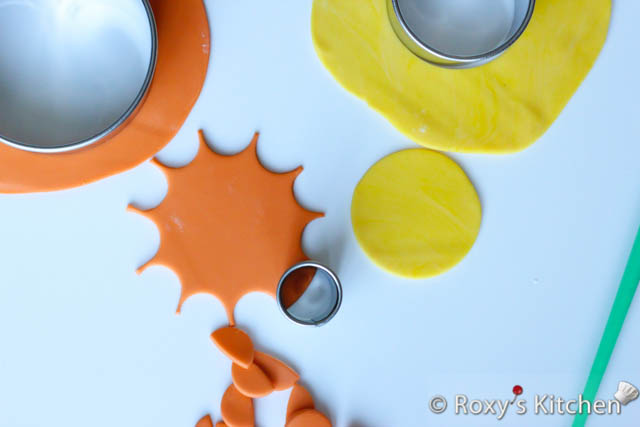
Step 2: Using the 2.5 cm (1’’) round cutter start cutting semi circles out of the orange circle as seen in the picture.
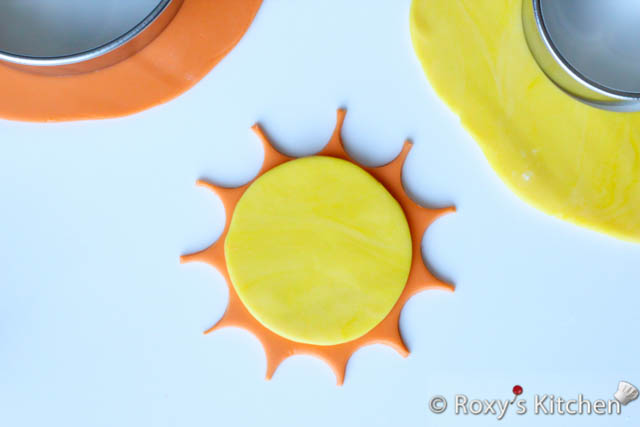
Step 3: Brush some water on the orange circle and place the yellow piece on top.
Step 4: Roll out some white fondant about 1/4 cm (1/10’’) thick and cut out the bird shapes using the round cutters and/or and X-Acto knife.
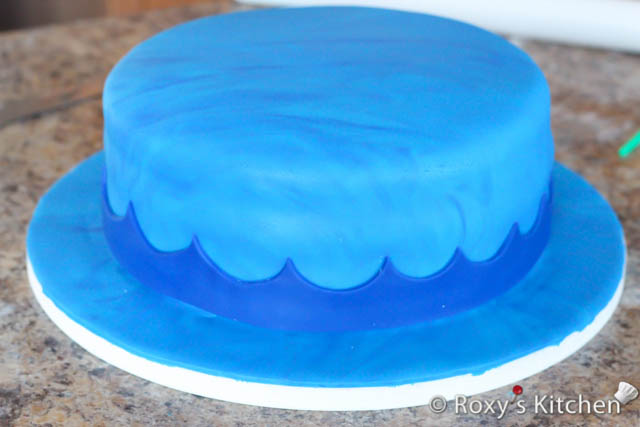
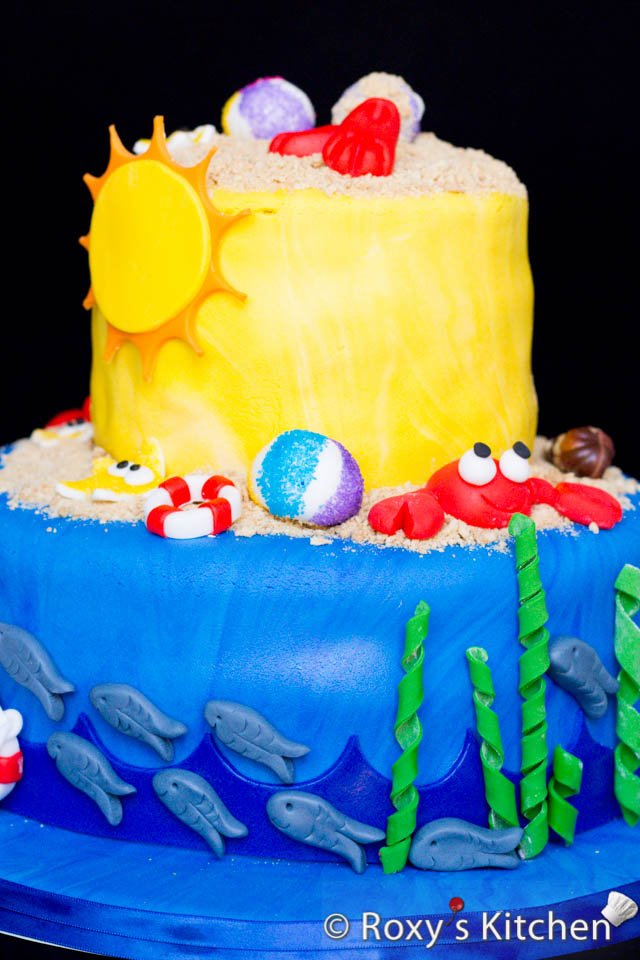
Sea Waves
Ingredients/Tools
- Fondant rolling pin
- Dark blue fondant
- 5 cm (2’’) round cutter – you can use the 5th cutter (smallest to largest) of the Ateco Plain Round Cutter Set of 11
- Small paint brush
- Powdered sugar or cornstarch for dusting your work surface
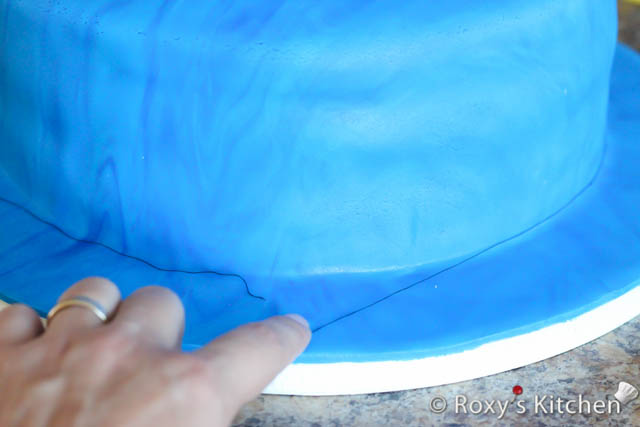
Step 1: Use a string to measure the circumference of your cake. My 10 inches round cake used for the bottom tier had a 32 inches circumference.
Step 2: Dust your work surface with powdered sugar or cornstarch to ensure the fondant does not stick to it. Use the fondant rolling pin to roll out a strip of dark blue fondant about 1/4 cm (1/10’’) thick that is at least 80 cm (32’’) long and 5 cm (2’’) wide.
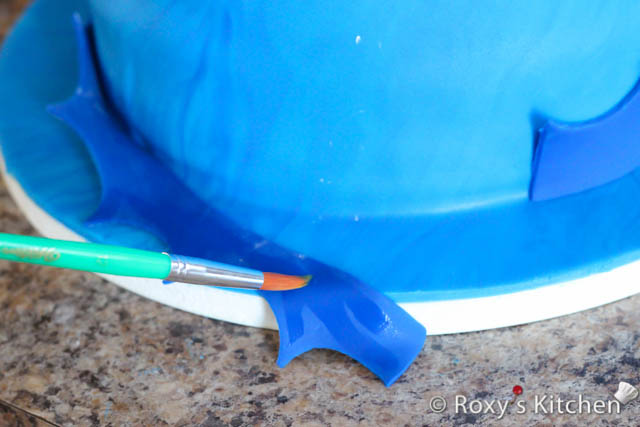
Step 3: Using a 5 cm (2’’) round cutter start cutting semi circles out. Your cut should begin and end either at the peak or trough of the wave to make sure your strip joins seamlessly when you attach it to the cake.
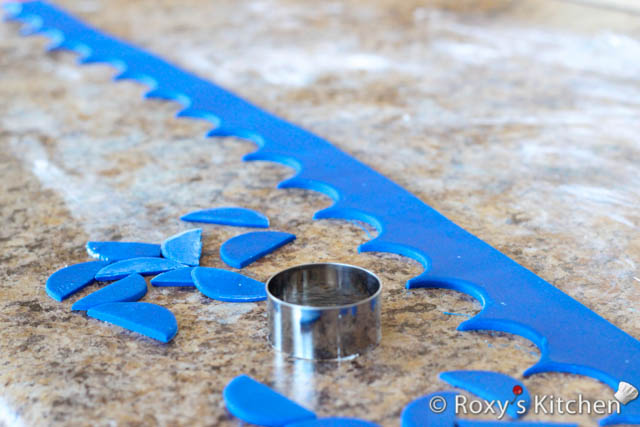
If you don’t have a round cutter you can use a shot glass. If you want larger waves use a larger size cutter or for smaller waves a smaller cutter
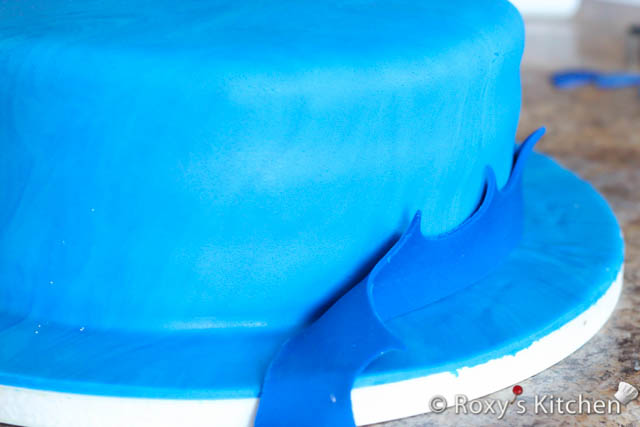
Step 4: Brush some water around the base of the cake and on your strip and begin sticking it all the way around the cake.
You can dust the strip with powdered sugar and roll it around a small rolling pin to make it easier to handle it while attaching it around the base of the cake.
Tip:
To achieve the dark blue shade for your fondant, knead in sky blue and royal blue paste food colouring (a 1:5 ratio). Knead the fondant with your hands until it’s very soft, smooth and pliable.
Use a toothpick to take a bit of sky blue food colouring and add dots of colour to your fondant. Repeat the steps to add the royal blue colour, making sure you use a clean toothpick every time you take more colour.
Keep kneading the fondant until the colour has been evenly distributed. If the fondant is not as dark as you want, just add more colour. It’s always best to start with a little colour and add more as needed.
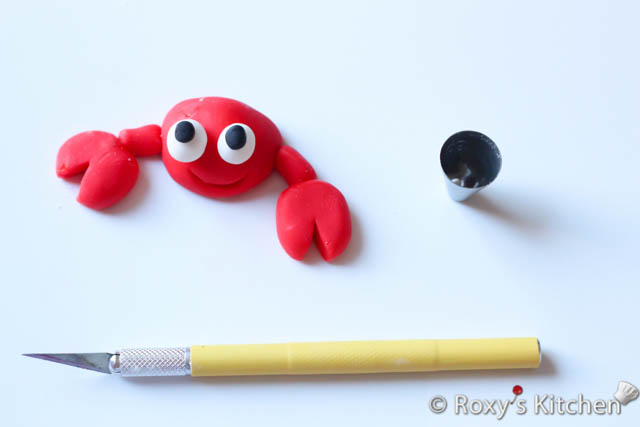
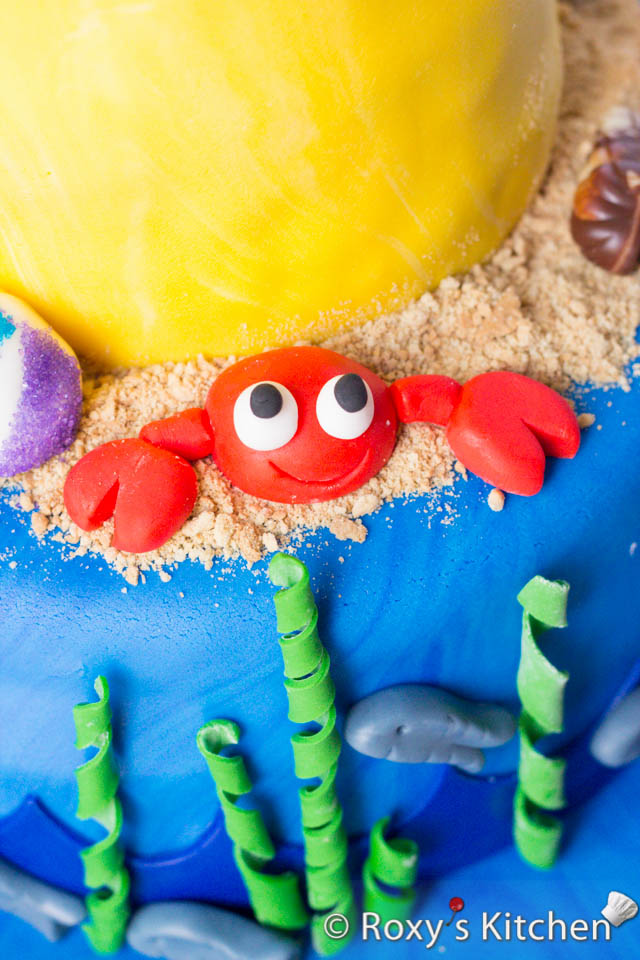
Crabs
Ingredients/Tools
- Red, white and black fondant
- X-Acto knife or any other sharp knife with a thin blade
- Piping tip or a very small round cutter
- Small paint brush
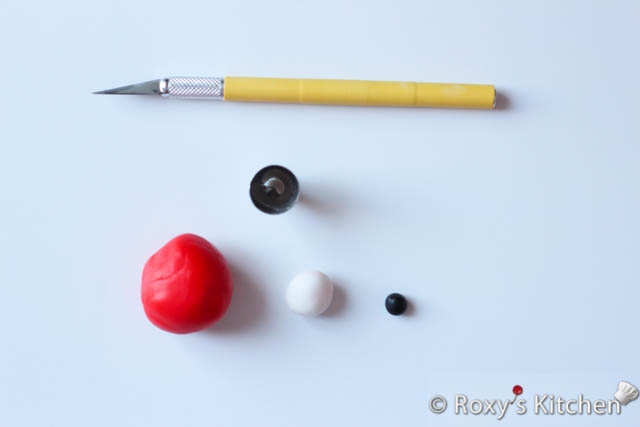
Step 1: Roll some red fondant into a ball about the size of a gumball to form the body of the crab. Use your fingers to flatten the back a little bit and adjust the shape a bit to look like in the picture below.
Step 2: Make two small balls of red fondant for the claws. Flatten them out with your finger and use your X-Acto knife to cut the claw shape about half way across. Roll out two small logs of red fondant for the legs.
Step 3: Make the eyeballs out of white fondant and the pupils out of black fondant.
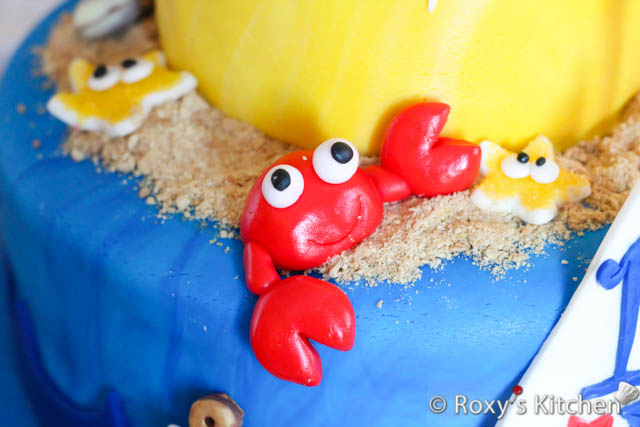
Step 4: Attach the legs to the claws and stick them to the body using some water as glue. Attach the pupils to the eyeballs using some water as well and then to the crab.
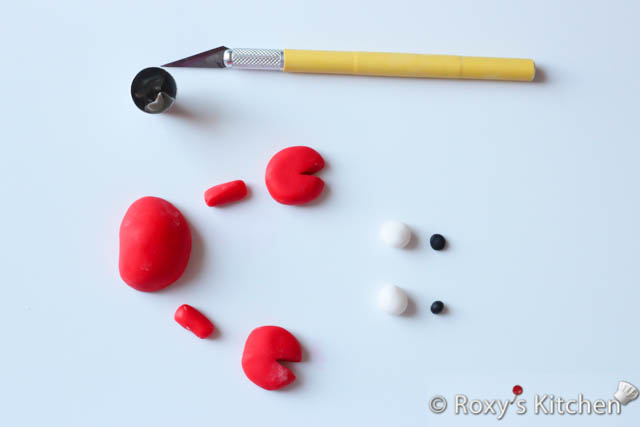
Step 5: Use the edge of a very small round cutter or a piping tip to make an indentation for the mouth.
Tip:
- You can also use a black food marker to draw the pupils instead of shaping them out of black fondant
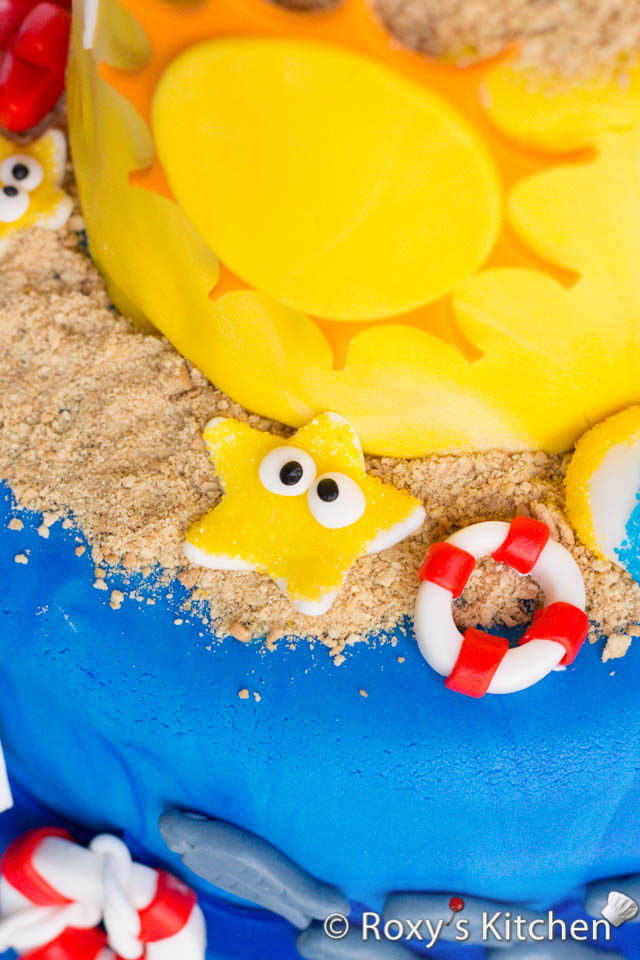
Starfish
Ingredients/Tools
- Small fondant rolling pin
- White and black fondant
- Star plunger and cutters in different sizes like the ones in this Ateco 3-Star Plunger and Cutter Set
- Yellow sugar sprinkles
- Piping gel
- Small paint brush
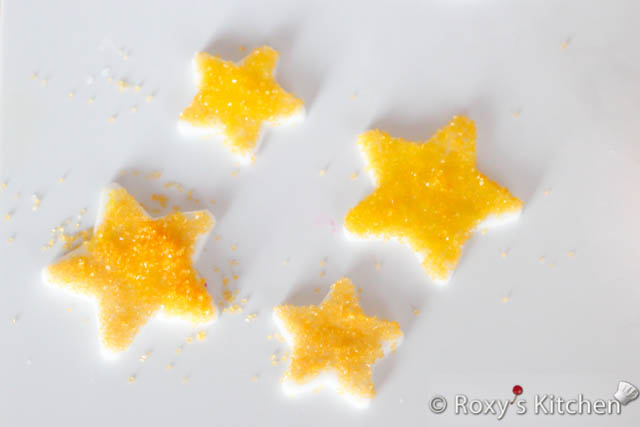
Step 1: Dust your work surface with powdered sugar or cornstarch to ensure the fondant does not stick to it. Use the fondant rolling pin to roll out some white fondant about 1/3 cm (1/8’’) thick. Use your star plunger cutters to cut out a few shapes.

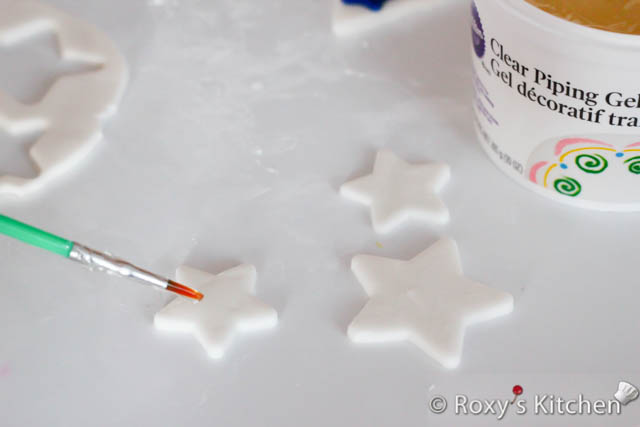
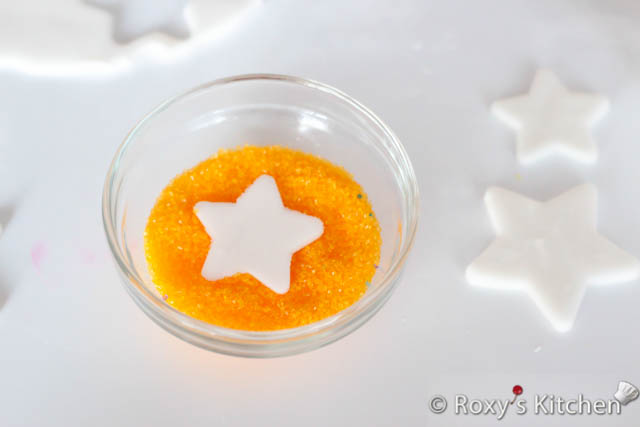
Step 2: Brush them on one side with piping gel and cover them with yellow sugar sprinkles.
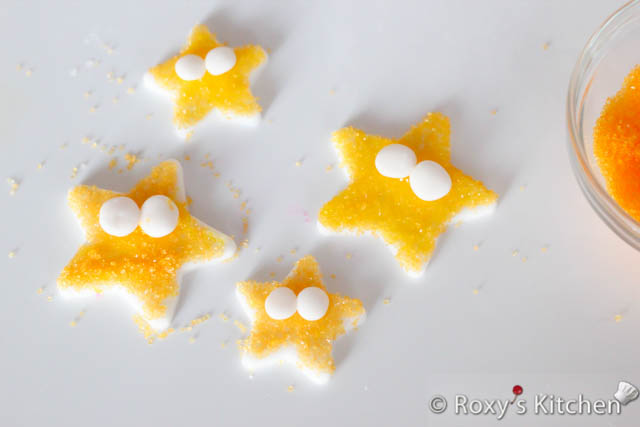
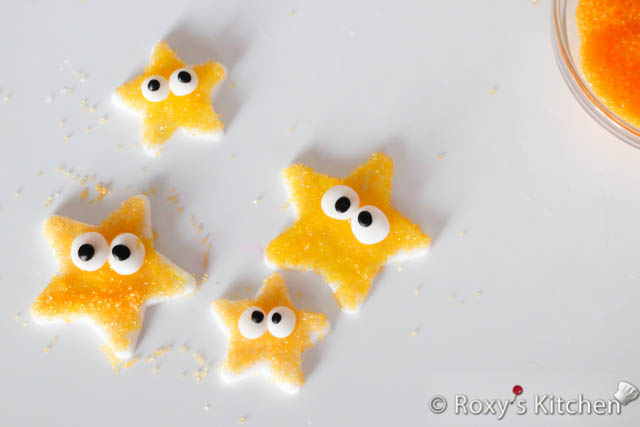
Step 3: Make the eyeballs out of white fondant and the pupils out of black fondant. Stick the eyeballs to the starfish and attach the pupils to the eyeballs using some water.
Fish

Ingredients/Tools
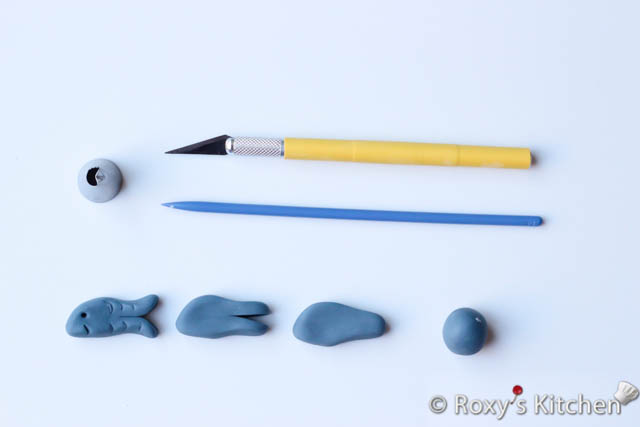
- Gray fondant
- X-Acto knife or any other sharp knife with a thin blade
- Piping tip – I used #63 Wilton tip but #61 or #10 would work too
- Pointy tool to make holes for the eyes – I used the pointed fondant modeling tool from the 10-Pc. Fondant/Gum Paste Tool Set
Step 1: Roll some gray fondant into a ball and shape it as seen in the picture.
Step 2: Cut the tail with your X-Acto knife and make a few indents with the tip of a piping nozzle to add some texture that would resemble the fish scales.
Step 3: Use the same piping tip to make an indentation for the mouth and the pointed fondant modeling tool from the 10-Pc. Fondant/Gum Paste Tool Set to make holes for the eyes.
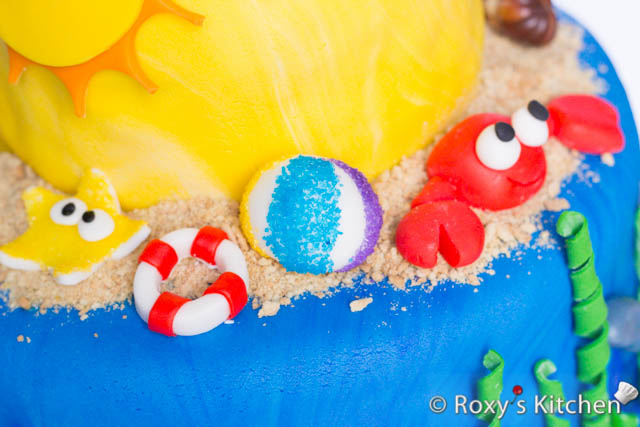
Beach Balls
Ingredients/Tools
- White fondant
- Sugar sprinkles, at least 3 different colours
- Piping gel
- Small paint brush
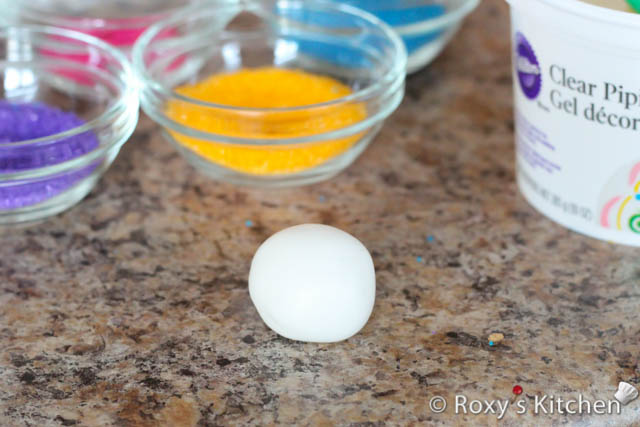
Step 1: Roll some white fondant into a ball about the size of a gumball. You can make a few balls and let them dry for a few hours or overnight.
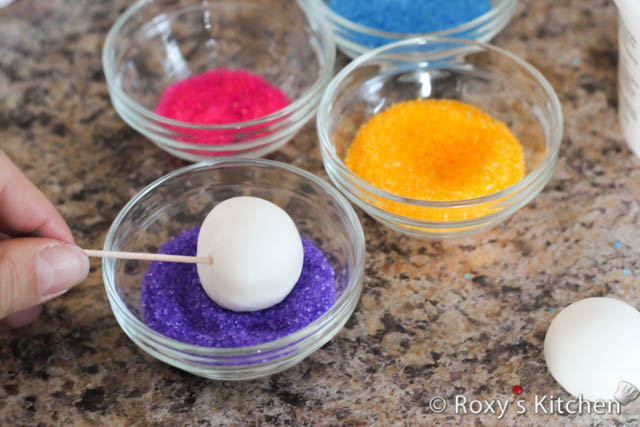
Step 2: Use the colourful sugar sprinkles to decorate 3 sections of the beach ball. To make sure your sprinkles stick to the fondant, use a small brush to apply a thin layer of piping gel to each section. Then dip that section in one of the sugar sprinkle colours. You can stick a toothpick halfway through the beach ball to make it easier to handle without touching the sugar sprinkles.
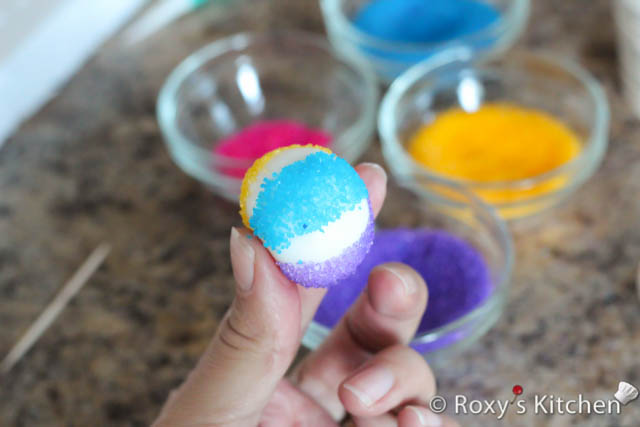
Step 3: After you are done covering all the sections in sprinkles you can use a toothpick to clean up any edges / sprinkles that are stuck to the white sections.

Tips:
- You can use a toothpick to draw lines and divide the ball into 6 equal sections
- Instead of sugar sprinkles you can use paste food colouring mixed with a few drops of vodka and paint the three sections of the ball using a small brush
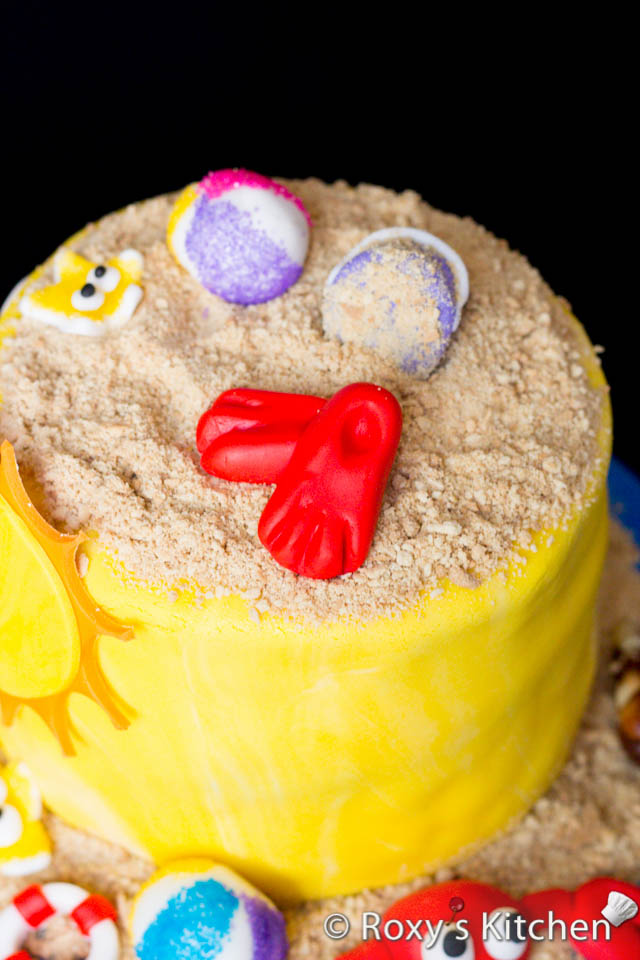
Snorkeling Fins
Ingredients/Tools
- Red fondant
- Small fondant ball tool and veining tool from the 10-Pc. Fondant/Gum Paste Tool Set
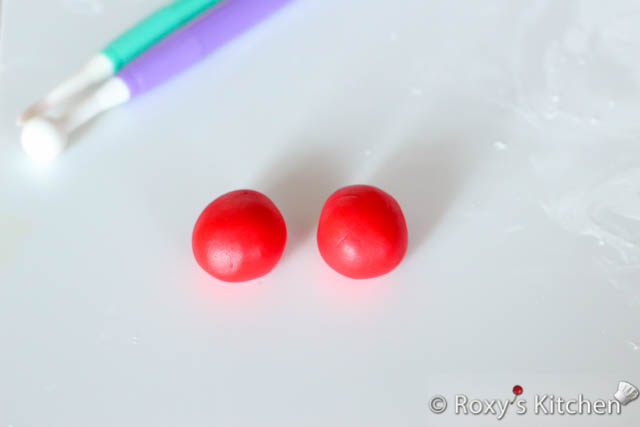
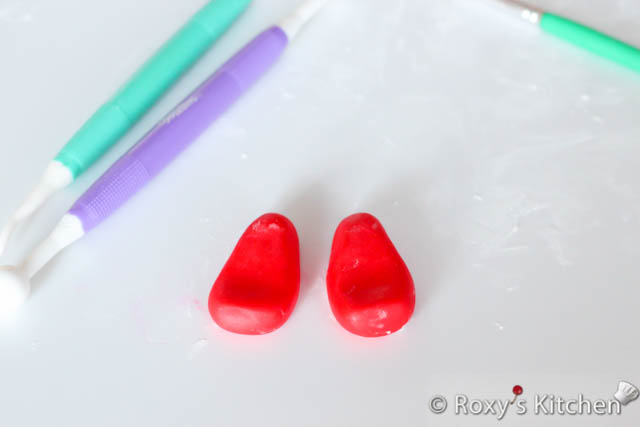
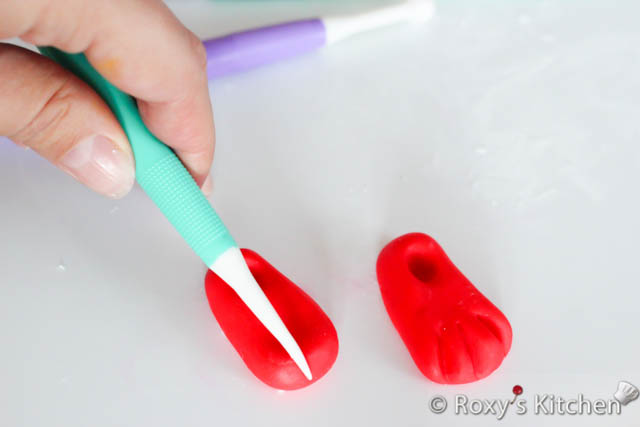
Step 1: Make two balls out of red fondant, each about the size of a gumball. Use your fingers to flatten them and adjust the shape a bit to make them look like snorkelling fins.
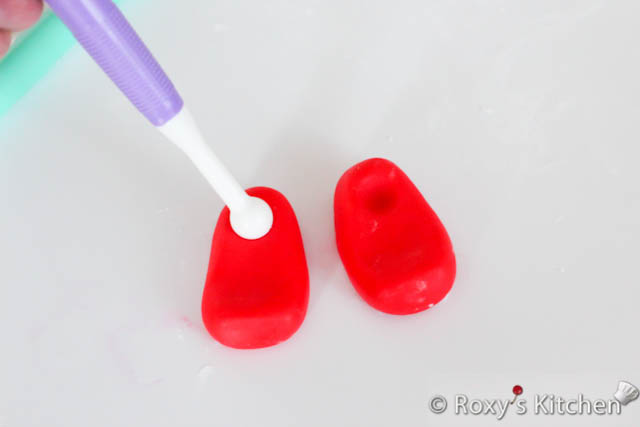
Step 2: Use the small fondant ball tool from the 10-Pc. Fondant/Gum Paste Tool Set to make the foot pocket.
Step 3: Use the veining tool or a toothpick to make indentations for the fins.
Seaweed
Ingredients/Tools
- Small fondant rolling pin
- Green fondant
- A few small paint brushes
- X-Acto knife or any other sharp knife with a thin blade
- Powdered sugar or cornstarch for dusting your work surface
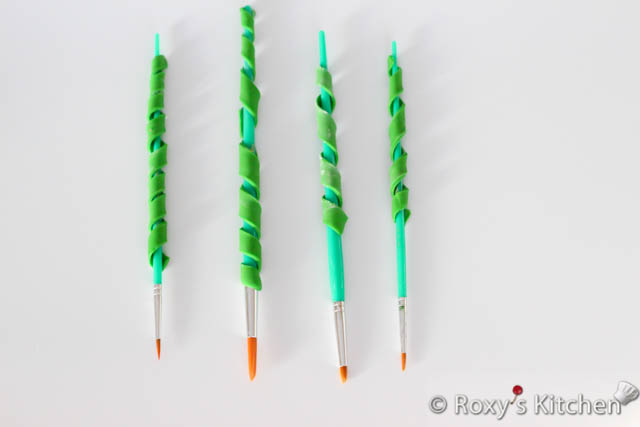
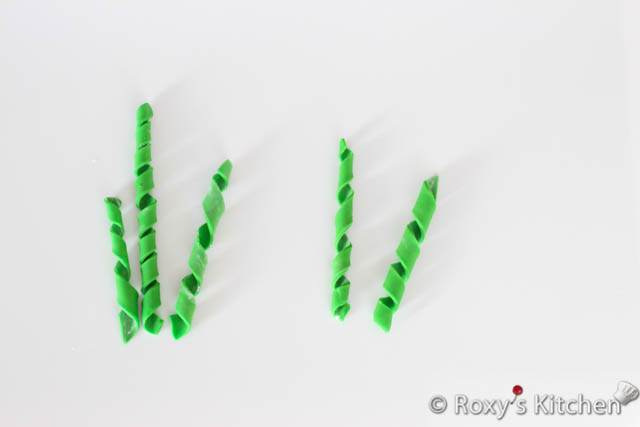
Step 1: Dust your work surface with powdered sugar or cornstarch to ensure the fondant does not stick to it. Use the fondant rolling pin to roll out some green fondant about 1/3 cm (1/8’’) thick.
Step 2: Cut out thin strips of different lengths using your X-Acto knife. Roll each strip gently around a brush, let them dry overnight and carefully remove them when you’re ready to decorate the cake.
Buckets with Sand

Ingredients/Tools
- Purple and white fondant
- Piping gel
- Small paint brush
- X-Acto knife or any other sharp knife with a thin blade
- Crushed tea biscuits for the sand
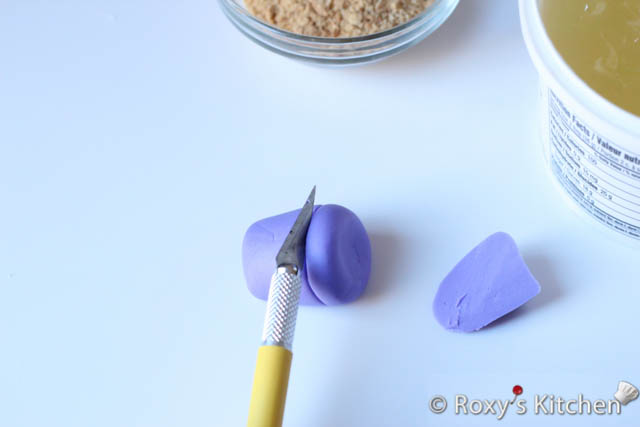
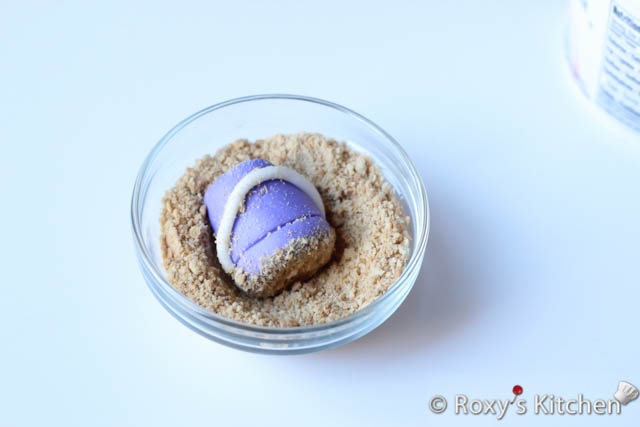
Step 1: Roll some purple fondant into a thick short cylinder making the bottom narrower than the top. I cut off one side of the bucket using an X-Acto knife as I laid it flat on the ‘sand’ on that side. If you want to keep it up you can ignore this step.

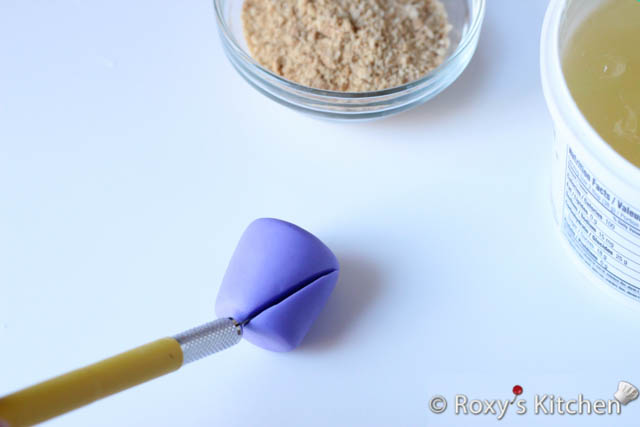
Step 2: Use your index finger to push down on the top to create the bucket look. Make an edge around the top of the bucket using the blunt edge of your knife.
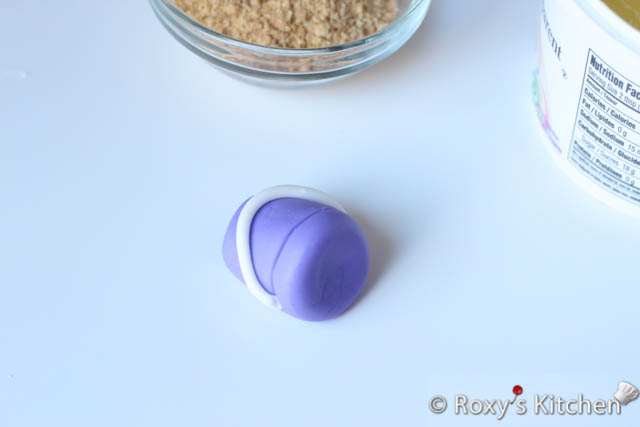
Step 3: Roll out a small strip of white fondant to make the handle and attach it to the bucket using some water.
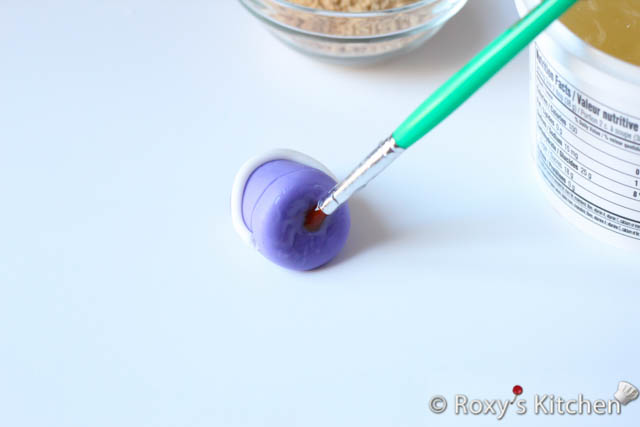
Step 4: Brush some piping gel on the top of the bucket then dip the top in ‘sand’ made out of crushed tea biscuits.
Tip:
- You can also make ‘sand’ out of brown sugar instead of crushed biscuits
Boat Life Rings
Ingredients/Tools
- Purple and white fondant
- Small paint brush
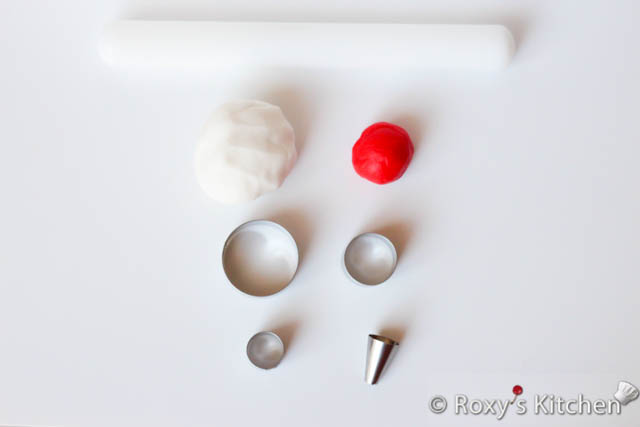
- White and red fondant
- 2.5 cm (1’’) and 3.8 cm (1.5’’) round cutters – you can use the 1st and the 3rd cutters (smallest to largest) of the Ateco Plain Round Cutter Set of 11
- Piping tip
- X-Acto knife or any other sharp knife with a thin blade
- Powder sugar or cornstarch for dusting your work surface
Step 1: Dust your work surface with powdered sugar or cornstarch to ensure the fondant does not stick to it. Use the fondant rolling pin to roll out some white fondant about 2/3 cm (1/4’’) thick and some red fondant about 1/4 cm (1/10’’) thick.
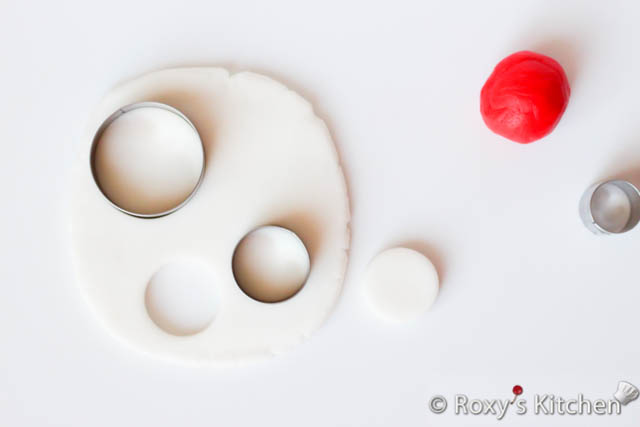
Step 2: Cut a circle out using a 2.5 cm (1’’) or a 3.8 cm (1.5’’) round cookie cutter. Then cut out another circle in the middle using the bottom of a piping tip to make your boat life ring.
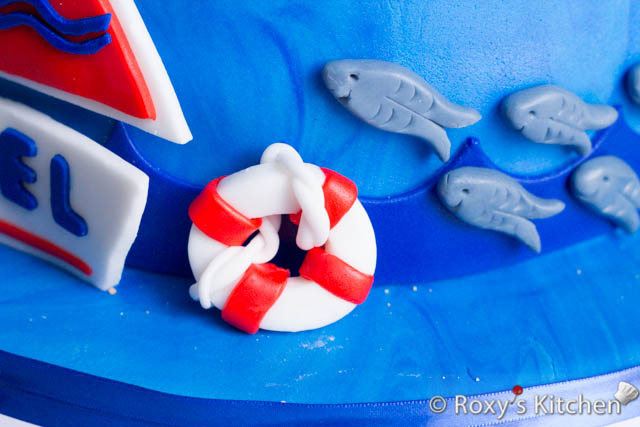
Step 3: Cut four thin strips out of the rolled red fondant using the X-Acto knife and use water to attach them around your life ring as seen in the picture below.
Step 4: Roll out two thin ropes and twist them together and place it around your life ring.

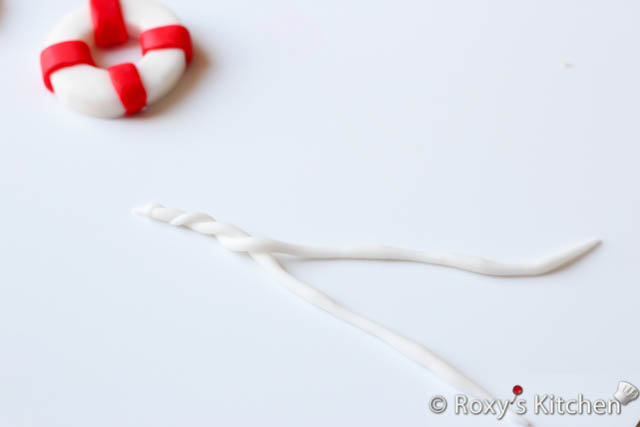
Sailing Boat
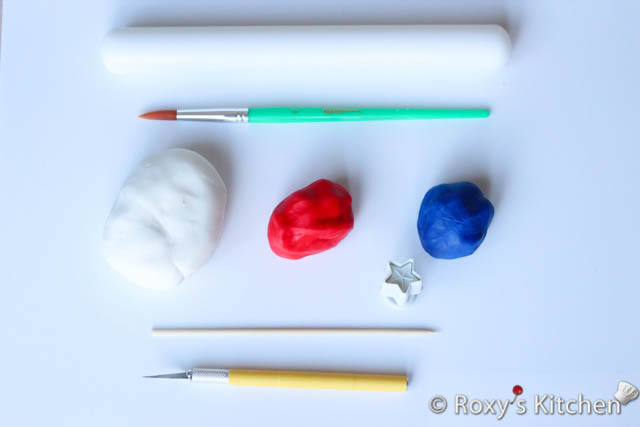
Ingredients/Tools
- Small fondant rolling pin
- White, red and blue fondant
- Small paint brush
- Small star plunger and cutter, I used one from this Ateco 3-Star Plunger and Cutter Set
- Number-shaped cutter depending on your little one’s age – you can use FMM’s Funky Number Tappit Cutter Set
- Small letter cutter set – you can use Wilton’s 37 Piece Alphabet & Number Cut-Outs
- A skewer
- Ruler
- X-Acto knife or any other sharp knife with a thin blade
- Powder sugar or cornstarch for dusting your work surface
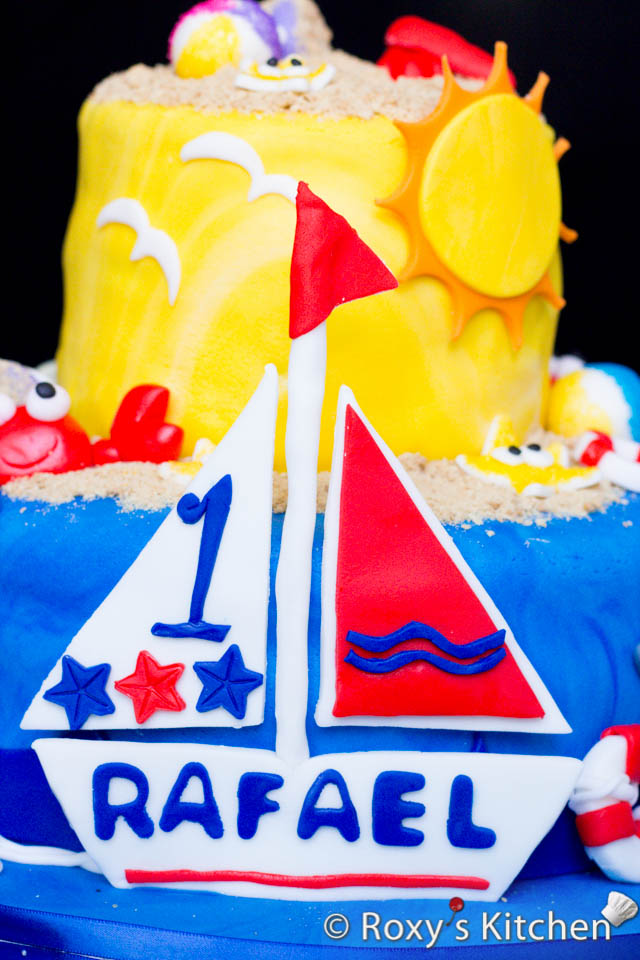
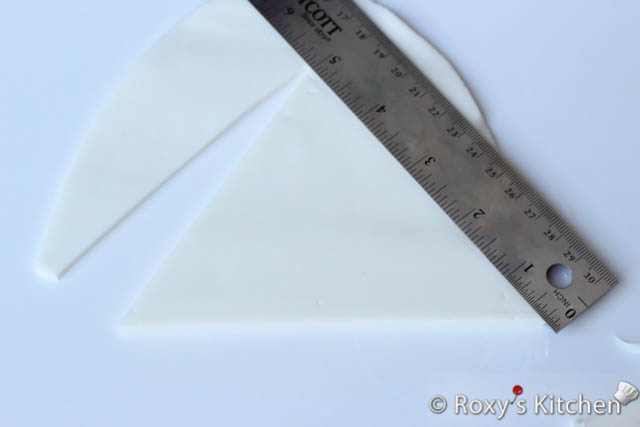
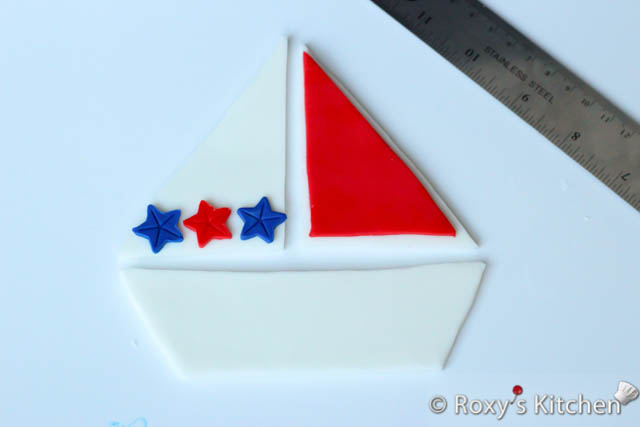
Step 1: Dust your work surface with powdered sugar or cornstarch to ensure the fondant does not stick to it. Use the fondant rolling pin to roll out some white fondant about ⅙ inches thick and at least 13 cm (5’’) wide and 23 cm (9’’) tall. You can use a ruler to measure and make marks to cut the hull and sails.
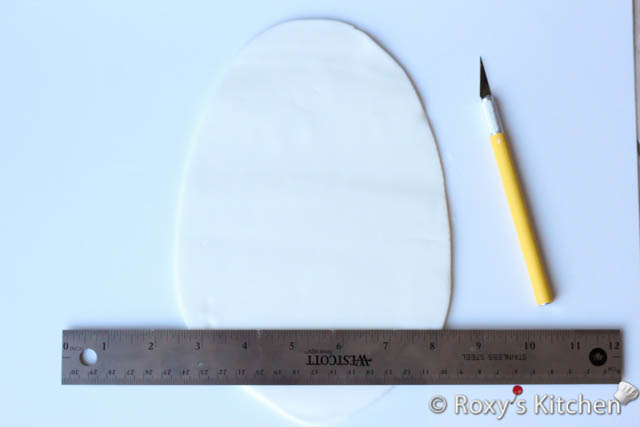
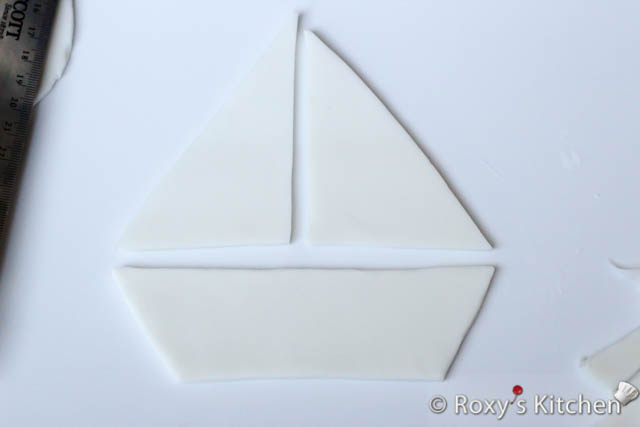
Step 2: Cut out the hull of the boat, 13 cm (5’’) wide at the top, about 4 inches at the bottom and 6.5 cm (2.5’’) tall.
Step 3: Cut out the sails, 5 cm (2’’) x 13 cm (5’’) x 13 cm (5’’). I actually made one a bit shorter than the other.

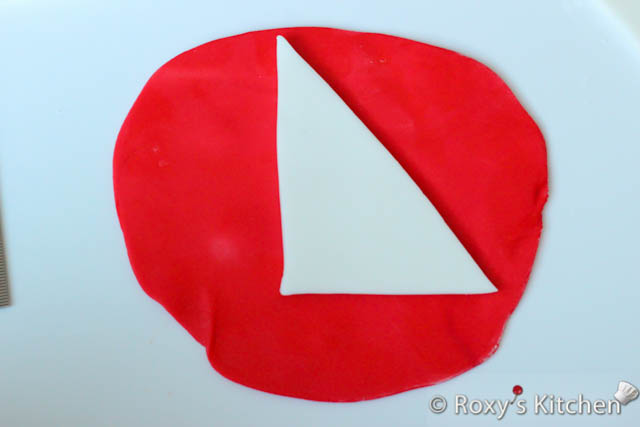
Step 4: Roll out some red fondant about 1/4 cm (1/10’’) thick and cut out a slightly smaller triangle than your sails. You can either measure it using a ruler or just place the right white sail on top and use it as a template to cut around it and then you can cut off the sides to make it a bit smaller.
Step 5: Brush some water on the white sail and place the red piece on top.
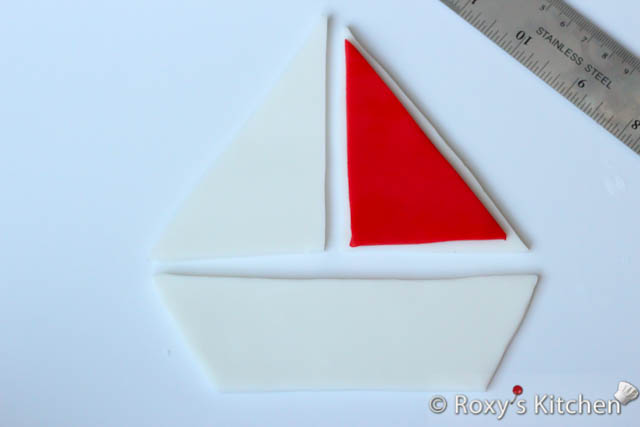
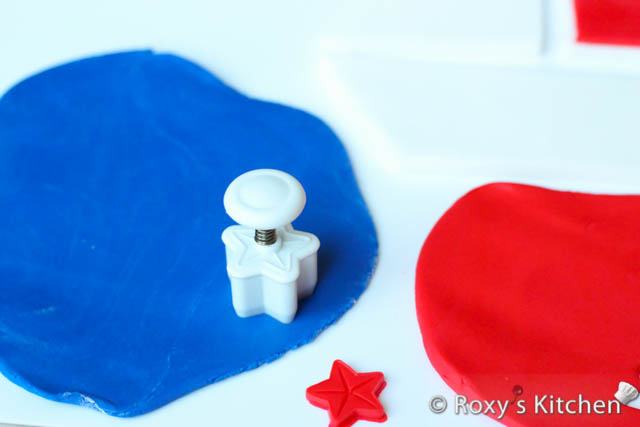
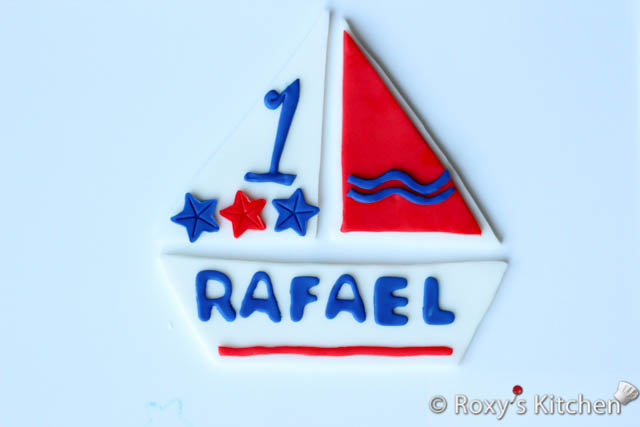
Step 6: Roll out red and blue fondant about 1/4 cm (1/10’’) thick. Use a small star plunger and cutter to cut out three little stars and attach them to the left sail using some water. Let the sails dry out overnight.
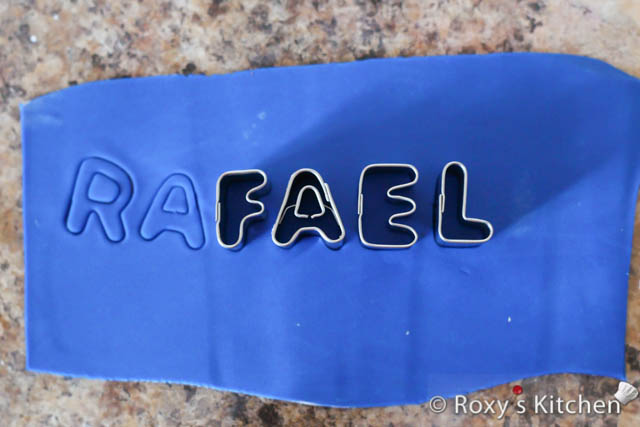
Step 7: Make a number 1 out of blue fondant using the FMM funky number tappit cutters. Use a small letter cutter set to make your little one’s name.
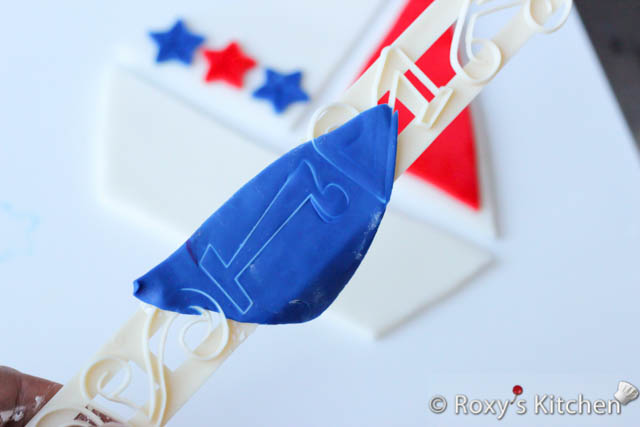
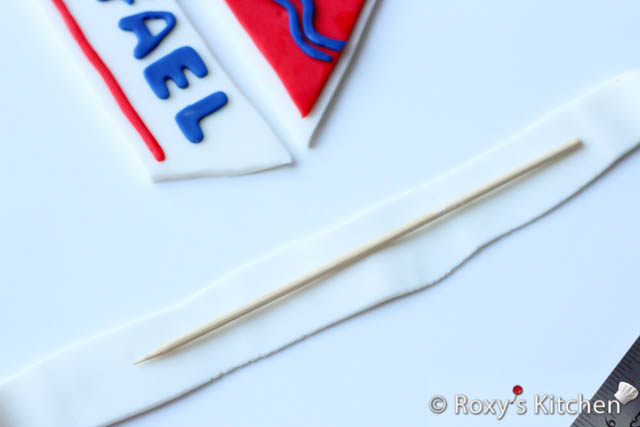
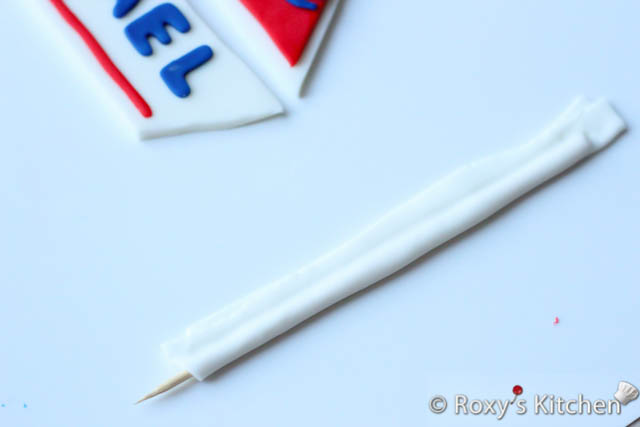
Step 8: Roll out a thin strip of white fondant and roll it around a skewer that is about 18 cm (7’’) tall. Leave half an inch of the pointy end of the skewer unwrapped in fondant so that you can stick it in the hull of the boat.
Step 9: Cut out two small wavy strips out of blue fondant and attach them to the sail using some water as glue.
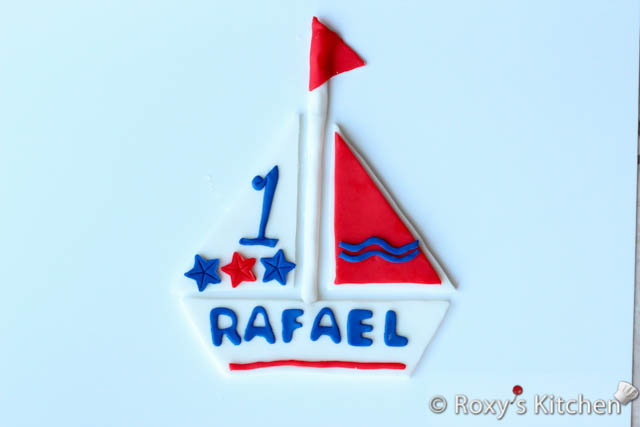
Step 10: Make the pennant out of red fondant by rolling out the fondant, cutting a triangular shape and wrapping it around your fondant-covered skewer.
Place the skewer in the middle of the hull and slightly push it down. Let it dry overnight on a flat surface.
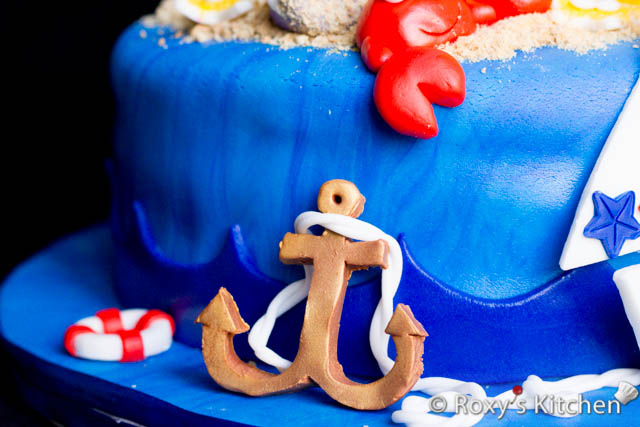
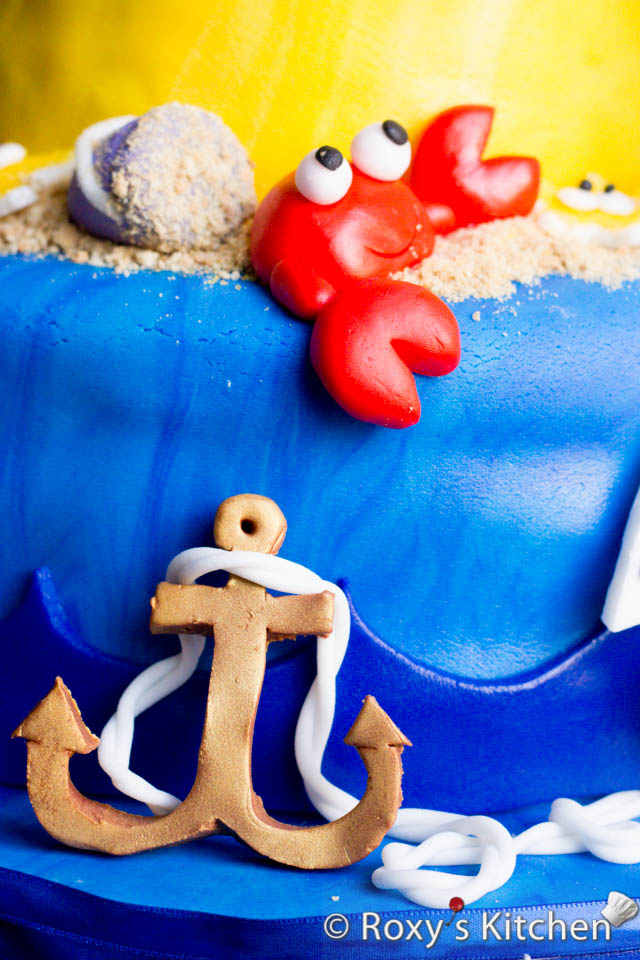
Boat Anchor and Rope
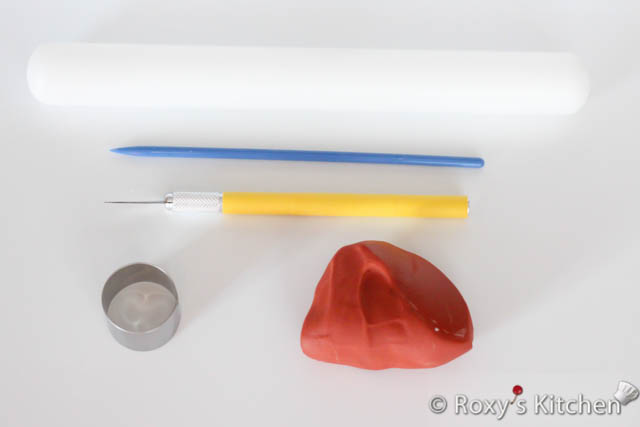
Ingredients/Tools
- Small fondant rolling pin
- Dark red fondant (red brick colour)
- Small paint brush
- 2.5 cm (1’’) round cutter – you can use the 1st cutter (smallest to largest) of the Ateco Plain Round Cutter Set of 11
- X-Acto knife or any other sharp knife with a thin blade
- Gold cake graffiti spray
- Clay/fondant extruder (it will save you some time but you can just roll the fondant with your hands as well if you don’t have one)
- A skewer
- Powder sugar or cornstarch for dusting your work surface
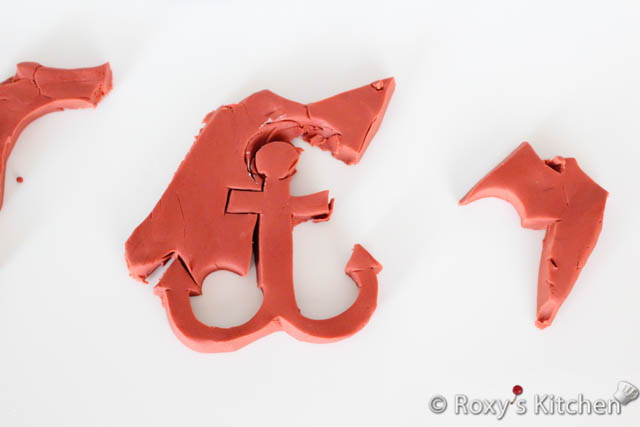
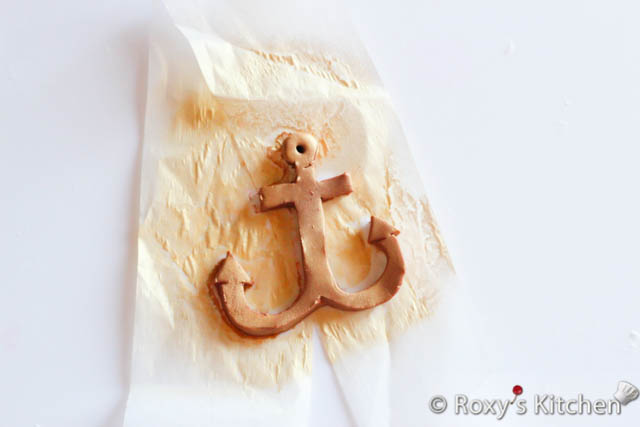
Step 1: Dust your work surface with powdered sugar or cornstarch to ensure the fondant does not stick to it. Use the fondant rolling pin to roll out some dark red fondant about 4/5 cm (1/3’’) thick and 10 cm (4’’) by 10 cm (4’’). My anchor was 9 cm (3.5’’) by 8 cm (3’’) but you can make it bigger/smaller.
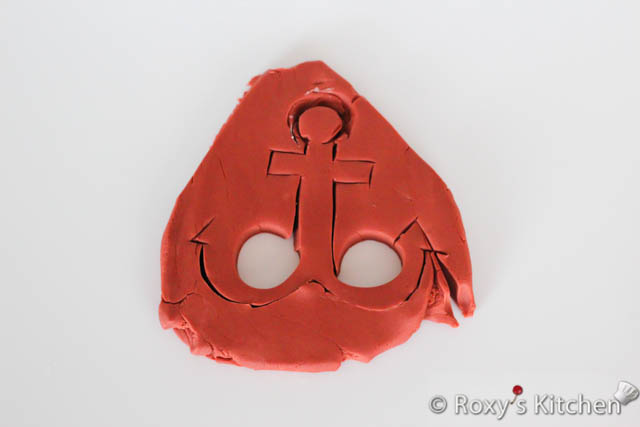
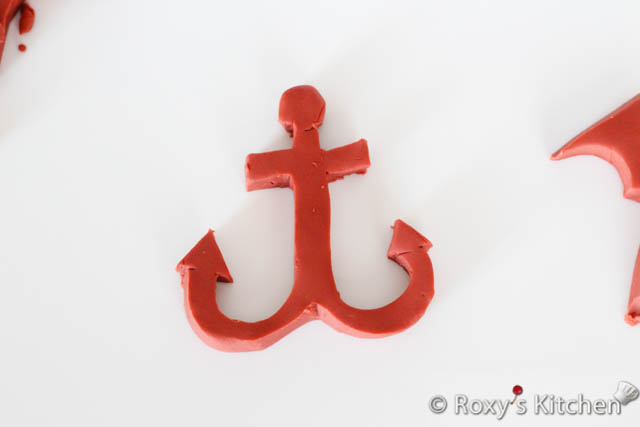
Step 2: Use a 2.5 cm (1’’) round cookie cutter and an X-Acto knife to cut out the anchor shape as seen in the pictures below. For easier ways to make this check out my tips below.
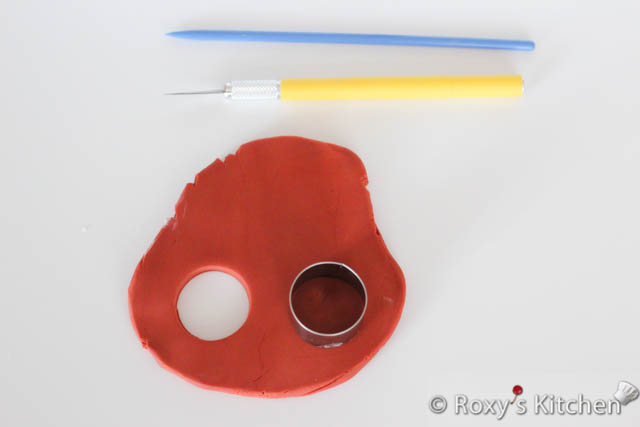
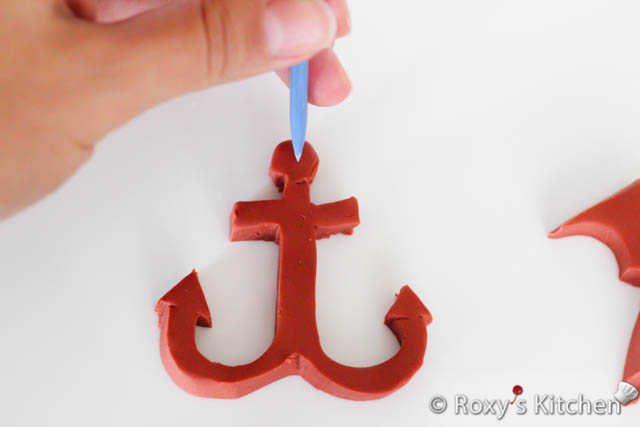
Step 3: After you cut the anchor shape, use the pointed fondant modeling tool or a skewer to make the hole that anchor ropes pass through.
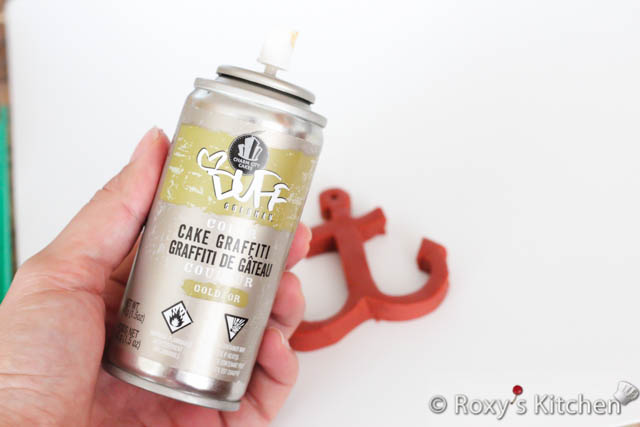
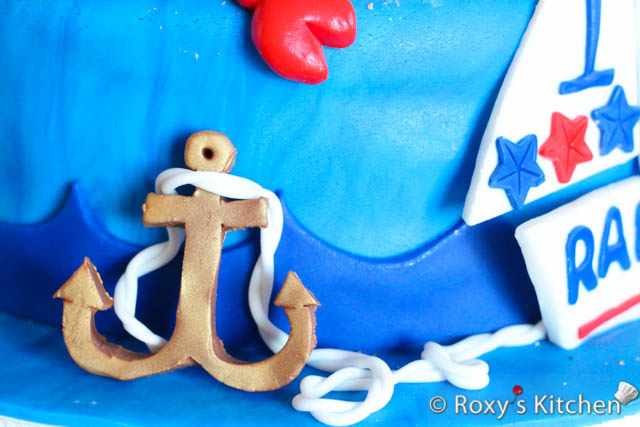
Step 4: As a final touch, spray a thin gold layer on the anchor using a cake graffiti spray.
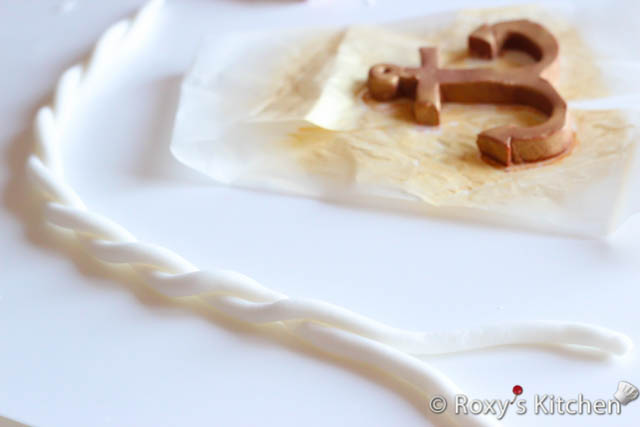
Step 5: For the rope use a clay/fondant extruder to squeeze out two ropes and just twist them together. If you don’t have an extruder you can make each rope by hand. Just roll it back and forth on your work surface using the palms of your hands.
Tips:
- Mix white fondant with a drop of red food paste colouring and a bit of brown to achieve the red brick colour
- You can buy a nautical boat anchor cookie cutter if you want to save some time or draw an anchor outline on parchment paper, cut it out and place it on top of your rolled fondant to use it as a template. If you’re not a big fan of drawing, a simple Google search for “boat anchor template” will give you many results so you can choose the one you like, scale it to the desired size and print it out.
- It’s better if you make the anchor a day earlier and let it dry overnight on a flat surface
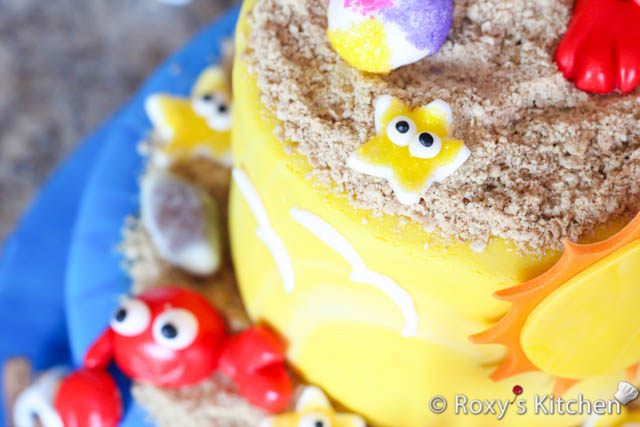
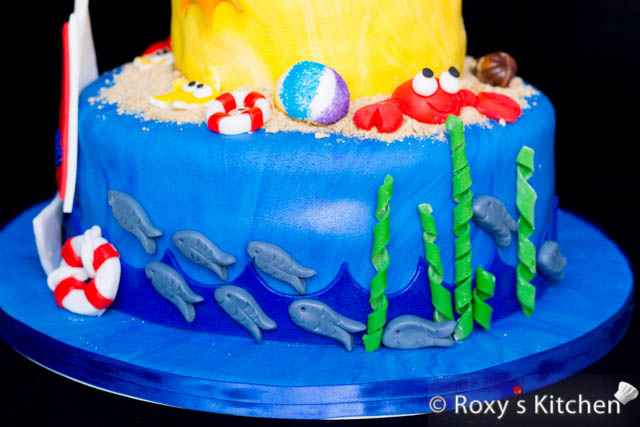
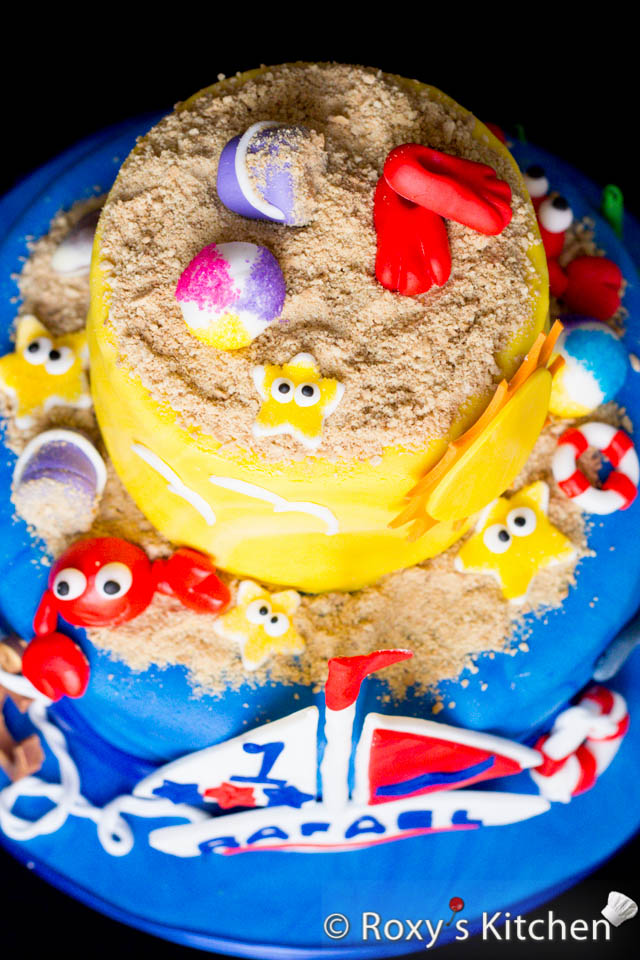
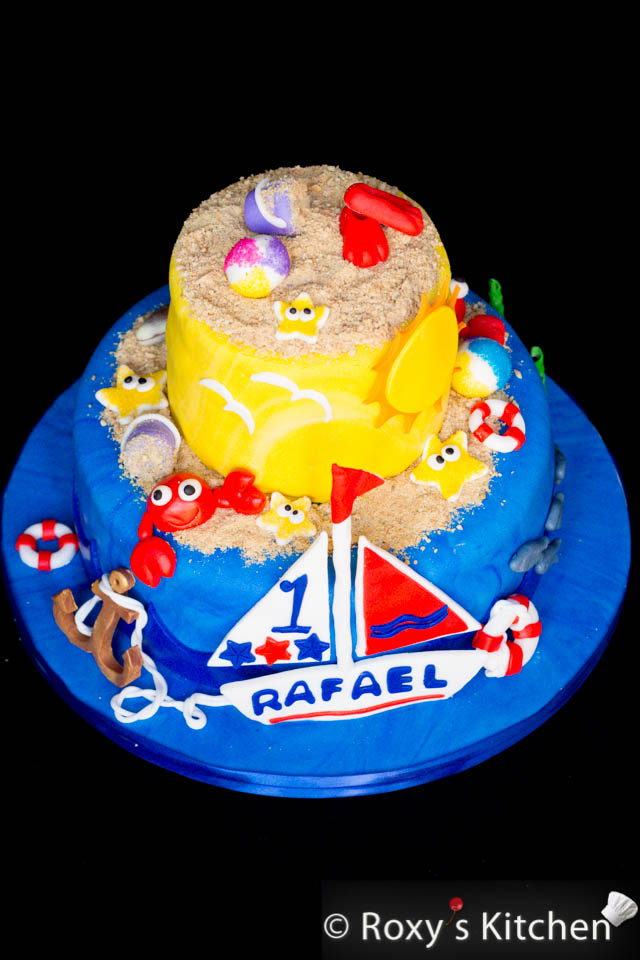
Placing all the Fondant Decorations on the Beach/Nautical Cake
After you’ve stacked the cakes and made all the fondant decorations you can now proceed with the final, and easiest, step – placing all the decorations on the beach/nautical cake.
Ingredients/Tools
- All your fondant decorations
- Crushed tea biscuits for the sand
- Small paint brush
- Piping gel
- Edible glue
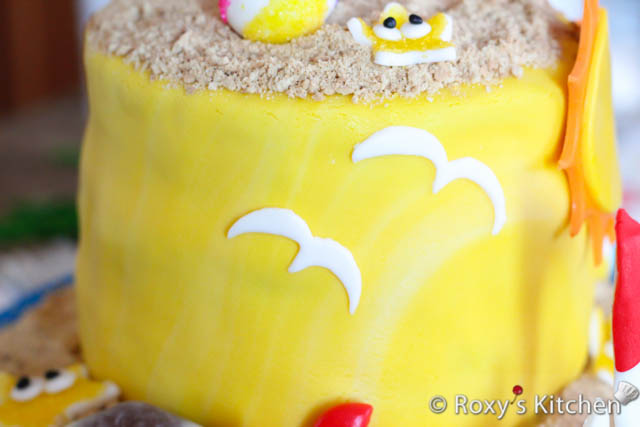
Step 1: Make some ‘sand’ out of crushed tea biscuits (you can use brown sugar as well). Use a small brush to apply a thin layer of piping gel on top of the second cake tier and on the bottom one just where you want the ‘sand’ to stick to the fondant. Sprinkle crushed biscuits over.
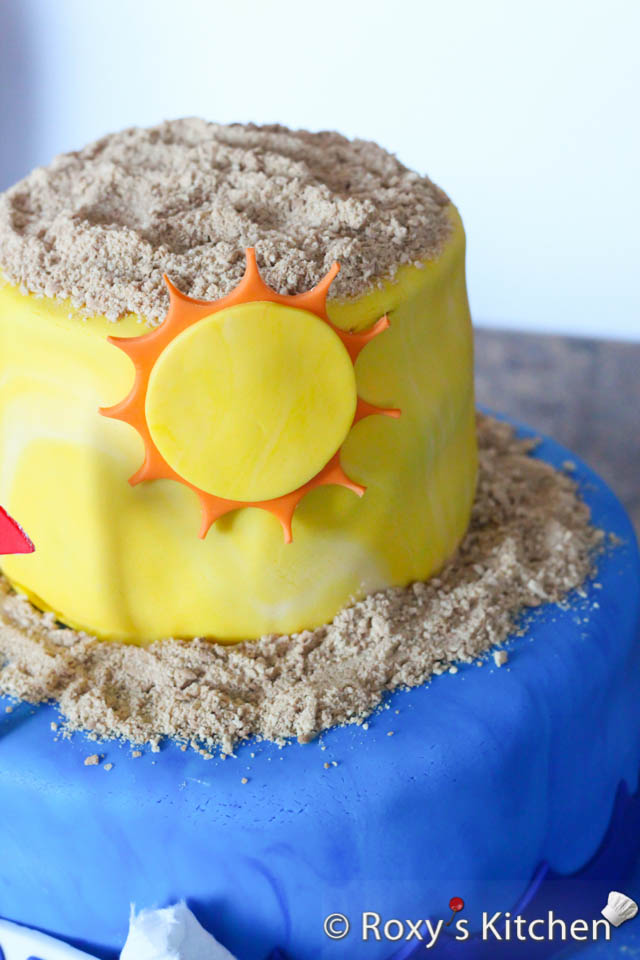
Step 2: Attach the sun, birds, water plants, fish and sailing boat to the cake by brushing some water or edible glue on the back of each decoration and a little bit on the cake, if necessary.
Step 3: Arrange the remaining fondant decorations on the cake including, the crabs, starfish, beach balls, snorkeling fins, boat life rings, boat anchor and rope.
Tip:
- If your fondant decorations are very dry (the ones you let dry overnight) you might have to use edible glue instead of water to make sure they’ll stay stuck to the cake.


I hope you found this Beach/Nautical Cake Tutorial useful. I would love to see your pictures if you decide to follow this tutorial to make your own cake.
This post contains Amazon.com affiliate links. If you purchase a product through an affiliate link, your costs will be the same but I will receive a small commission which is used for hosting and running this site. I appreciate your support!


[…] Part II: Making the Fondant Decorations […]