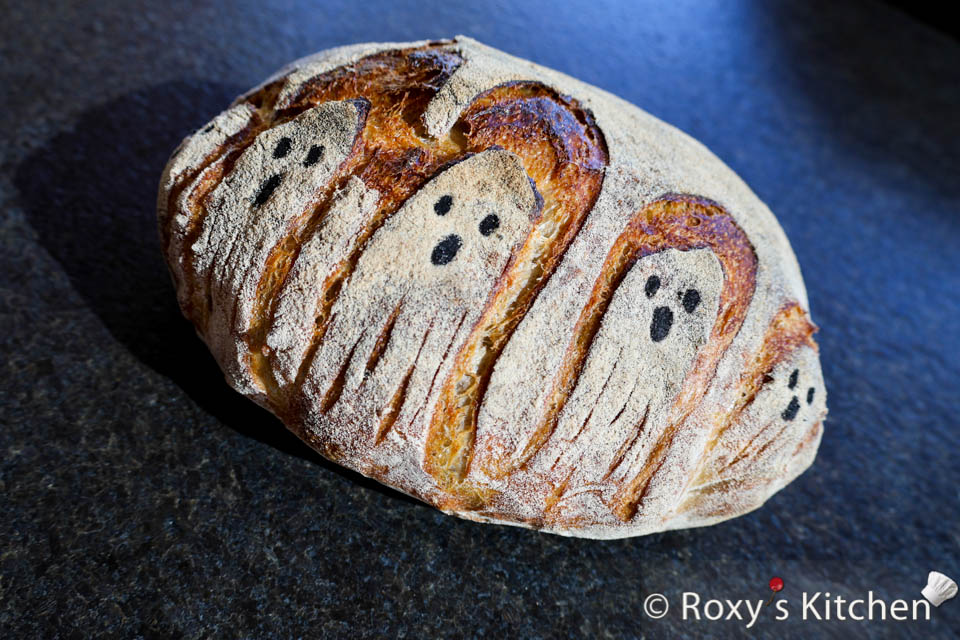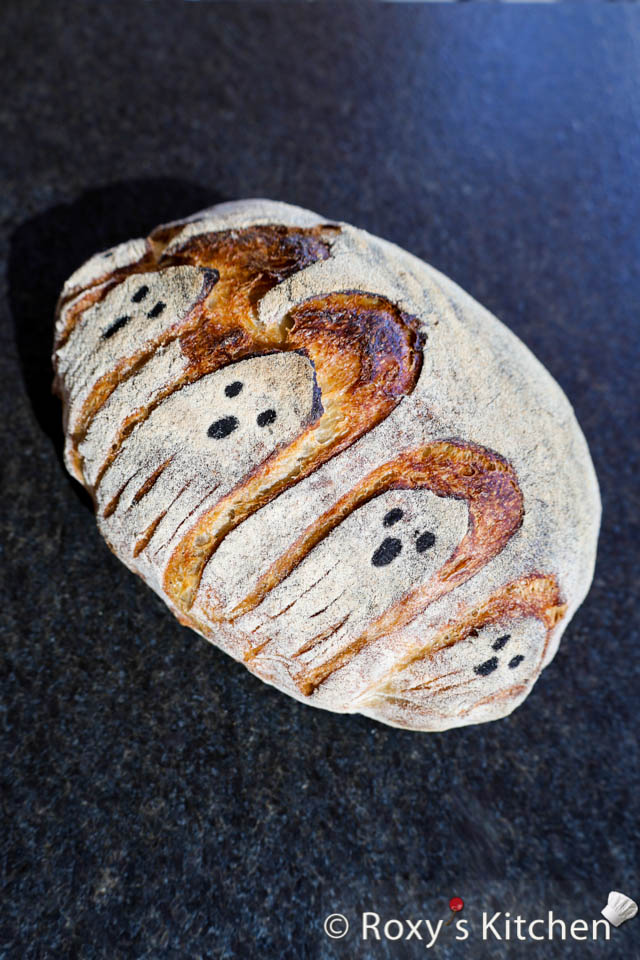
Scoring ghosts on a bread is a fun and creative way to give your loaf a spooky, Halloween-inspired look! Here’s a simple step-by-step guide to score ghosts on your bread:
What You’ll Need
- Your proofed loaf of bread – sourdough or regular
- Rice flour and a small sieve for dusting the top
- A sharp bread lame (or a very sharp knife)
- Black marker with edible ink (or black gel food colouring and a brush)
How to Score Ghosts on Bread
Watch this video on read the instructions below:
Preheat your oven along with your Dutch oven or baking stone, typically around 465°F (240°C).
Prepare your bread as usual, shaping the dough into a round or oval loaf (I prefer oval) and letting it proof in a banneton or a proofing basket.
If you want crisp lines, you can place the proofed dough in the freezer for about 30-45 minutes before scoring. I didn’t this time but, chilled dough is often easier to score, especially for intricate designs.
Before scoring, lightly dust the top of the loaf with rice flour. This will help the ghost design stand out more clearly after baking. Use a small sieve for an even flour coating.
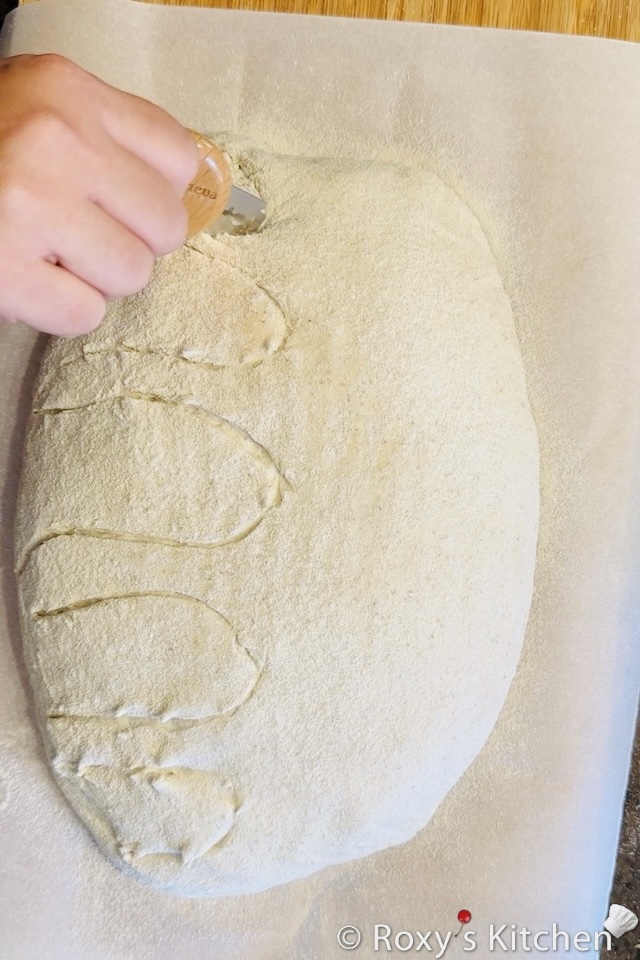
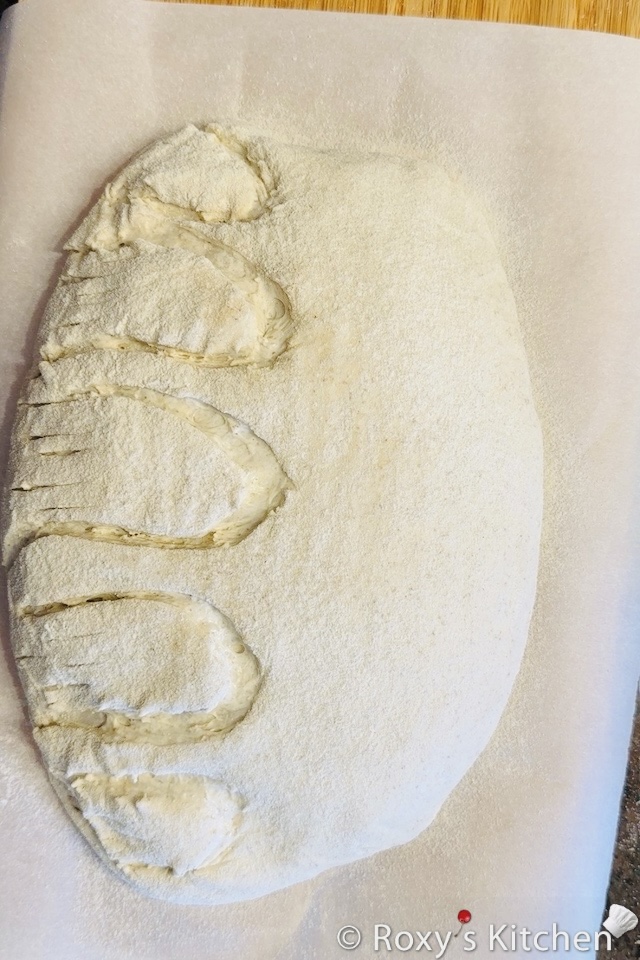
Using your bread lame or sharp knife, score the outline of a ghost—a rounded head with a flowing, curvy body. Keep the ghost shape simple, with rounded edges that resemble a sheet-like ghost. For a 12-inch (30 cm) oval loaf, you can score 4-5 ghost outlines.
Lastly, make a few vertical lines on the body of each ghost. Keep the scoring shallow so that it creates light marks on the bread without expanding too much during baking. The outline of each ghost should be scored deeper than the vertical lines.
Bake your loaf as usual. The ghost design will open up slightly during baking, and the floured top will give the ghost a pale, spooky appearance!
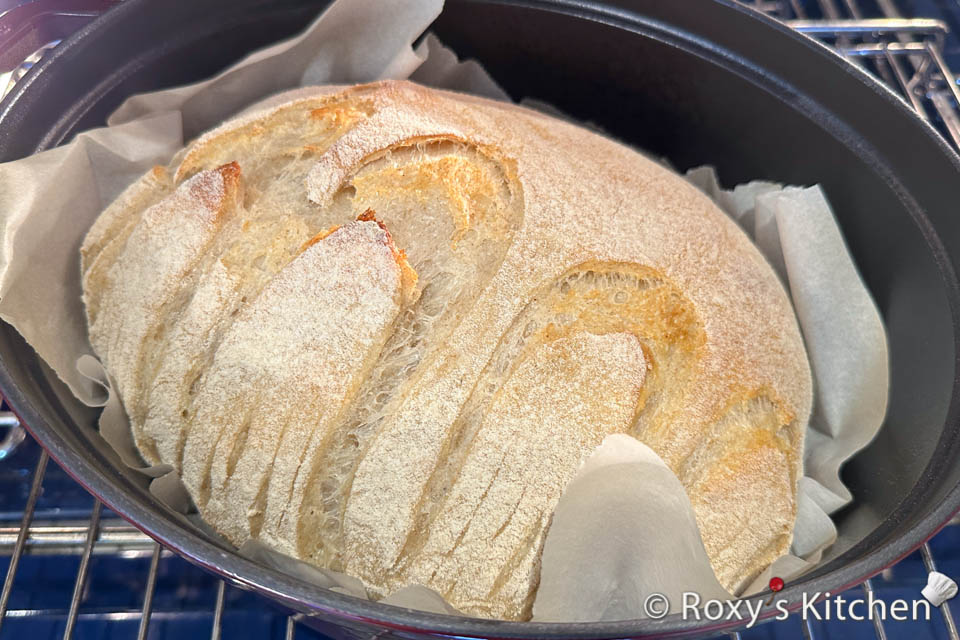
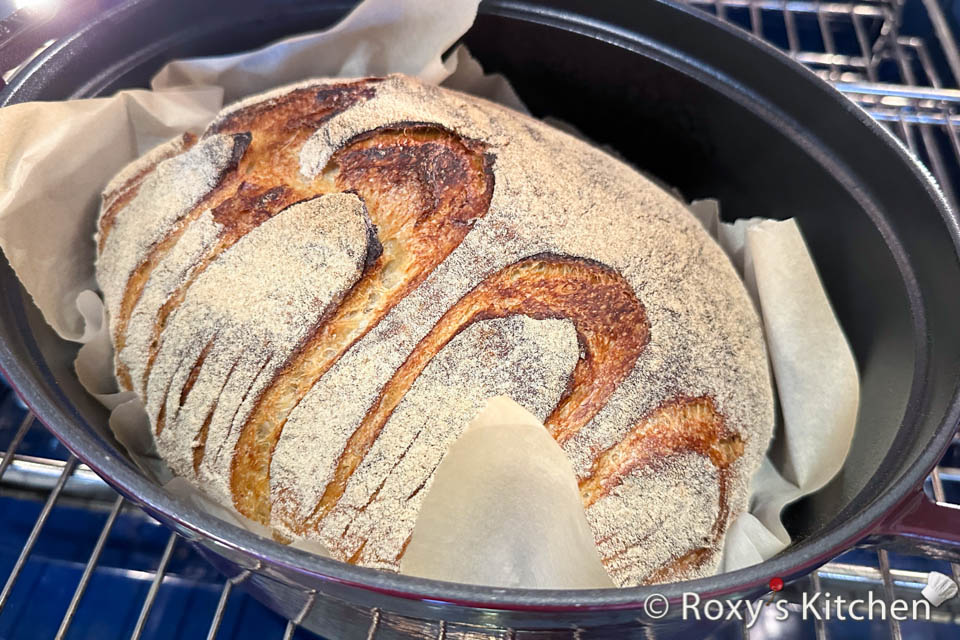
After baking, use an edible ink marker to draw the ghost’s eyes and mouth. This gives the ghost a more detailed and expressive look without the need for intricate scoring.
