


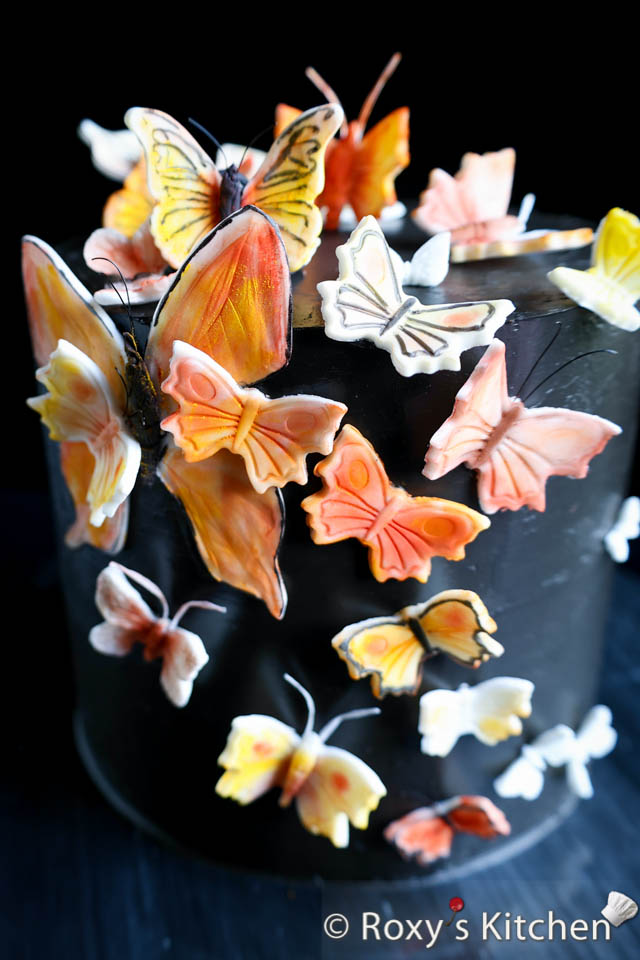
In this post I’ll show you how to make fondant/gum paste butterflies. Butterflies are timeless and enchanting creatures that add a touch of elegance to cakes, cupcakes, and various desserts. In this post, we will explore two techniques for crafting delicate and lifelike butterflies: using plunger cutters and silicone molds. We’ll also delve into dusting gum paste butterflies with petal dust to achieve a breathtaking level of detail.
Ingredients/Tools
- gum paste or fondant mixed with Tylose or CMC Powder (e.g. for 250g fondant mix in 1 teaspoon of Tylose powder)
- rolling pin
- corn starch or powdered sugar for dusting
- butterfly-shaped plunger cutter
- butterfly silicone molds – I used two types of butterfly silicone molds for the small butterflies
- for the larger butterflies, butterfly wing impression silicone molds
- butterfly body silicone molds
- Wilton wave flower former set (optional)
- X-acto knife or a very sharp knife
- black and white thin (e.g. 0.2mm-0.3mm) floral wires for the antennas
- small soft-bristle brush
- black food-safe marker
- petal dusts in the colours of your choice – e.g. yellow, orange, brown/black
Directions
Knead your gum paste or fondant mixed with Tylose Powder (e.g. for 250g fondant mix in 1 teaspoon of tylose powder) until it has a workable consistency and it doesn’t feel and look dry. It should become soft and pliable. If the gum paste is too dry, you can add a small amount of vegetable shortening to make it easier to work with.
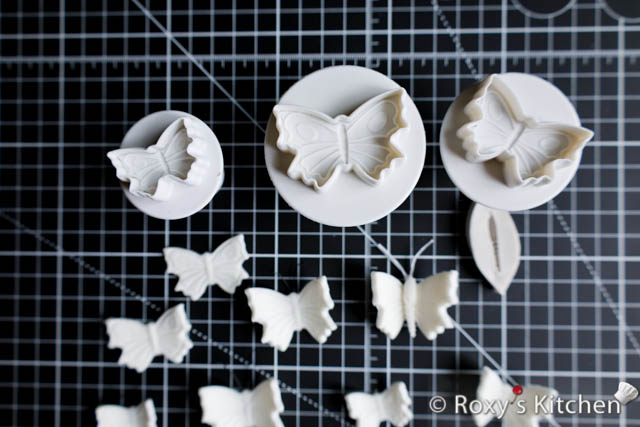
How to Make Fondant/Gum Paste Butterflies Using a Plunger Cutter
The fondant plunger / cutter is the easiest to use.
Dust your working surface with cornstarch and roll the gum paste around 3mm (1/8’’) thick.
Dust your work surface with cornstarch or powdered sugar to prevent sticking. Roll out the gum paste to a thickness of about 3 mm (1/8’’) using a rolling pin. Make sure it’s evenly rolled and smooth.
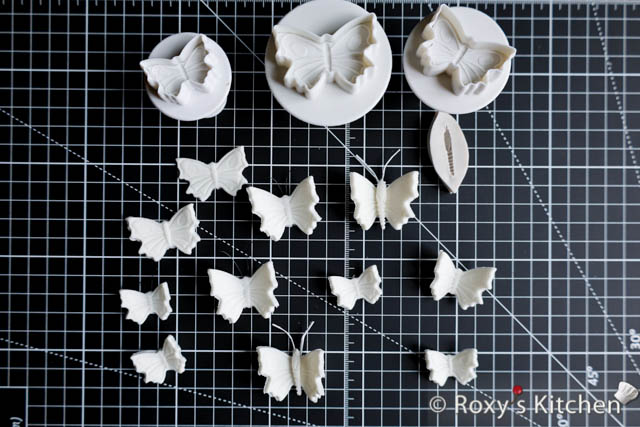
Press the cutter firmly into the rolled gum paste, applying even pressure. Twist the cutter slightly to ensure a clean cut. To add texture and details to the butterflies, gently press the plunger down to emboss the pattern onto the gum paste butterfly.
Lift the cutter, and the excess gum paste will be released, leaving the butterfly shape behind. The plunger cutter should have a spring mechanism that releases the embossed butterfly when the plunger is pressed.
Repeat this process to cut out as many butterflies as desired.
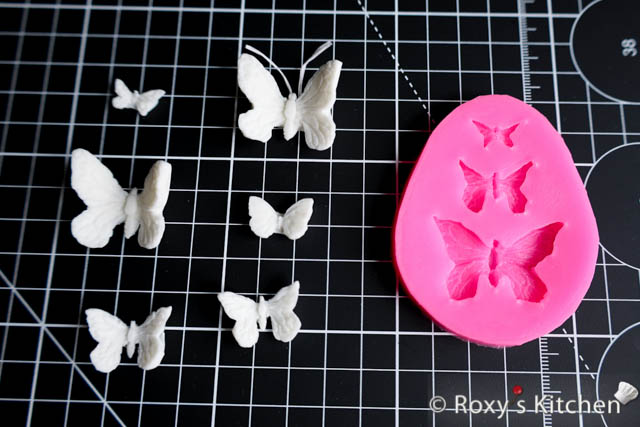
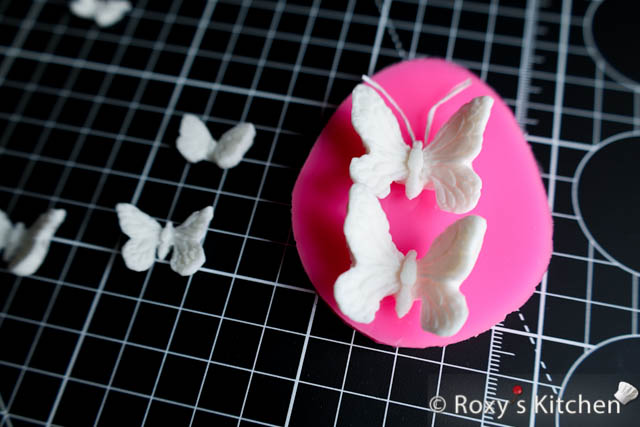
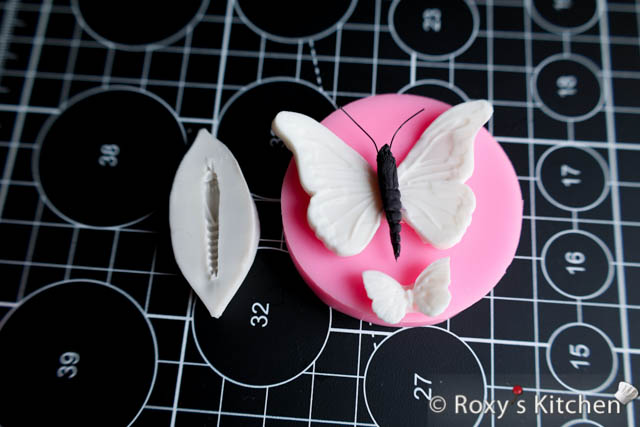
How to Make Fondant/Gum Paste Butterflies Using Silicone Molds
The process to use the butterfly molds is pretty straight forward too. You have to lightly dust your silicone molds with cornstarch and tap the mold lightly to remove the excess. Then, you knead your fondant and press it into the mold using your hands. Lastly, use a blunt blade to remove the excess fondant; if you use a knife you might cut your silicone mold.
Lightly dust the inside of the silicone mold with cornstarch or powdered sugar. This helps prevent the gum paste from sticking to the mold and allows for easy release.
Knead a piece of gum paste that is approximately as big as the butterfly cavity of your mold. Gently press the gum paste into the mold, ensuring that the gum paste fills all the details and contours of the butterfly shape. Use your fingers to press it firmly and evenly.
Trim off any excess gum paste around the edges of the mold using a sharp knife or fondant cutter. This helps create a clean and neat butterfly shape. You can use a blunt blade to remove the excess fondant so that you don’t risk cutting your silicone mold with the sharp knife.
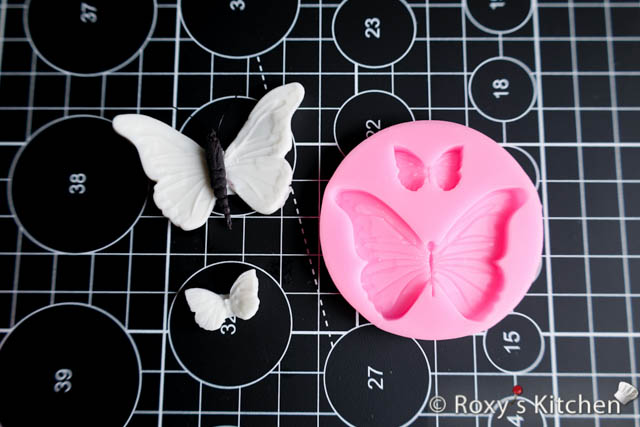
Gently flex or bend the silicone mold to release the gum paste butterfly. If it doesn’t easily come out, you can use a toothpick or a small brush to carefully push the edges of the butterfly away from the mold.
You can use the butterfly body molds in a similar way.

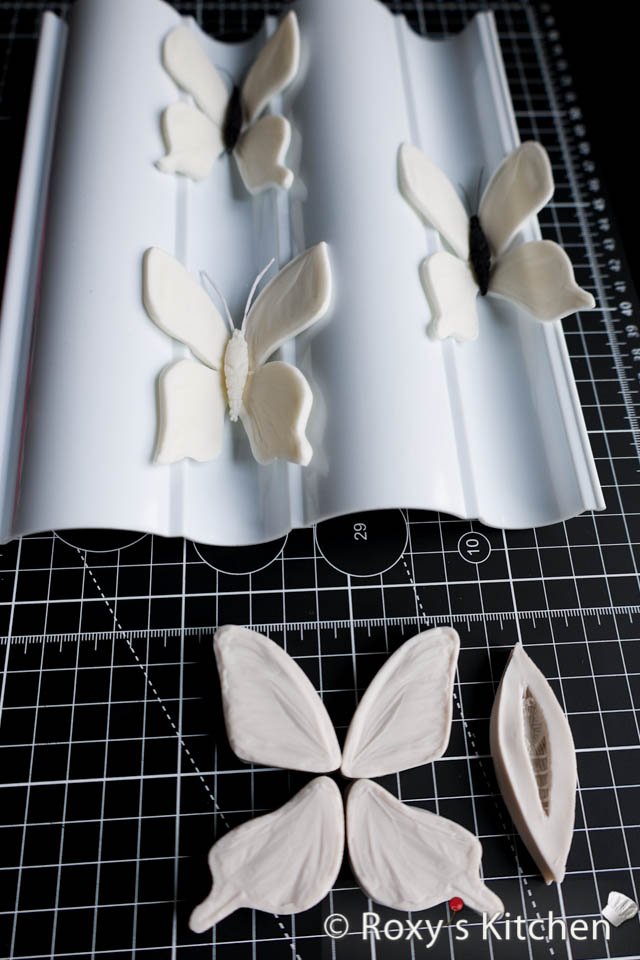
The butterfly wing molds are used slightly different. Dust your work surface with cornstarch or powdered sugar to prevent sticking. Roll out the gum paste to a thickness of about 3 mm (1/8’’) using a rolling pin. Make sure it’s evenly rolled and smooth. You can either place the rolled gum paste over the silicone mold and gently press it into the mold or you can place the silicone mold, face down, over the fondant and gently press it down. Ensure that the gum paste fills all the details and contours of the butterfly shape. Use your fingers or a small fondant smoother to press it firmly and evenly. Trim off any excess gum paste around the edges of the mold using a sharp knife or fondant cutter.
Making the Butterfly Antennas
Cut small antennas out of white and black flower wires. Carefully push a wire through the butterfly’s head & body, leaving a small portion sticking out at the end to serve as the antenna. Repeat the process to insert the second antenna.
Bend and curve the exposed portion of the wire at the end to create a realistic antenna shape. You can use your fingers or small pliers to shape the wire as desired.
Attach the butterfly body to the wings using a bit of water.
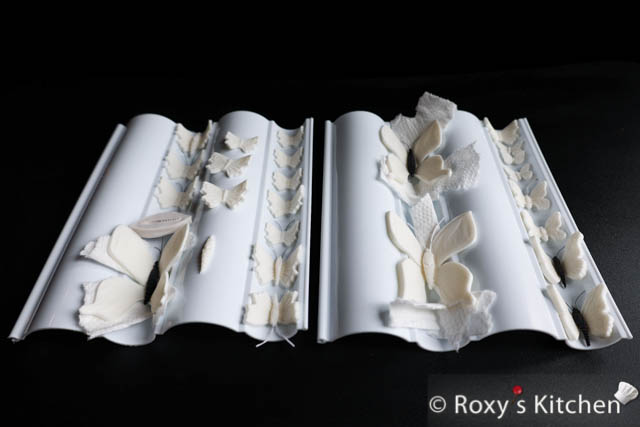
Drying the Fondant/Gum Paste Butterflies
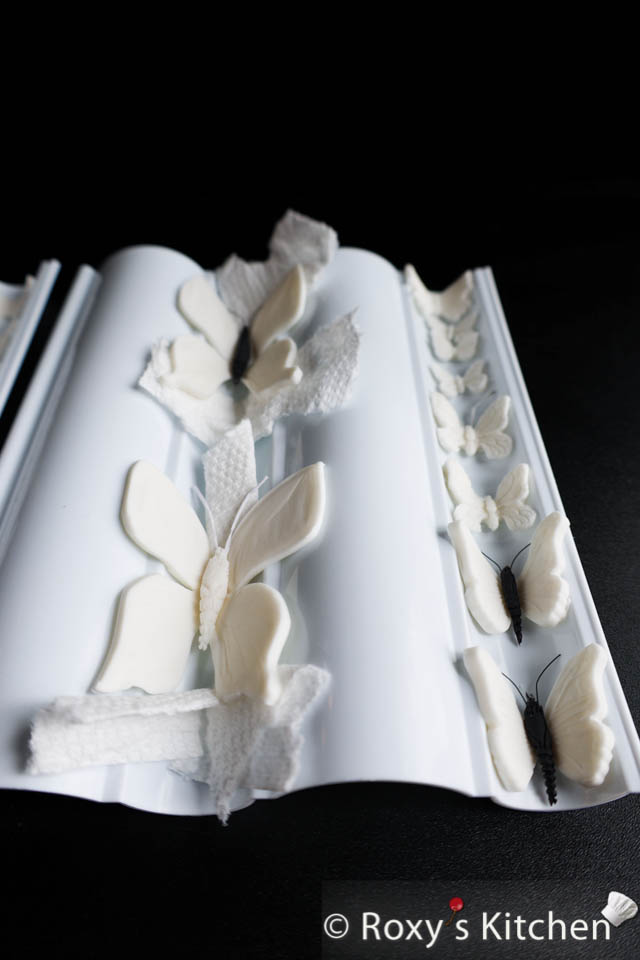
Carefully transfer the butterflies onto a non-stick surface or a parchment-lined baking sheet. Allow them to air dry for several hours or overnight until they become firm and hold their shape. Avoid direct sunlight or excessive heat, as it can cause the gum paste to dry out too quickly or crack.
I placed the butterflies in the Wilton wave set/former so that their wings were curved upwards. I listed the forming cups as optional because you can always find a substitute for these. As an example, for the butterflies you can fold a piece of cardstock into a V shape and lay the butterflies to allow them to dry with their wings up. You can also place some cotton balls or small pieces of paper towels underneath their wings to achieve the same effect.
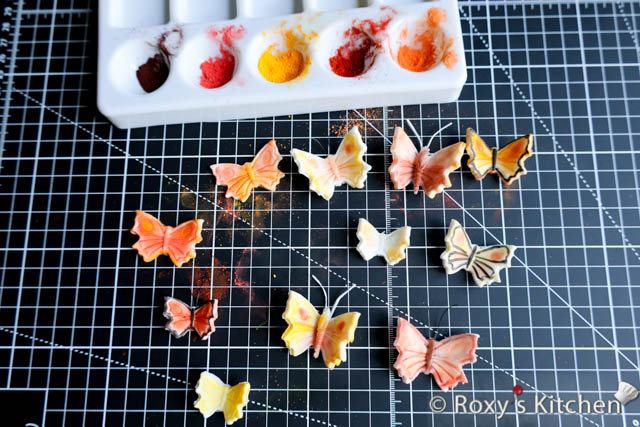
Dusting the Butterflies with Petal Dust
Ensure you have a clean and dry work surface to prevent any unwanted debris or colours mixing. It’s a good idea to work on a surface that is easily cleanable, such as a non-stick mat or parchment paper.
Select petal dust colours that match or complement the desired colour scheme for your butterflies. Petal dust comes in a wide range of colours, so choose the ones that best suit your design.
Ensure that your gum paste butterflies are fully dried and firm before dusting them. This will prevent any smudging or distortion of their shape. If needed, let them air dry for a few hours or overnight.
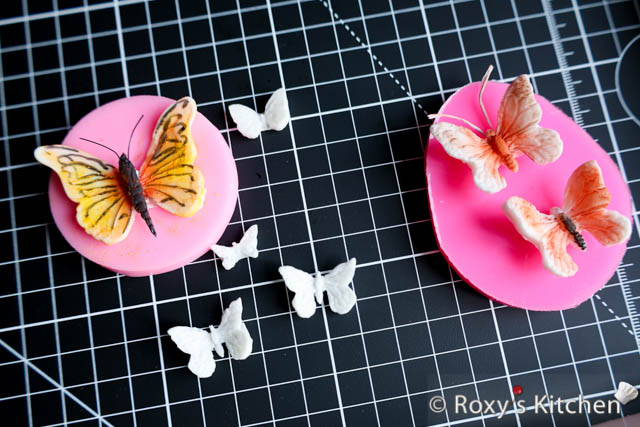
Before dusting the butterflies, you can use a black food-safe marker to highlight crevices or draw the outline of the butterfly.
Take a soft-bristled brush and dip it into the petal dust of your chosen colour. Tap off any excess dust to avoid applying too much at once. Lightly brush the petal dust onto the surface of the gum paste butterfly.
To create depth and shading, use multiple colours of petal dust. Start with a lighter shade as a base colour, and then layer on darker shades to create shadows and highlights. Blend the colours together gently with the brush to achieve a smooth transition.
Pay attention to the intricate details of the butterfly’s wings and body. Use a smaller brush to dust petal dust into the crevices and textured areas, highlighting the natural patterns of a butterfly’s wings.
You can try different techniques to achieve the desired effect. For example, you can lightly dust the entire butterfly with a base colour and then use a more concentrated amount of petal dust on specific areas to create depth and dimension. Experimenting with different brush strokes and techniques can yield unique results.
After dusting, set the gum paste butterflies aside to allow the petal dust to adhere and settle. Be careful not to touch or smudge the dusted areas while they dry.
If you want to preserve the dusted effect and protect it from smudging, you can use a food-safe sealant spray specifically made for use on edible items. Follow the manufacturer’s instructions for application.
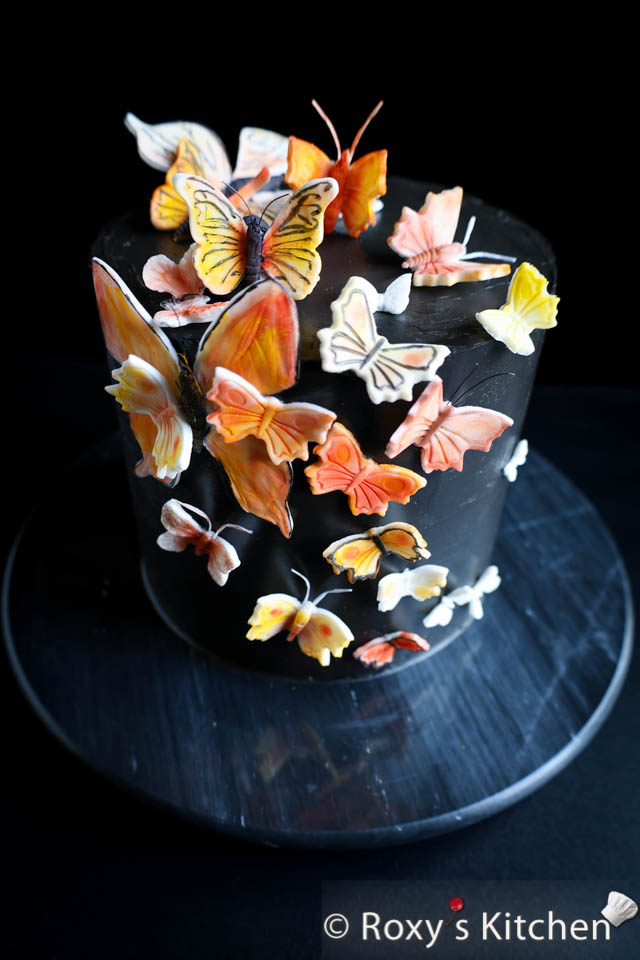
Once the butterflies have dried completely, you can use them to decorate cakes, cupcakes, or other desserts. They can be attached using a small amount of edible glue or by gently pressing them onto the icing or fondant surface.
This post contains Amazon.com affiliate links for products I used to make these butterflies.


[…] I made all the butterflies using gum paste. Please see this post for its of supplies and instructions to make them – How to Make Fondant/Gum Paste Butterflies. […]