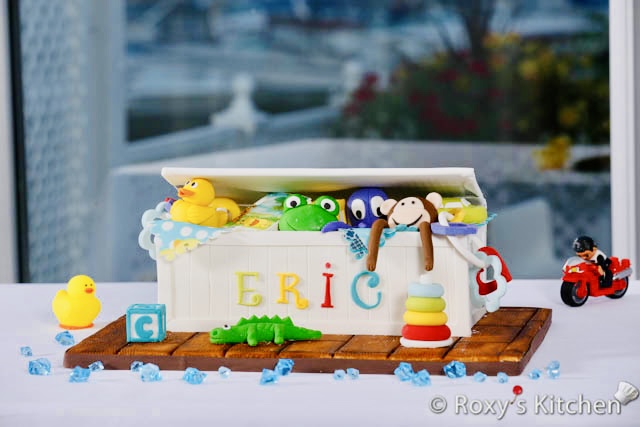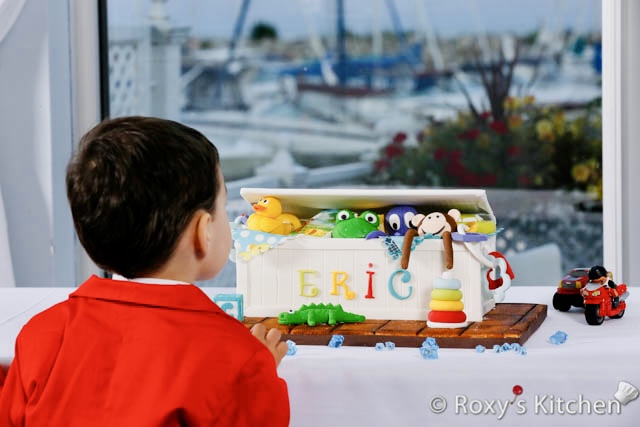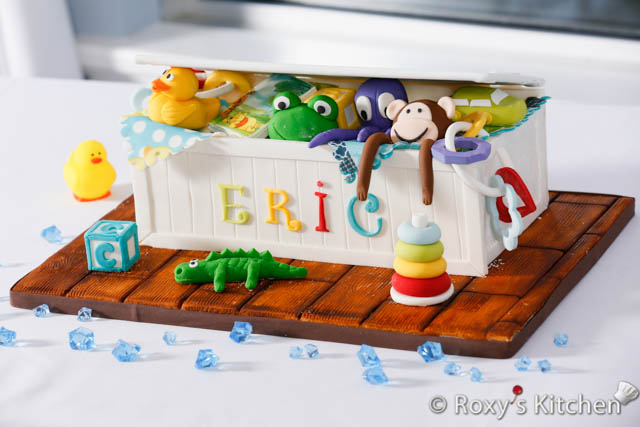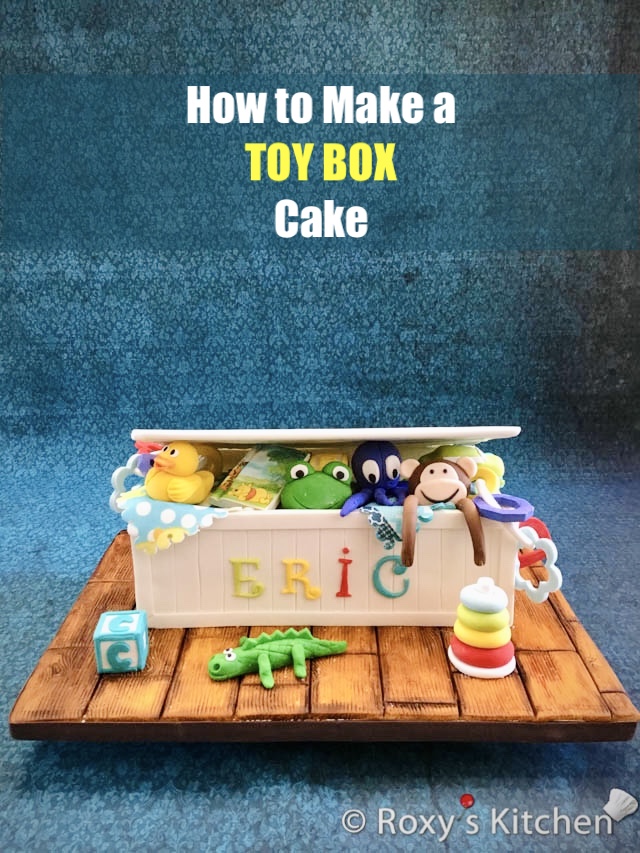
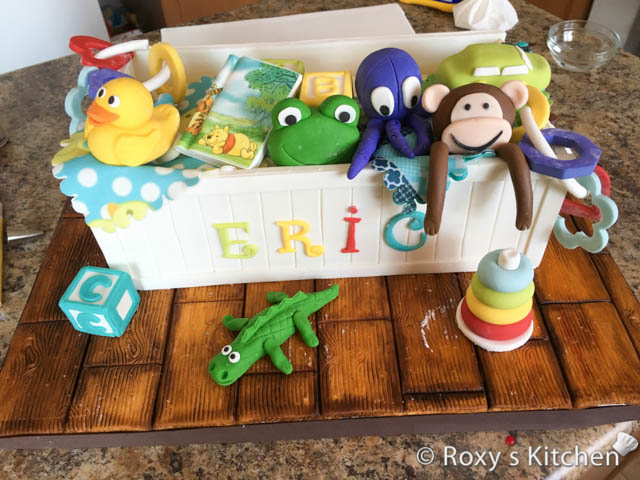
In this post, I’ll show you how to make a Toy Box Cake that’s filled with adorable baby toys made out of fondant/gum paste. From adorable rubber ducks and mischievous monkeys to beloved storybooks and baby rings, this cake is a celebration of childhood joy.
This toy box cake would be great for a baby shower, a 1st birthday party celebration, a gender reveal party or any other special occasion for your little ones. I made this Toy Box Cake for my youngest boy’s party after his christening / baptism ceremony almost seven years ago. As with some of my old cakes, I’ll be sharing a shorter and less detailed tutorial than usual.
Making the Fondant/Gum Paste Baby Toys
Most of the baby toys should be made a few days in advance so that they have time to dry. The toys (or parts) that I don’t recommend making in advance as you still want them to be flexible so you can arrange them as you please on the cake are: the octopus’ arms, monkey’s arms and baby blankets.
Make the baby toys using gum paste as this dries faster. Or, alternatively, you can use fondant mixed with Tylose (CMC) powder to get the same outcome. You can mix 1 tsp of Tylose (CMC) powder for every 900 g (2 lbs) of fondant.
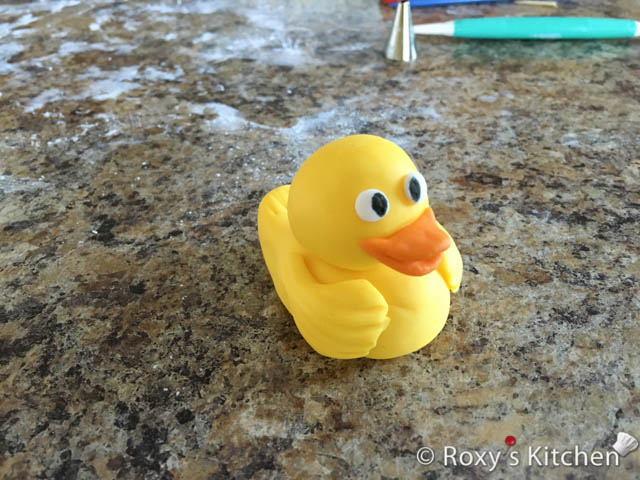
Rubber Duck
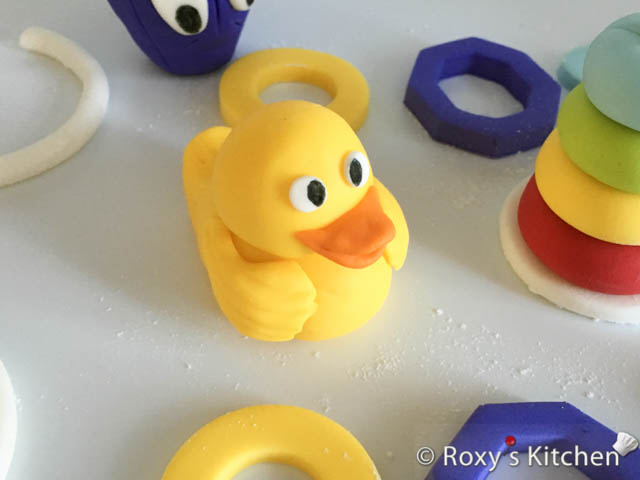
To make the fondant rubber duck you need yellow, orange and white fondant.
Knead the fondant until it has a workable consistency and it doesn’t feel and look dry.
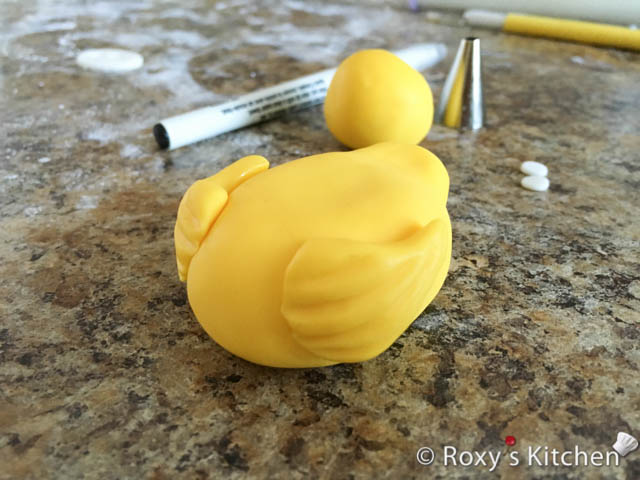
Use yellow fondant to shape the duck’s body and head with your hands as seen in the picture below.
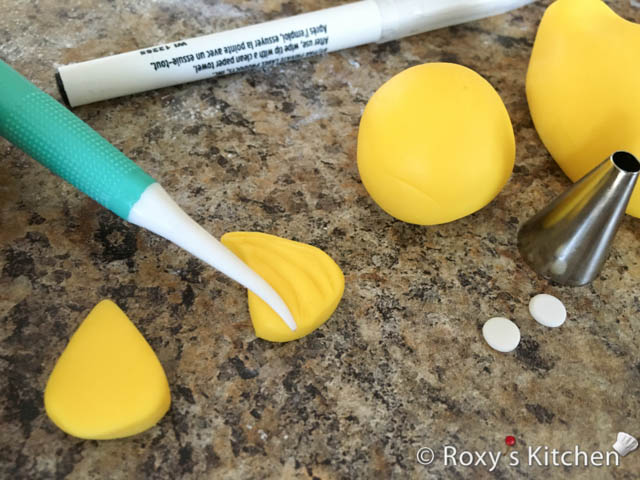
Cut two tear drop shapes out of rolled yellow fondant that’s about 0.65 (1/4’’) thick. Use a fondant tool to trace some lines and make these look like a baby duck’s wings with feathers. Use the same tool to make the feather effect on the duck’s tail.
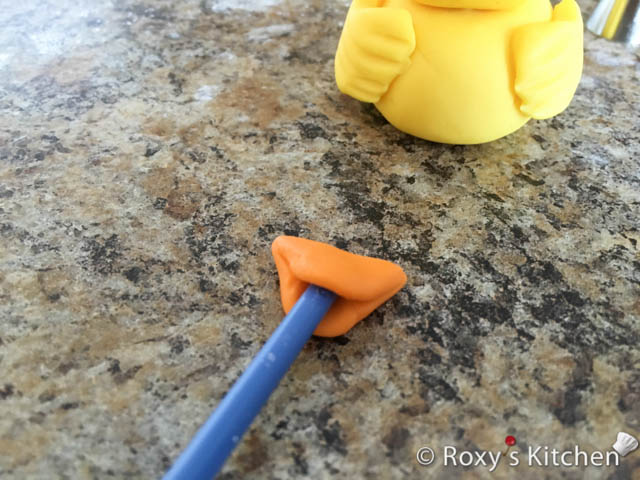
Shape the duck’s beak out of orange fondant. I used the blunt/thicker end of a fondant petal veiner/friller tool to shape it.
Cut the eyes out of rolled white fondant using the large part of a piping tip.
Glue all the pieces together using a bit of water.
Lastly, draw the pupils using a black marker with edible ink.
Frog
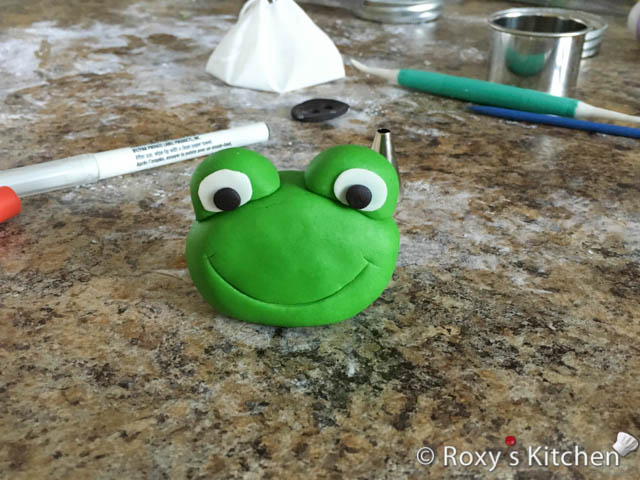
To make the fondant frog you need green, white and black fondant.
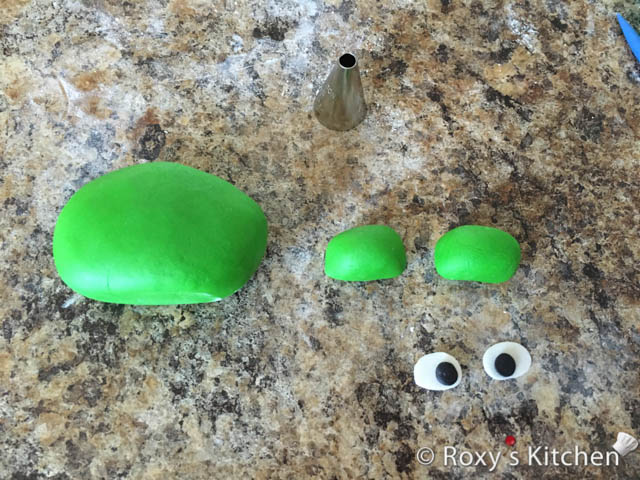
Use your hands to shape the frog’s face and eye sockets out of green fondant.
Cut the eyes out of rolled white fondant using the large part of a piping tip. Use the small part of the round piping tip (it’s a #8 Wilton tip) to cut out the black pupils. You can also draw them with a black marker with edible ink.
Glue all the pieces together using a bit of water.
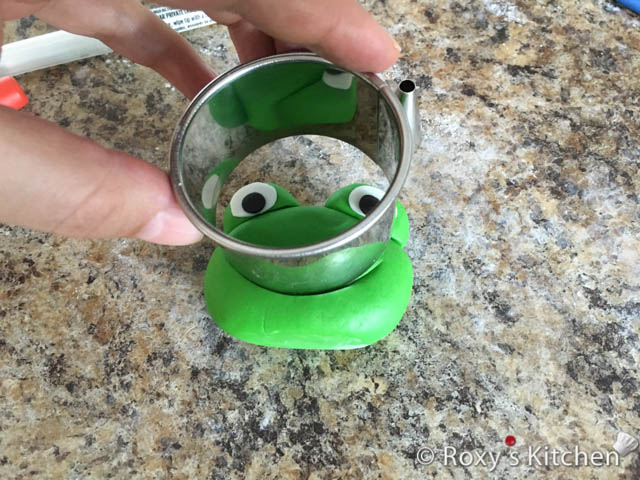
Place the frog face up and use a circle cutter to make the mouth by gently pressing down on one side of the cutter as seen in the picture.
Octopus
To make the fondant octopus you need purple and white fondant.
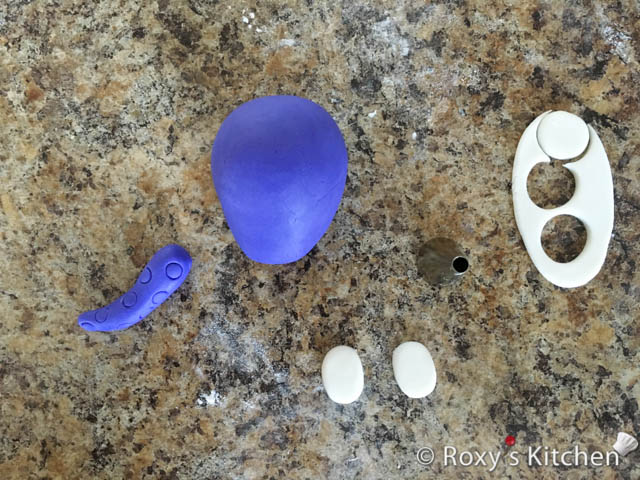
Use purple fondant to shape the octopus’ body and arms with your hands.
Cut the eyes out of rolled white fondant using the large part of a piping tip. Then use your fingers to flatten them out a bit and give them an oval shape.
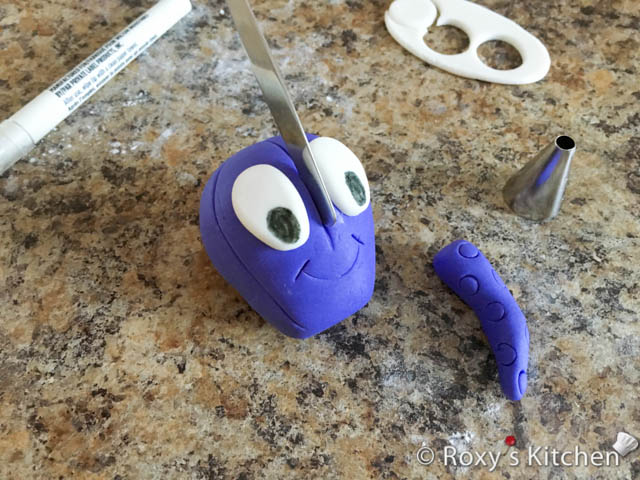
Use the small part of a round piping tip (it’s a #8 Wilton tip) to make the marks on the octopus’ arms that resemble their suckers. Use the large part of the tip to make the mouth mark and the back of a knife blade to make the lines as seen below.
Glue all the pieces together using a bit of water. Note that I made all the octopus legs when I was ready to decorate the cake. I wanted them to still be flexible and not dried out so I could arrange them easily on the cake.
Lastly, draw the pupils using a black marker with edible ink.
Baby Letter Blocks
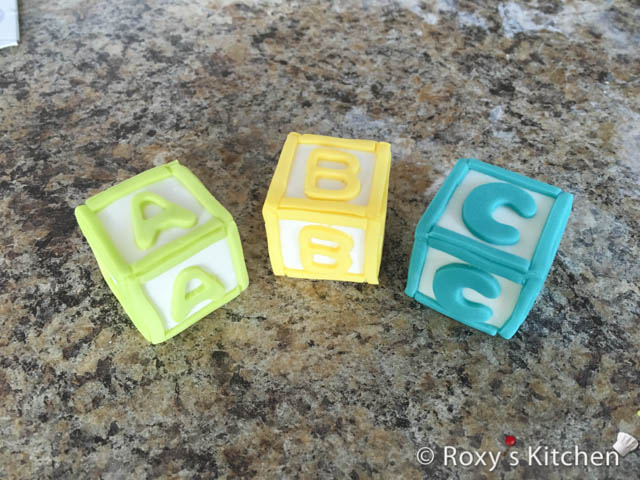
For the baby blocks I used white, yellow blue and green fondant but you can make them in the colours of your choice. You will need alphabet cutters. I also used a square sushi press and a pasta machine to make my job easier but they are not a must-have.
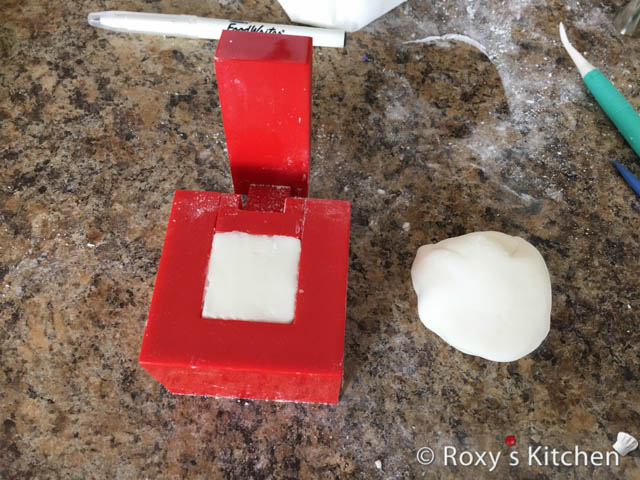
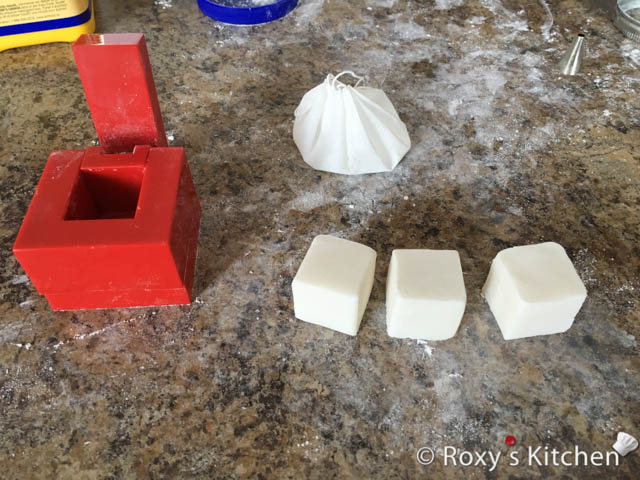
Make the blocks using the square sushi press. Dust it with a bit of cornstarch and then knead the fondant very well and press it into the mold. Any cube mold would work just fine. If you don’t have a mold, feel free to shape them by hand. You can roll the white fondant into a log that is about 3.8 cm (1.5’’) in diameter. Then, you can flatten the log on all side to give it square edges and cut the log into 3.8 cm (1.5’’) squares.
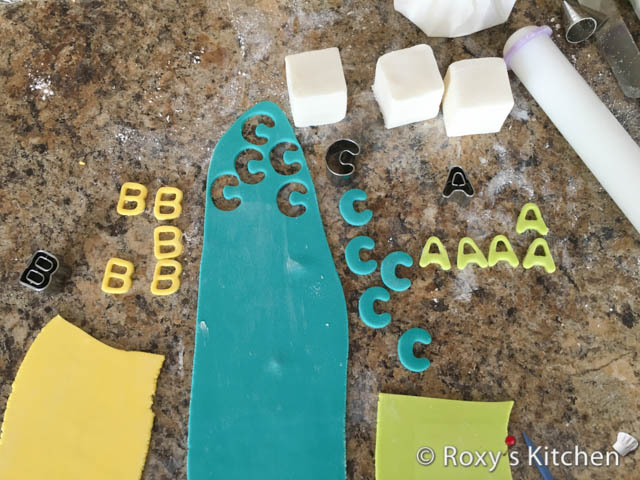
Make the letter cut-outs out of green, yellow and blue fondant and glue them to the cubes (on 3 sides – top, front, back) using a bit of water.
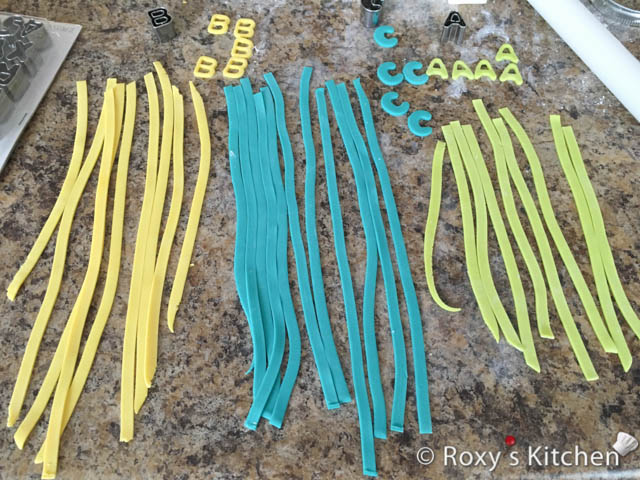
Roll the green, yellow and blue fondant thinly using a pasta machine. Then, using a fettuccine pasta cutter, make the thin strips that are glued around the edges of the blocks. If you don’t have a pasta machine, you can simply roll the fondant using a rolling pin and cut the thin strips with a sharp knife.
Cut all the strips to size and glue them to the cubes using a bit of water.
Ring O’ Links / Link Toys
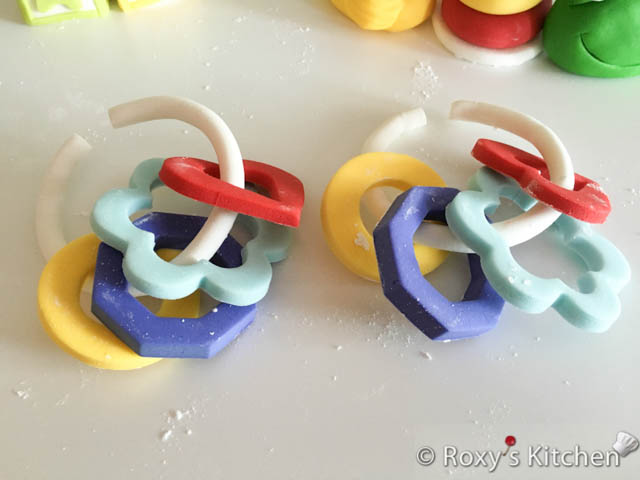
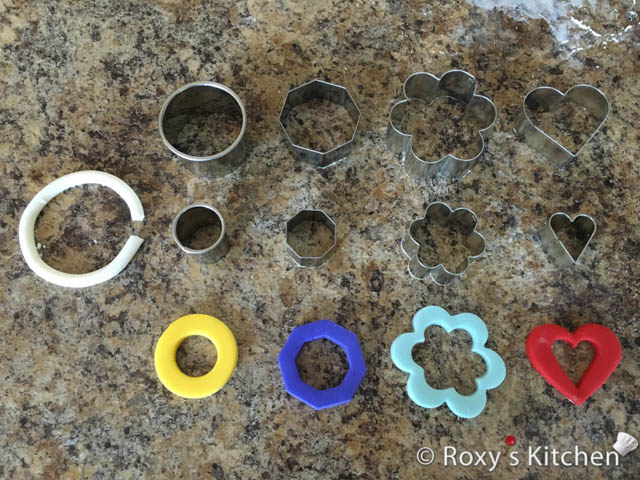
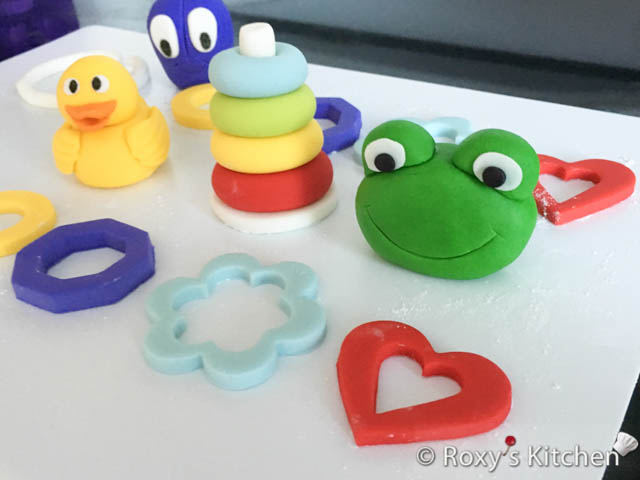
For the link toys you need four different shapes of cutters of your choice (e.g. round, octagon, flower, heart), each of them in two sizes. Make them using white, yellow, purple, blue and red fondant.
Roll a rope out of white fondant and shape it as a ring with a slight opening.
Roll the coloured fondant about 0.75 cm (1/3’’) thick and cut out all the shapes as seen in the picture.
Let all the pieces dry out very well before assembling them.
Baby Book with Winnie the Pooh
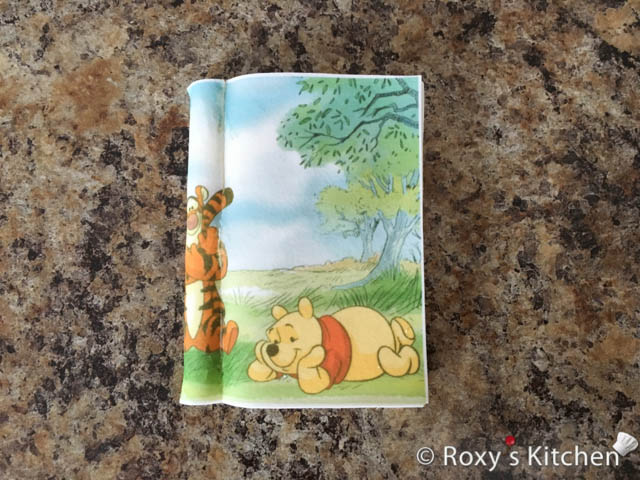
For this baby book I used white fondant as well as a printer with edible ink and paper to print the image/design shown in the picture.
I found that image with Winnie the Pooh online. A simple google search should give you plenty of options. Look for a square-shaped image. Once you have the image, print it on edible paper using edible ink.
Then, roll a thick piece of fondant and cut a rectangle out that’s a little less than half as wide as your image you just printed and as tall as your image. My book was about 10 cm (4’’) tall and 5 cm (2’’) wide.
I shaped the left side of the book with my hands to make it look round like in the picture.
Brush the fondant with a bit of water and place the edible printout on top. Start at the right side of the book and wrap it all the way around the back.
Stacking Wooden Rings
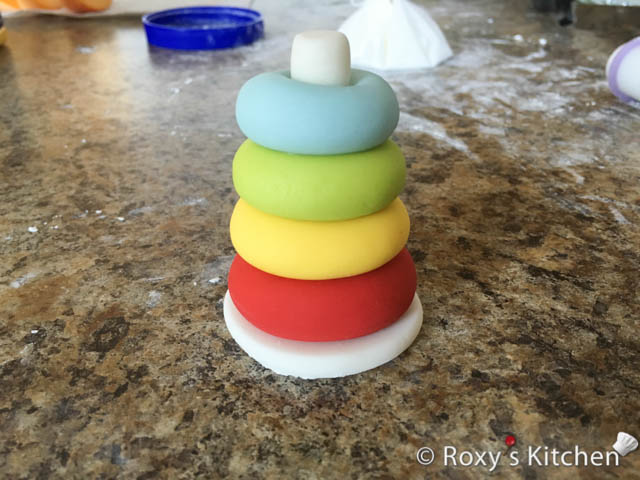
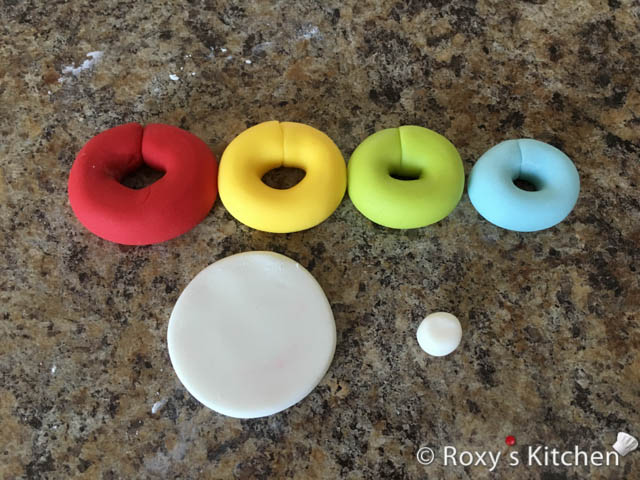
For the stacking wooden rings you need a circle cutter as well as white, red, yellow, green and blue fondant.
Roll white fondant about 0.5 cm (1/5’’) thick and cut a circle out to make the base.
Roll thick ropes out of the colourful fondant and shape them as rings as seen in the picture. Note that they are different sizes, the red one on the left is the largest and the blue one on the right is the smallest.
Roll a small log out of white fondant for the top pieces.
Stack them all as seen below and glue the pieces together using a bit of water.
Car Toy
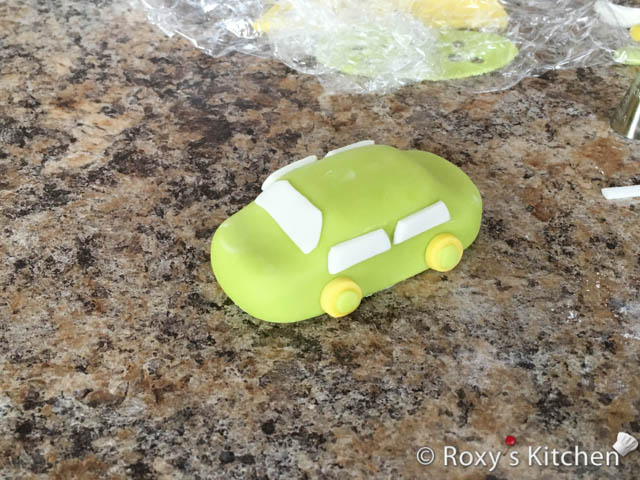
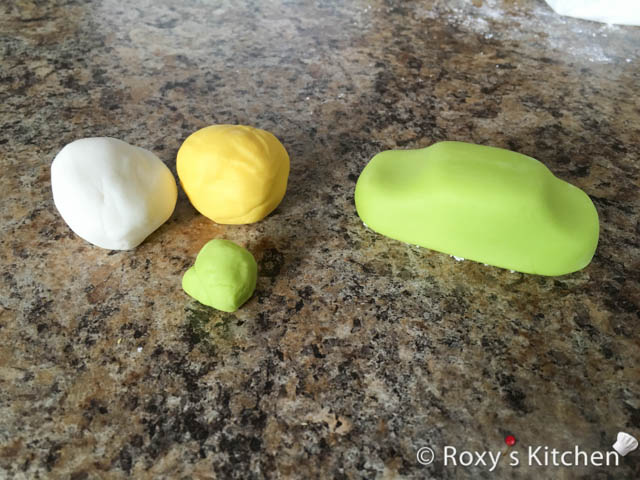
The car is made out of white, yellow and green fondant.
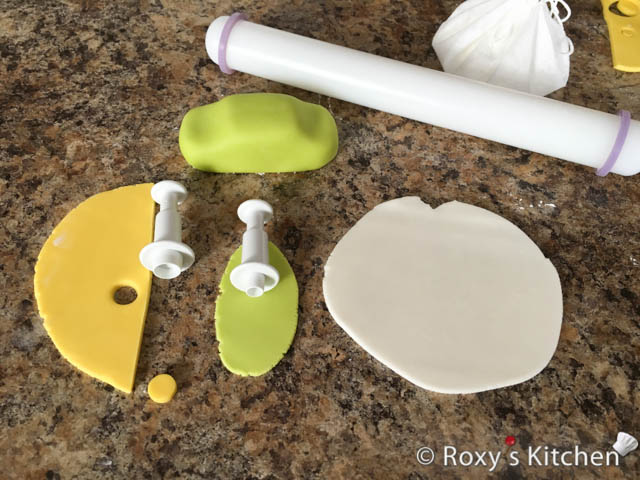
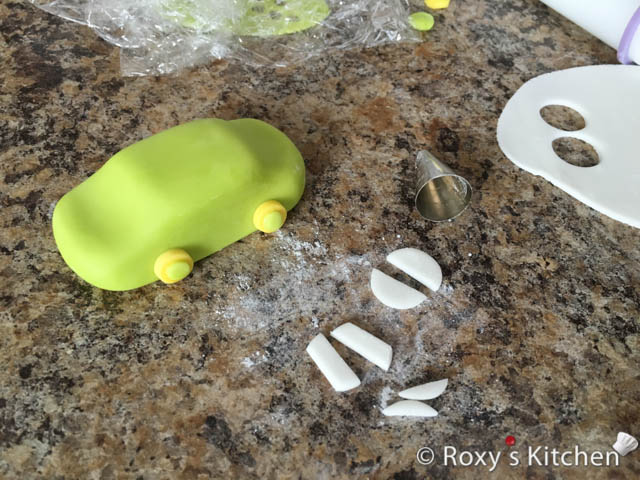
I just shaped the car by hand and made the wheels using round plunger cutters and the small end of a round piping tip (it’s a #8 Wilton tip).
Cut the windshield and other windows out of thinly rolled white fondant.
Glue all the pieces together using a bit of water.

Baby Blankets
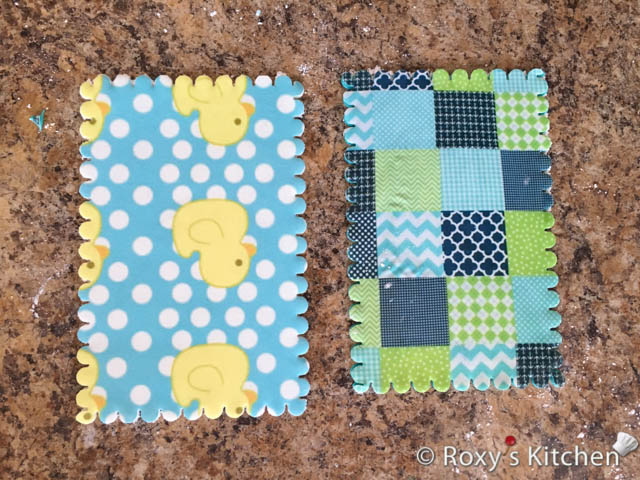
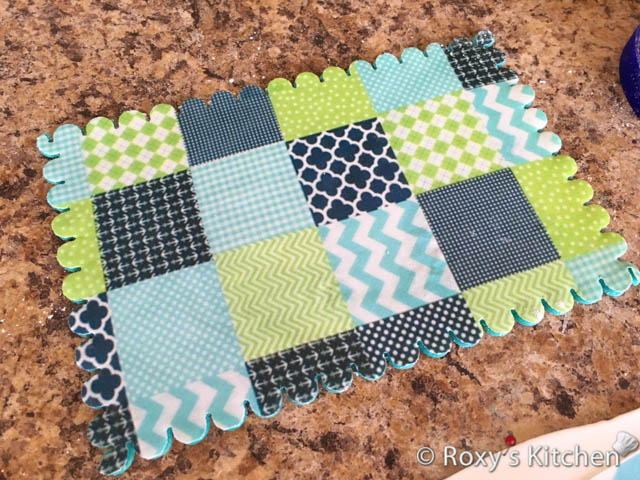
For the baby blankets I used white and blue fondant as well as a printer with edible ink and paper to print the images/designs shown in the pictures. I also used a round frill cutter to make the edges around the baby blankets.
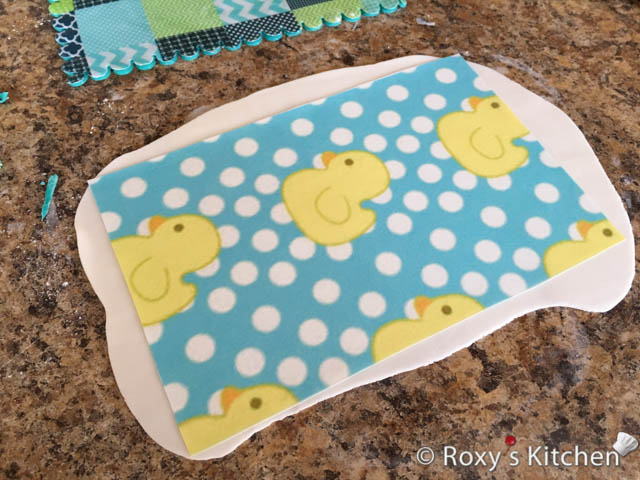
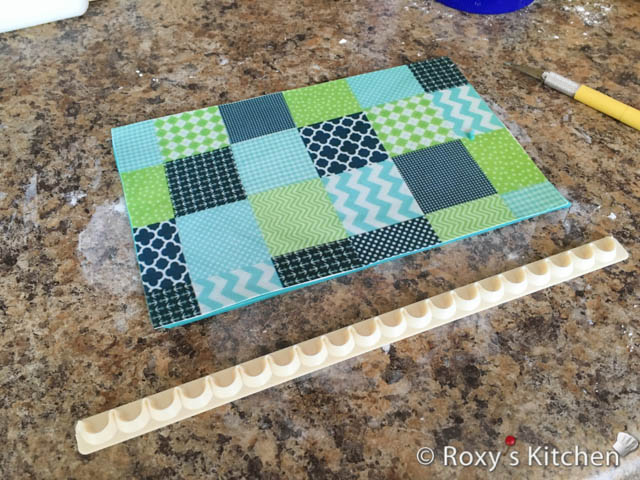
Firstly, print your images of choice on edible paper using edible ink. Then, roll two pieces of fondant (white and blue) that are about 0.5 cm (1/5’’) thick and cut them into rectangles. They should have the same size as the images you printed out. Brush them with a bit of water and place the edible printouts on top.
Cut the edges using the round frill cutter as seen in the picture.

Monkey
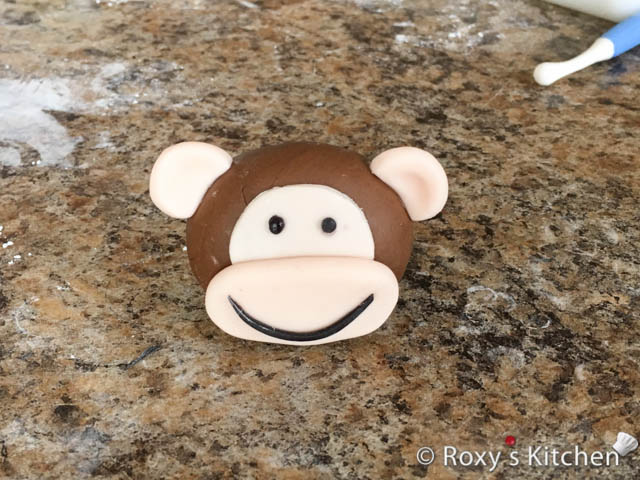
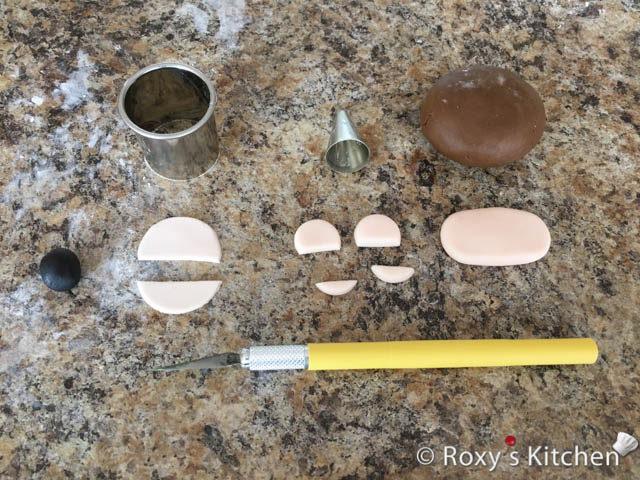
For the monkey, use light brown, dark brown and tan fondant. A circle cutter and a piping tip will make your job easier to cut out all the pieces.
Shape the monkey’s head by hand. Then, cut all the pieces (face, mouth, ears) as seen in the picture.
Glue them to the monkey’s head using a bit of water.
Roll a thin rope out of dark brown fondant to make the mouth. Make tiny eyes out of the same fondant. Attach them to the monkey’s face.
Note that I made the arms when I placed the decorations on the cake. I wanted them to be flexible and not dried out when arranging them on the cake.
Alligator
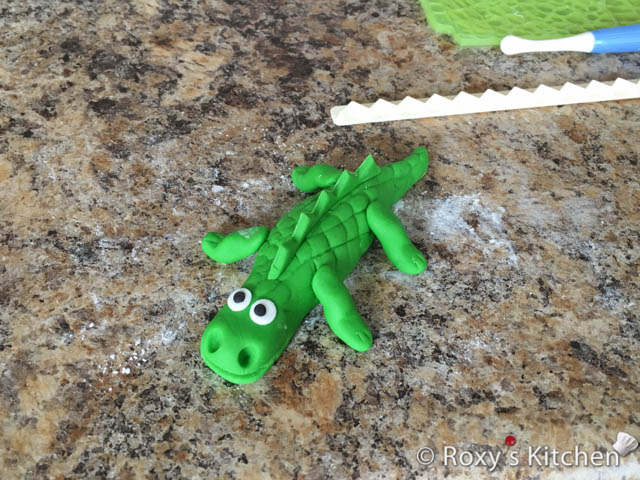
For the alligator you need green, white and black fondant.
Shape the alligator’s body and legs by hand out of green fondant. Use a blunt blade or the back of a knife to make the squares on the alligator’s skin.
Use a fondant ball tool to make the two round indentations for the snout.
The spikes on the back are cut out of rolled green fondant using a frill cutter. However, you can use a sharp knife or a small triangle cutter as well to make tiny triangles.
Cut the eyes out of rolled white fondant using the large part of a round piping tip. Use the small part of the round piping tip (it’s a #8 Wilton tip) to cut out the black pupils. You can also draw them with a black marker with edible ink.
Glue all the pieces together using a bit of water.
Making the Toy Box Cake
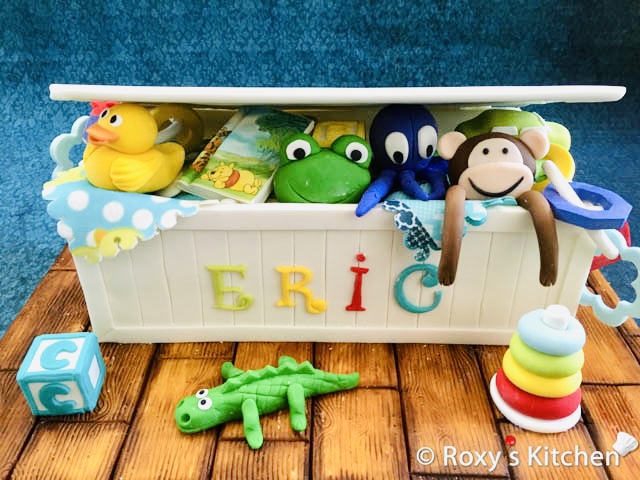
Step 1: A simple sheet / rectangular cake is sufficient to make this toy box cake. Make it as big or small as you’d like. Cut the cake into two layers horizontally. You can use my recipe for perfectly moist chocolate cakes/cupcakes to bake the cake.
Step 2: Make your favourite cake filling and fill the cake. I filled the cake with this triple chocolate mousse.
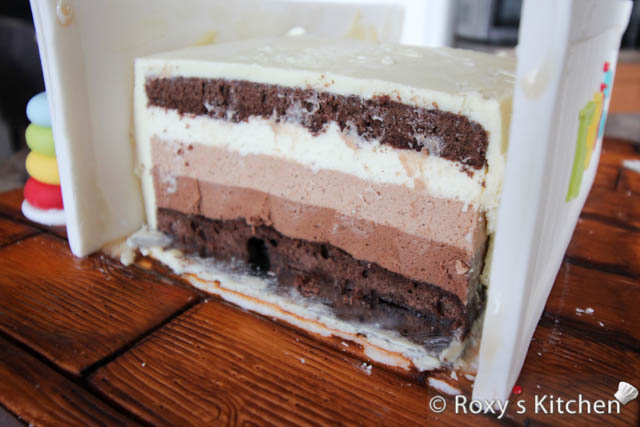
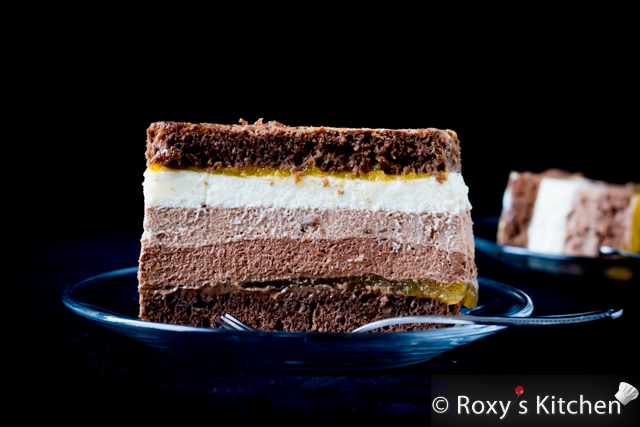
Step 3: Cover the cake either in white buttercream or unwhipped white chocolate ganache. You need to apply a thin layer of buttercream or ganache to crumb coat the cake. Then, keep it in the fridge for 1-2 hours and apply another layer. You can smooth it out as much as you can with an offset spatula and/or cake scraper.
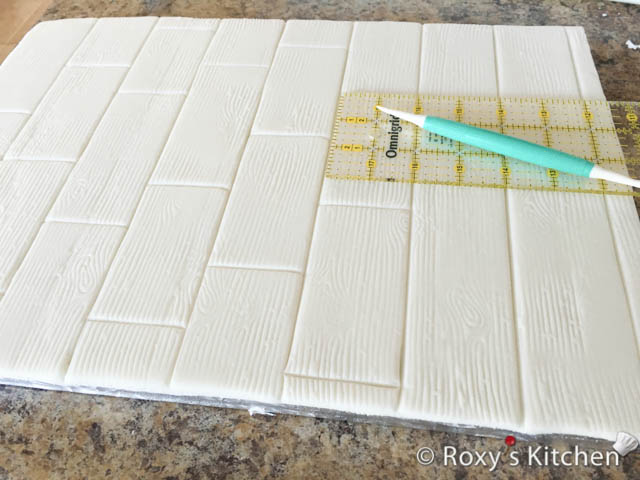
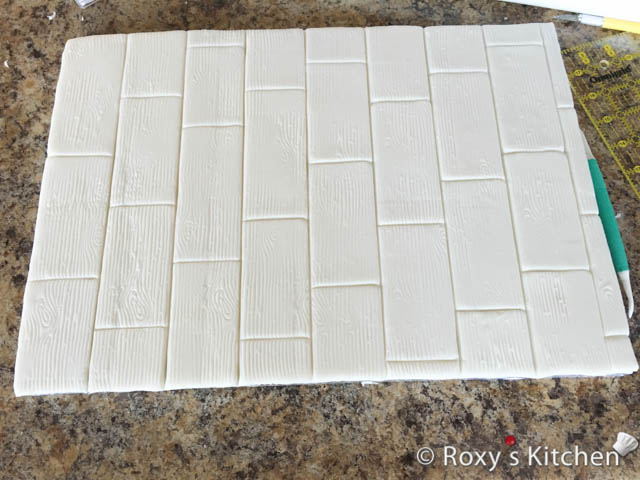
Step 4: I placed the toy box cake on a big cake board covered in fondant with a wood effect. Use a cake drum if you can as it’s sturdier. I covered my cake board in white fondant and gave it the wood effect using a tree bark fondant impression mat. Then, using a roller and the fondant tool seen in the picture, I traced all the lines to make the wood panel effect.
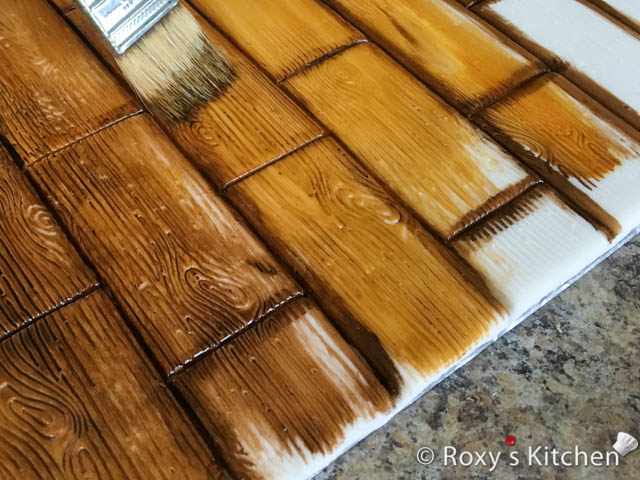
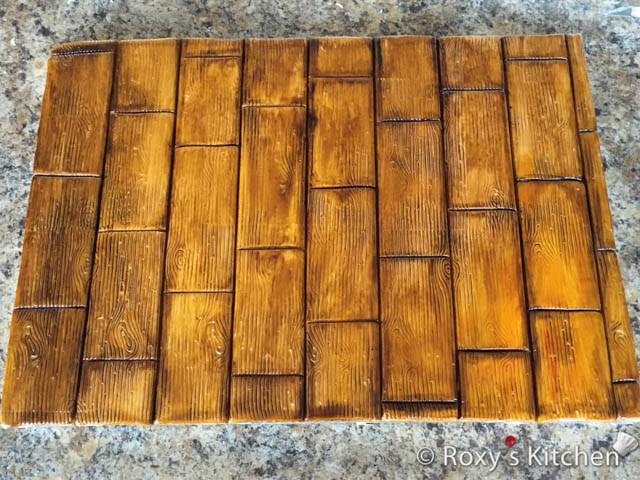
Lastly, I painted it in different shades of brown using a pastry brush and gel food colouring. Mix a bit of gel food colouring with a drop of clear alcohol (such as vodka) or food-grade extract to achieve a paint-like consistency.
Step 5: Make the toy box’s side, front & back panels out of gum paste or fondant mixed with Tylose (CMC) powder at least 2-3 days in advance so that they have enough time to dry out and harden. If not, they will start bending once placed around the cake. If using fondant, you can mix 1 tsp of Tylose (CMC) powder for every 900 g (2 lbs) of fondant. The fondant should be rolled about 0.5 cm (1/5’’ thick).
To make them, sprinkle some corn starch on your work surface, knead and roll your white gum paste or fondant. Cut out 4 panels / rectangles. The panels should be as wide as the sides and front/back of your cake and about 2.5 cm (1’’) taller than your cake. You need four panels in total. Once cut, use a ruler and a blunt blade or the back of a knife to trace vertical lines that are evenly spaced.
Step 6: Make the edges attached to the toy box panels by rolling white fondant and cutting this into thin strips that are as tall/long as your panels. If you have a pasta machine it will be easier to roll the fondant evenly.
Glue the edges to the panels by brushing a bit of water on the part of the edges of each panel.
Step 7: Place your chilled cake covered in buttercream or ganache on the prepared cake board. Brush water around the sides of your cake and attach the fondant panels once they are dried out. Place all the fondant baby toys in the toy box and around it.
Step 8: Make the toy box lid out of a cardboard piece. You can use a rectangular cake board. Cut it to size, brush it with a bit of water and wrap rolled white fondant around it creating seams underneath the lid so that they are not visible.
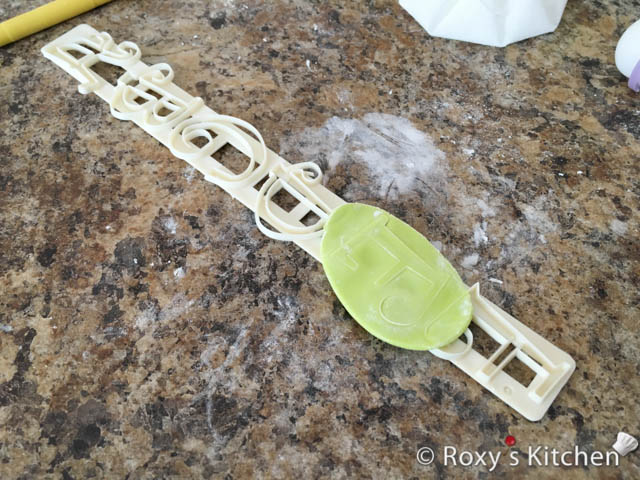
Step 9: Make your kid’s name out of colourful fondant using these Upper Case Funky Alphabet Tappit Cutters. Brush a bit of water on the back of each fondant letter and attach them to the front of the toy box cake.
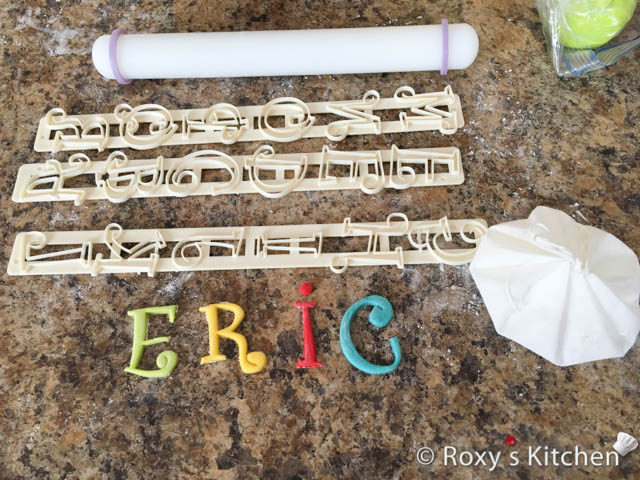
Step 10: Place the lid on top. The box lid is slightly open only, just enough so you can peek through and see the toys. I placed it on top and secured it in place in two ways: 1) by brushing water on the edge that’s touching the back panel and 2) by making two decorative hinges placed on the left and right sides of the lid which are glued to the lid and back panel.
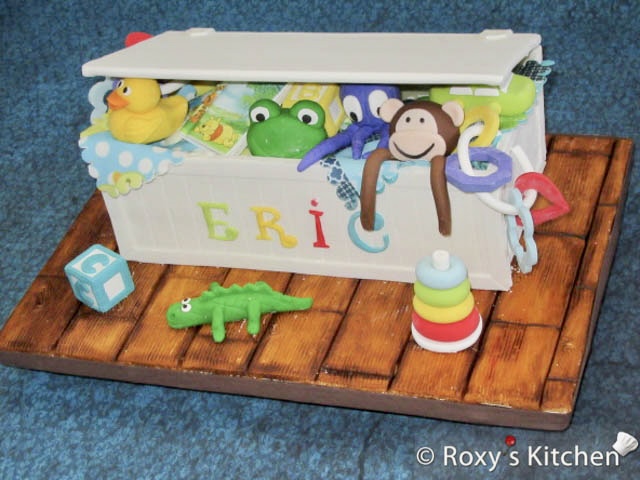
If your lid is more open, then the lid might not be secure as the centre of gravity will shift, putting pressure on the back of the cake. So your lid might fall off. However, you can use flexible but sturdy floral wires that you will insert in the cardboard lid and the back of the cake to secure the lid safely in place.
I hope you found this tutorial useful! If you have any questions or you decide to make this cake, I’d love to hear from your or see your cake pictures!
