


This is the best cake I’ve made for the best surprise party to celebrate the best occasion of the year – my husband’s 30th birthday … well, best occasion until November, when I’m turning 30 :-P. If you’re looking for ways to surprise your loved one for their 30th birthday or another milestone birthday party I will give you some great ideas in this post.
Firstly, book a dream vacation for the two of you and your close family and friends… forget about a romantic celebration, you’ll have plenty of other occasions to go on vacations in two. I made him a 2-in-1 surprise… I managed to bring his parents over (they flew all the way from Spain to Canada) and we all went for a vacation to the Caribbean and HE HAD NO IDEA!!!
Secondly, if you realize that all his friends can’t really join you on the awesome vacation, just organize him a surprise birthday party … which I did and IT WAS A BLAST! And this is the party for which I made him the Tuxedo Cake with a Striped Bow Tie. It was a 12 inch chocolate walnut cake, filled with a triple chocolate mousse and peach jelly. That triple chocolate mousse filling was such a huge hit… it looks great and the taste is out of this world!
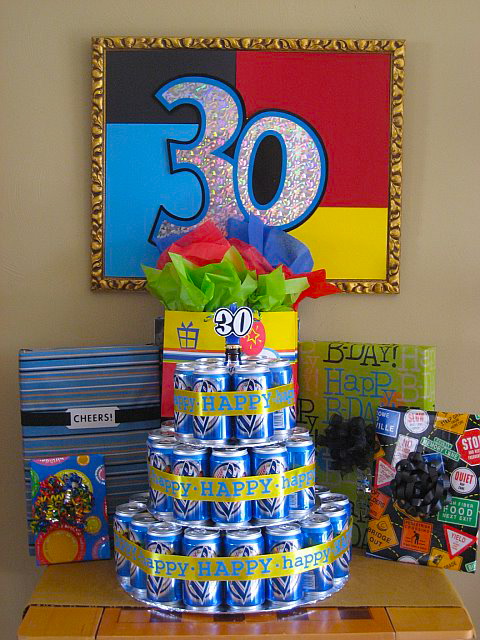
Lastly, buy him a unique birthday present. I got him an eOne watch and made him a custom mug and a custom t-shirt. I also made him a beer can cake… scroll down to the bottom of this post to see the t-shirt and the beer can cake picture that I found on Pinterest and used as inspiration.
Ingredients
For chocolate cake with walnuts:
- 7 large eggs
- 7 Tbsp water (40 ml)
- 10 Tbsp all-purpose flour (160 g)
- 4 Tbsp cocoa powder (50 g)
- 14 Tbsp sugar (210 g)
- 4-5 Tbsp chopped or ground walnuts (optional)
You also need a 30.5 cm (12 inch) round pan greased with butter and floured or lined with parchment paper.
For triple chocolate mousse filling:
White chocolate layer:
- 500 ml (2 cups) whipping cream, divided
- 200 g (1 1/5 cups or 7.5 oz) white chocolate chips or grated chocolate
- 10 g (1.5 pouches) unflavoured gelatin, softened in 120 ml water
Milk chocolate layer:
- 500 ml (2 cups) whipping cream, divided
- 200 g (1 1/5 cups or 7.5 oz) milk chocolate chips or grated chocolate
- 10 g (1.5 pouches) unflavoured gelatin, softened in 120 ml water
Dark chocolate layer:
- 500 ml (2 cups) whipping cream, divided
- 200 g (1 1/5 cups or 7.5 oz) dark chocolate or semi-sweet chocolate chips or grated chocolate
- 10 g (1.5 pouches) unflavoured gelatin, softened in 120 ml water
Note that I saved some of the dark chocolate mousse to crumb coat the cake. You can also use buttercream or simply softened butter to cover the cake.
For peach jelly filling:
- 2 x 550ml (~ 49 oz) cans of sliced peaches in light syrup, strained
- 2 x 2 Tbsp sugar
- 2 x 14 g (2 pouches) unflavoured gelatin
For syrup to moisten cake:
- 200 ml water
- 5 Tbsp sugar
- 5 Tbsp rum extract
Boil the water and sugar, add the rum extract and let it cool off. You can also use cappuccino to moisten the cake or the syrup from the peaches.
For decorating the cake:
- 2.3 kg (5 lbs) black fondant – I don’t recommend buying white fondant and colouring it at home using gel food colouring as it can get quite messy and sticky… just buy pre-coloured fondant
- a bit of white, red, and black fondant for making the shirt and bow tie
- Some cornstarch or powdered sugar for dusting
- Fondant tools: fondant smoother (or palm of your hands), fondant rolling pin, X-Acto knife or any other sharp knife with a thin blade, Clay/fondant extruder (optional, you’ll see why in the tutorial for the bow tie below), small 9-inch fondant rolling pin for making the decorations
- Edible glue – water works just fine
- 1 Tbsp light corn syrup
Directions
Making, Filling and Crumb Coating the Cake
Use the ingredient quantities listed above and follow the step-by-step instructions here to make your chocolate cake. Let the cake cool off and cut it horizontally in two.

Blend 550 ml peaches using a food processor, add 2 tablespoons of sugar and place in a saucepan over medium heat until the sugar dissolves. Remove from heat.


While your peach mixture is cooking, soften the gelatin in a few tablespoons of cold water and then dissolve over hot water. I placed the bowl with gelatin in another bowl with hot water and stirred until the gelatin dissolved. Pour the gelatin over the peaches, stir to combine and set aside to cool until it starts to thicken a bit but still has a pouring consistency.


Place the first cake layer in a springform pan and pour your chilled peach jelly over.


Place in the refrigerator, wait an hour and start making your mousse layers by following the step-by-step instructions in this Triple Chocolate Mousse Filling recipe. Don’t forget to save 4-5 tablespoons of dark chocolate mousse to crumb coat your cake. If you forget to save some you can also use buttercream or simply softened butter for this.


After you’re done making all you mousse layers, prepare one more peach jelly filling following the same steps above., let it cool off and pour over the dark chocolate mousse.

Add the second layer, moist it with sugar syrup, cover the cake with plastic wrap and refrigerate for 5-6 hours or overnight.


To remove the cake from the springform pan, take a knife, run it under hot water and run the knife along the edges of the cake against the sides of the pan. This loosens the cake while keeping the sides smooth.
Turn your cake upside down onto a cake platter of cake board and remove the springform pan.
Apply a thin layer of dark chocolate mousse (or buttercream or softened butter) using a straight or offset icing spatula (whichever feels more comfortable to you) to cover all holes and imperfections. In the cake decorating world this is called crumb coating a cake. Refrigerate the cake for at least 30 minutes to allow the filling and coating to harden so that the cake layers will not slide out of alignment.

And now it’s time for the fun stuff…covering and decorating the cake.
Covering the Cake with Fondant
Before rolling out your fondant, sprinkle some powdered sugar or cornstarch on your work surface and knead it until it has a workable consistency and it doesn’t feel and look dry.
Use a measuring tape or a piece of string to measure the top and sides of the cake. So if you measured 10 inches across the top and your cake is 4 inches tall that is 18 inches of cake in total (10 inches + 2 sides of 4 inches each) so you need to roll out the fondant at least 20 inches in diameter but you should leave an inch or two extra.
Sprinkle some powdered sugar onto your work surface and roll out the black fondant using a fondant rolling pin in the approximate shape of your cake (i.e. circle for a round cake). As you are rolling it make sure you lift the fondant occasionally and rotate it 45 degrees to make sure it doesn’t stick to your work surface. If it sticks lift the fondant and sprinkle more powdered sugar or cornstarch.
Gently lift fondant over rolling pin and place it on the side of the cake. Start unrolling the fondant from the side of the cake and across the top to the other side.


Smooth the fondant with a fondant smoother (or the palm of your hand) starting from the top. Start to gently pull the fondant out and down around the sides of the cake using one hand and spread the excess fondant and smooth it out using a fondant smoother (or your other hand).
Keep turning the cake and repeating these steps until the sides are smooth and without any ruffles formed towards the bottom. It’s better if you use a fondant smoother since the pressure of your hands could leave marks and the warmth from your hands might make the fondant sticky.

Use your fondant smoother to get rid of any wrinkles and air bubbles as well. If you see any air bubbles, insert a pin on an angle, release the air and smooth the area again.
Trim the edges at the bottom using an X-Acto knife, a pizza cutter or any other sharp knife you have.

Making the Striped Bow Tie
For this you will need some white, red and black fondant. You can mix the fondant with a bit of tylose powder so that your bow tie will harden faster.
I will tell you two ways of making a striped bow tie. I used option 1 this time but for you option 2 might be easier.
Option 1:
Use a clay/fondant extruder to squeeze out three long red ropes, two white and two black. I used the circle insert for the red ropes and the three-hole insert for the white and black ropes on my Wilton clay/fondant extruder . Place the ropes next to each other as seen in the picture below and just brush a tiny bit of water in between them.


Take your small 9-inch fondant rolling pin and roll it over while slightly pressing down and applying even pressure. Even pressure is important as otherwise your stripes won’t be too straight (mine are not perfect either…shhh, don’t tell anyone J)


Option 2:
Sprinkle some powdered sugar or cornstarch on your work surface and roll all three fondant colours. The red fondant should be rolled out into a 16 by 5 inch rectangle.
Cut out thin, even strips out of the white and black fondant. If you have a pasta machine you can use the fettuccini cutter attachment to cut out the stripes… so much easier and your stripes will definitely have the same width.
Stick the white and black stripes on top of the rolled out white fondant using a bit of water. Again using your small 9-inch fondant rolling pin, gently press and flatten the stripes while making sure you apply even pressure.
For the bow tie, cut out a 2 x 8 inch rectangle, turn it over, dab some water or edible glue in the middle and folder over both sides, joining them together. Insert some paper towel or cotton wool in the bows to hold their shape.
From the remaining striped fondant, cut out a tiny rectangle to wrap it around the middle of the bow tie and two small triangles using a cookie cutter to make the handkerchief.


Let the bow tie dry for a few hours.
If you want to keep it simple just make a black bow tie and a white handkerchief.


Making the Shirt and Tuxedo Collar
Sprinkle some powdered sugar or cornstarch on your work surface and roll out the white fondant. Cut a 3.5 by 3 inches rectangle to make the shirt.


Cut along the longer sides of the rectangle to make a trapezium shape. You should have 2 inches left at the bottom and 3 inches at the top. Brush the back of the shirt with some edible glue or water and attach to the cake.


Take a knife, pizza roller or sticking tool and trace a line from top to bottom to make the button line. Make sure you don’t cut it all the way through.

Roll out some black fondant and cut out the tuxedo collar. Make small buttons by rolling out tiny balls out of black fondant. Attach all pieces to the cake using edible glue or water.


Make the shirt collar out of white fondant and attach it to the shirt.
Place some edible glue on the back of the bow tie and place it onto the shirt collar. Do the same to attach the handkerchief
Roll out a thin strip of black fondant to make the pocket and place it onto the cake slightly overlapping it over the handkerchief.


To give the tuxedo a shiny look, mix a tablespoon of light corn syrup with a tablespoon of water and brush it over the parts you want shiny.


Here are a few other 30th birthday party ideas for men. I actually bought hubby that first T-shirt and made him the beer can cake . I would’ve taken some shots to show you at least the beer can cake but didn’t get a chance to do this with Daniel running around the cake. J.
Made in 1985 and Aged to Perfection T-Shirt for Men

Happy 29th Birthday, Again – Gift Basket Idea

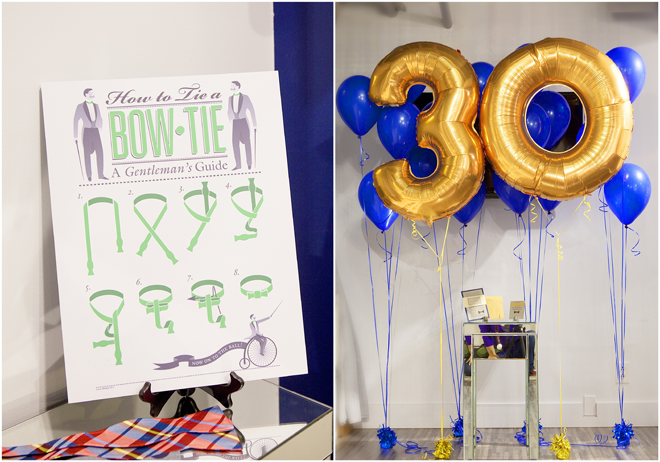
A Dapper Gentleman Bow-tie Party with so Many Fabulous Ideas
30 Helium Filled Balloons with a Photo Attached for Each Year of the Person’s Life


Que máximo!! É bem mais raro encontrar dicas de bolos para homens, para mulheres a variedade é grande, que bom que encontrei esse aqui, estava procurando para fazer para o meu marido no seu aniversário. Vocês estão de parabéns.
I want to know where you get the candles 30 and is that a dowel that you use and you stick the 30 candles? thank you!
If I remember correctly, I got them from Party City in Canada. They came with the dowel.
Omg you are so fricking talented lady!!! I would never have the patience to do such a thing!!!!!!!! Love the step by step photos too!
Thanks Anne for your kind words! Baking / decorating cakes is my meditation, it relaxes me…. I could spend hours doing this and would never get bored :).