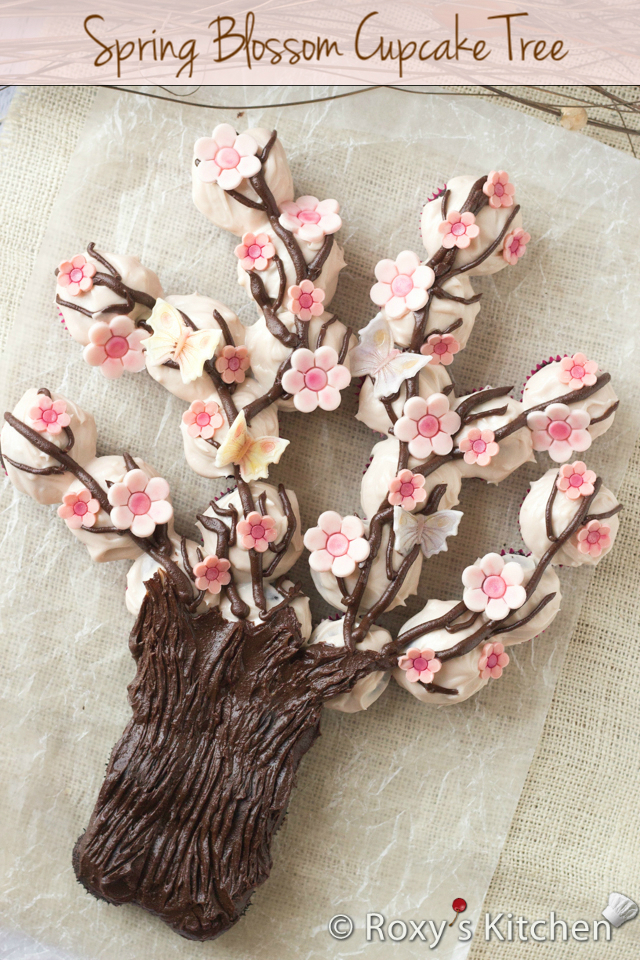
Spring is finally here! Yes, I know it’s almost June but hey, we live in Canada and here the Winter lasts for six months, and that’s if you are lucky! Thank God we picked Toronto and not Iqaluit when we decided to move to Canada! Even so we escaped the cold weather over the past months and spent several weeks in San Francisco, San Diego and Riviera Maya at over 20°C… now that’s what I call Spring!
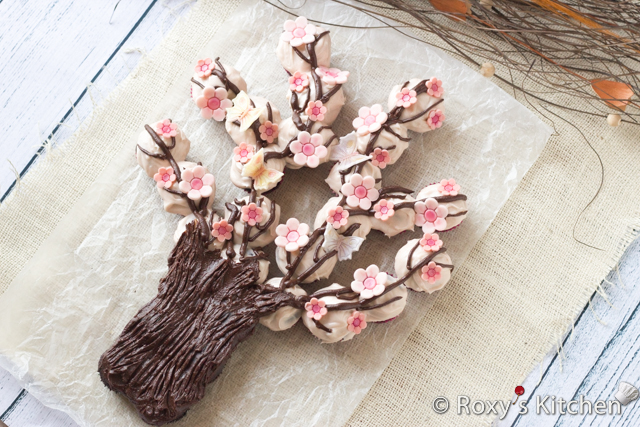
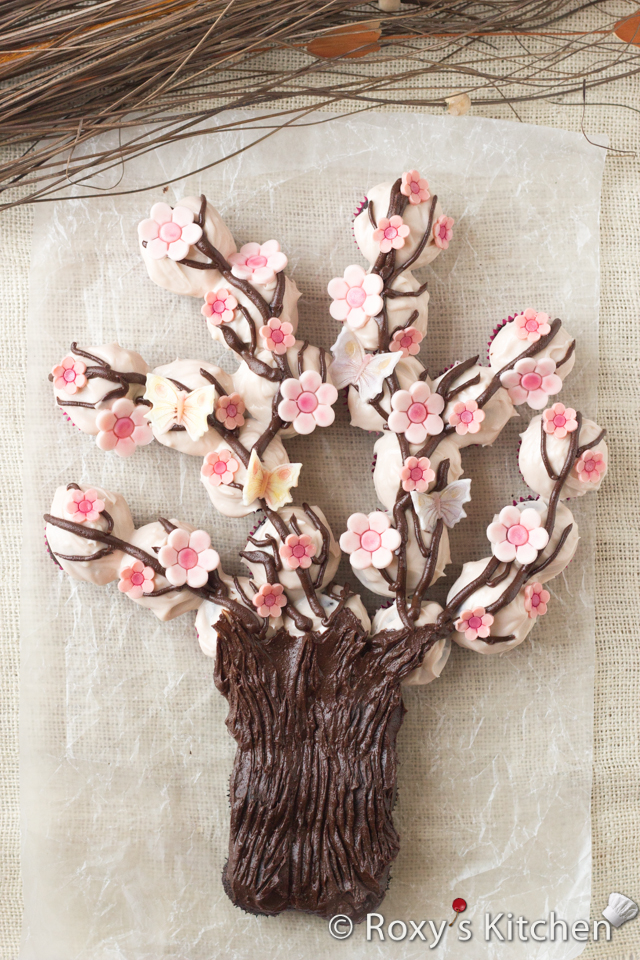
But if it’s Spring and you’re in Toronto you can’t miss a walk in High Park to admire the beautiful cherry blossoms. This was my inspiration for my little baking project last week – a Spring Blossom Tree made out of cupcakes. It’s fun to make and not that hard as long as you have a few basic decorating tools including some cutters to make the fondant flowers and butterflies (you can get them from Amazon for a few bucks each set).
Materials & Tools:
- About 28 mini cupcakes of your choice – I recommend these Perfectly Moist Chocolate Cupcakes
- White frosting of your choice mixed with a drop of pink gel food coloring, at room temperature – I made this Cream Cheese Frosting, use ¼ of the ingredients indicated in the recipe
- Brown/Chocolate Frosting, at room temperature – I made Chocolate Ganache out of almost ½ cup (80g) semi-sweet chocolate and 100ml (3.4 oz) whipping cream
- A fork
- 1 piping bag
- 1 larger round decorating tip – I used #8 Wilton tip
- 1 smaller round decorating tip – I used #5 Wilton tip
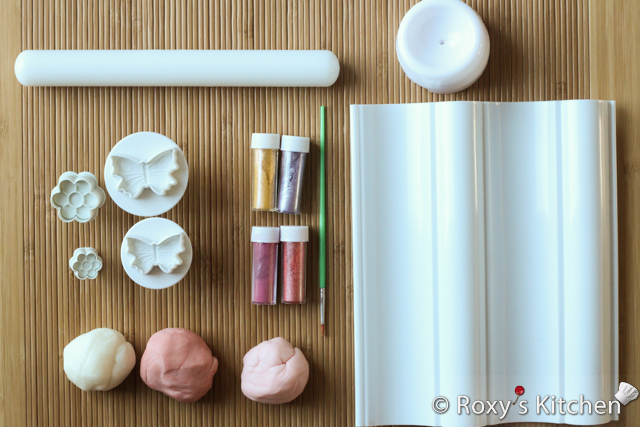
- Fondant in two shades of pink and white fondant (you just need a bit of each colour)
- Flower plungers/cutters in two sizes – I used the two smallest cutters from the Ateco 1957 Petal Plunger and Cutter Set
- Butterfly cutters in two sizes – I used the Sugarcraft Butterfly Shape Cookies Plungers
- Pink, yellow, purple petal dust (optional)
- A brush to apply the petal dust (optional)
- Some flower forming cups / set (optional)
Directions:
Bake your cupcakes and make the cream cheese and chocolate frostings.
Arrange the cupcakes on a cake board to form a tree as seen in the photo below.
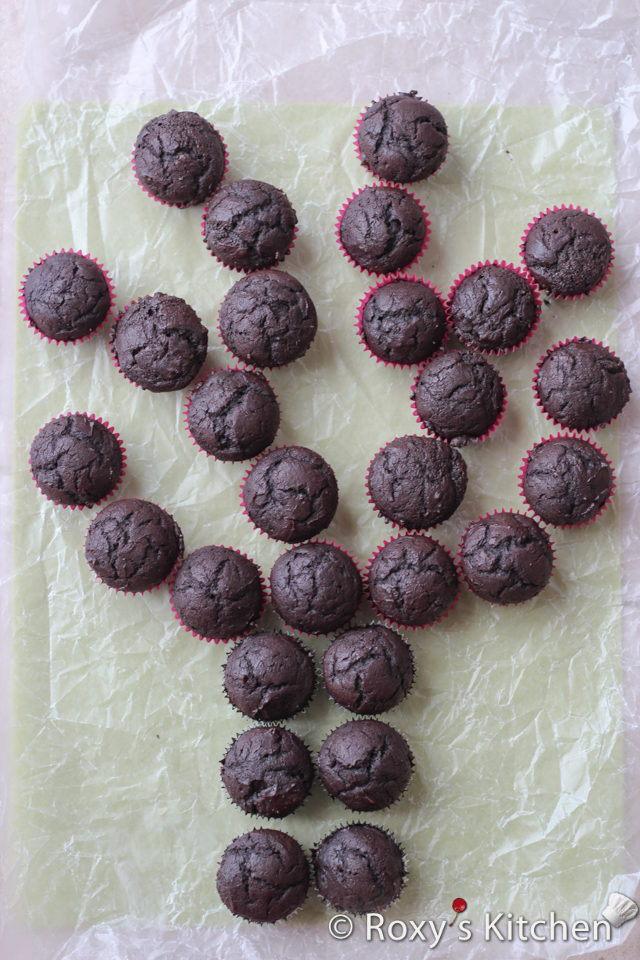
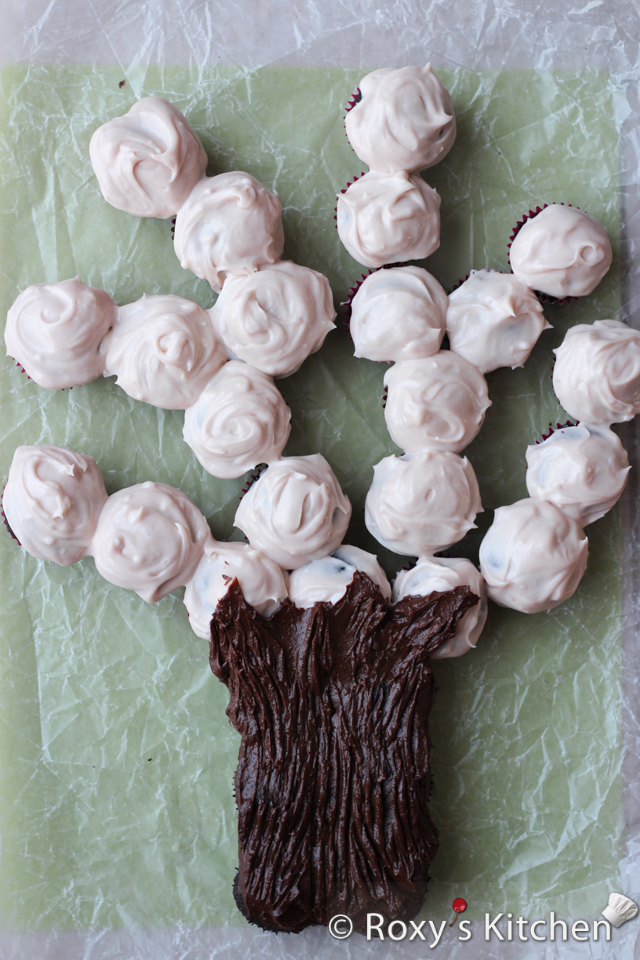
Cover the bottom six cupcakes generously with chocolate frosting to make the tree trunk and the remaining cupcakes with the light pink frosting. Drag a fork along the trunk to create bark on the tree.
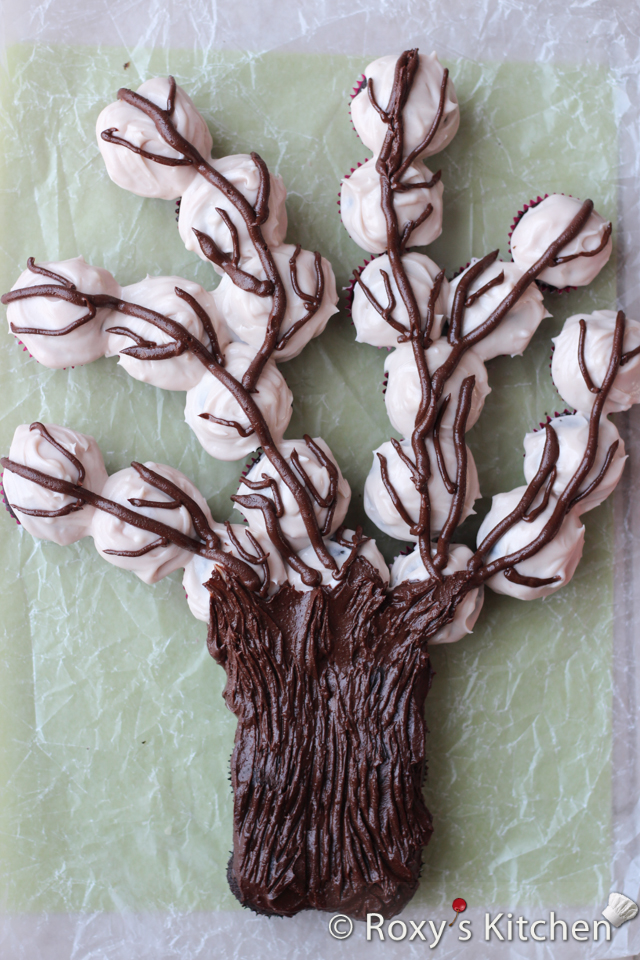
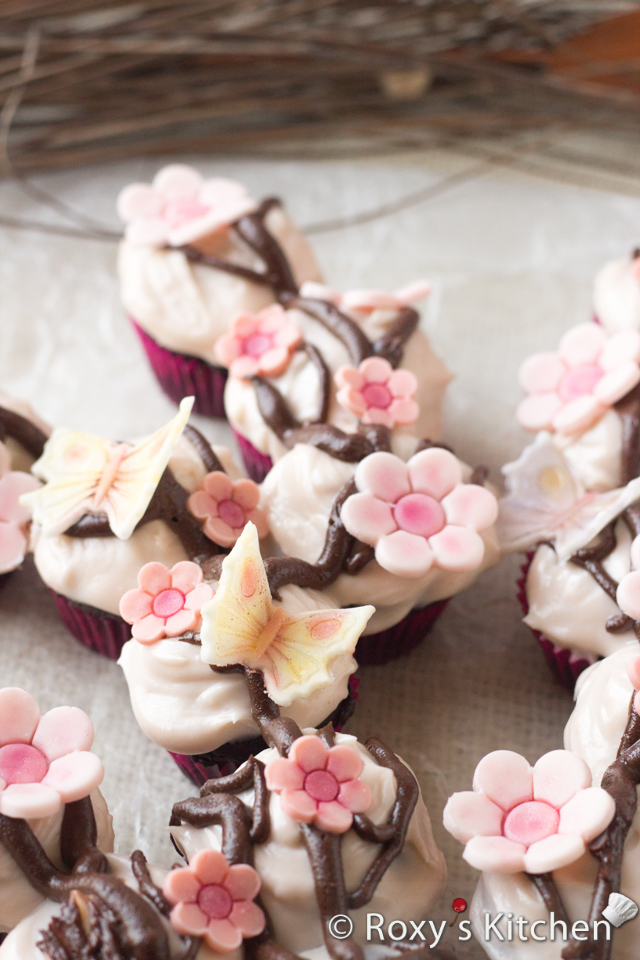
Place some chocolate frosting in the piping bag fitted with the #8 tip and pipe branches. Then change the tip to #5 and pipe some smaller branches as seen below. Let the cupcake tree chill for about an hour before placing the fondant decorations on top.
You should make the fondant spring blossoms and butterflies the night before so they are dried and firm.
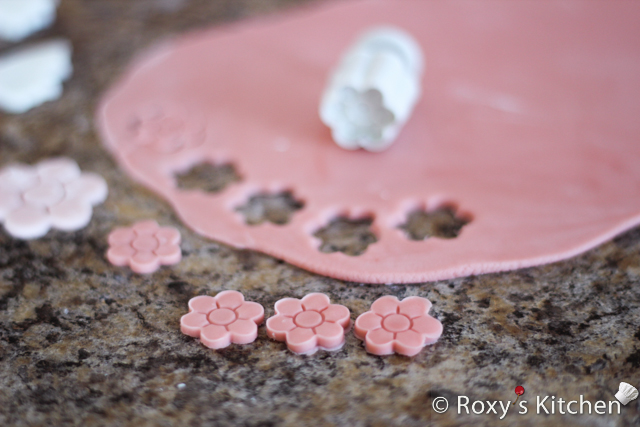
To make the flowers, roll out the pink fondant, cut out and imprint the flower shape with the cutter (without pressing on the plunger) and then press out the flower with the plunger. I used the lighter pink fondant for the bigger flowers and the darker one for the smaller flowers.
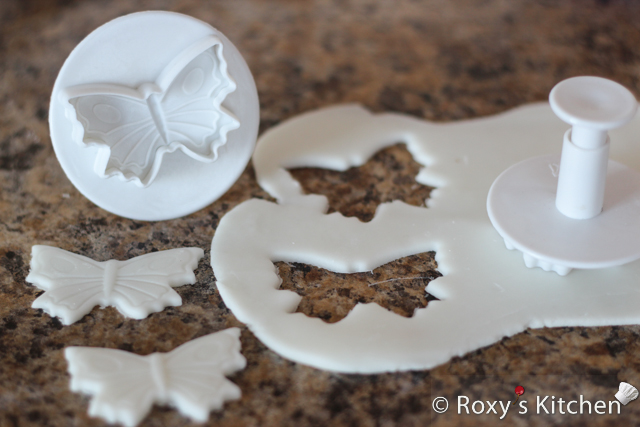
Roll out the white fondant and cut out a few butterfly shapes.
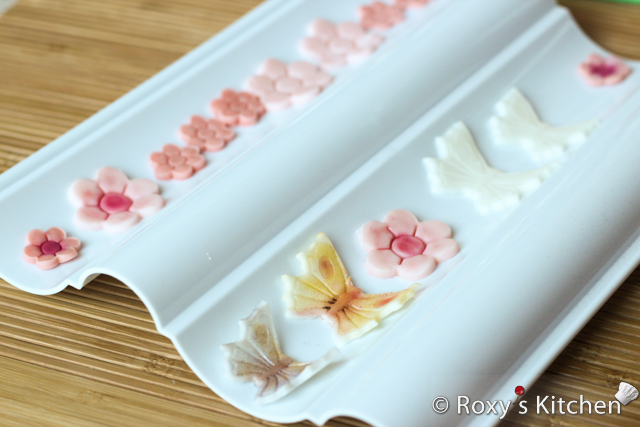
Gently lift the flowers and butterflies and place them in a forming cup/tray to dry. I placed the butterflies in the Wilton wave set/former so that their wings curved upwards as if they were flying. I listed the forming cups as optional because you can always find a substitute for these. As an example for the butterflies you can fold a piece of cardstock into a V shape and lay the butterflies to allow them to dry with their wings up. You can also place some cotton balls or small pieces of paper towels underneath their wings to achieve the same effect. For the flowers, if you don’t have the forming cups, you can put foil over an egg carton or a cupcake pan and press it down to the depth that you want.
As a final touch, take your brush and apply some pink petal dust on the dried flowers (apply more in the middle of the flower). Also, brush the finished butterflies with yellow, purple and pink dust – or whichever colours you prefer!
Lastly, arrange all the fondant decorations on the cupcake tree.


I love this! Very pretty and wonderful tutorial!
This is so pretty! Love the idea for a birthday or bridal shower. Very creative!
Thanks Raquel! You’re right, it would be a great treat for a spring birthday or bridal shower :)!
Ok I’ll be honest-the thumbnail of this pic did not at ALL look like food. This looks as beautiful as real blossom trees! Thank you so much for linking up at Tasty Tuesday! Your recipe has been pinned to the Tasty Tuesday Pinterest board! Please join us again this week!
Aww thanks so much for your kind words, Stephanie <3 ! Thanks for hosting the party and for pinning!
What a lovely idea! So perfect for spring!
Thank you :)!
Super creative and the result is sooo pretty!
Thanks Ai Lin!
That cake looks amazing!! It must have taken a lot of work. Keep it up!
Thanks Anne! It was really fun to make and it’s actually not that hard to put together :).