


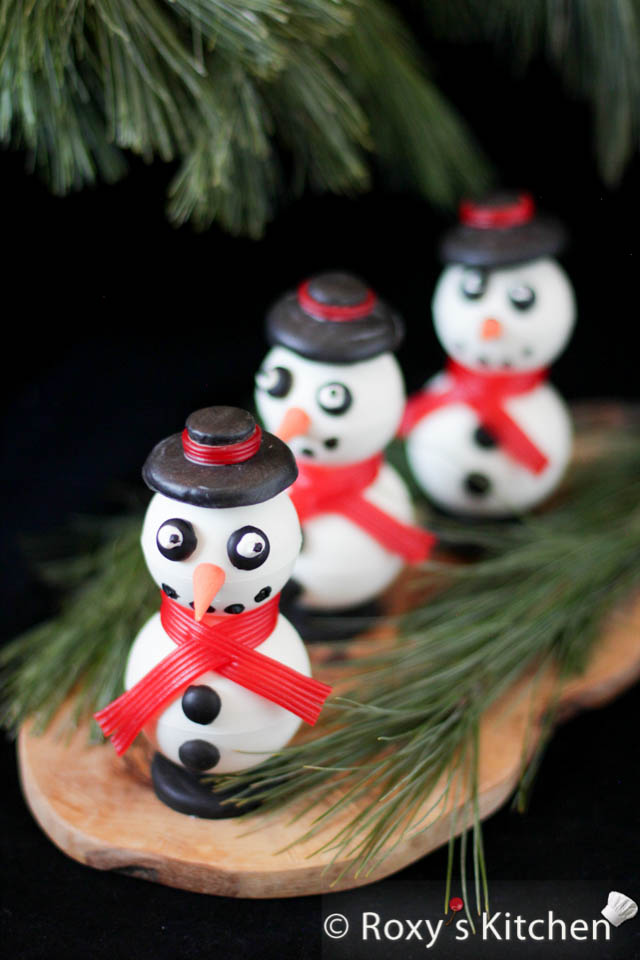
If your kids love chocolate and Oreos then these Chocolate Snowmen filled with chocolate Oreo mousse might be the perfect dessert for them this holiday season. You will need to make a small investment in some ball/sphere silicone molds to make these but I think it’s worth it if you’re into baking cakes and making fun desserts (check out this elegant cake decorated with chocolate balls to see how else you could use the molds). If not, I recommend making my other snowmen but out of eggs – not sweet but just as cute :).
Ingredients (3 chocolate snowmen)
- 200 g white chocolate (good quality, couverture chocolate)
- 4 tsp powdered cocoa butter
- white oil-based food colouring
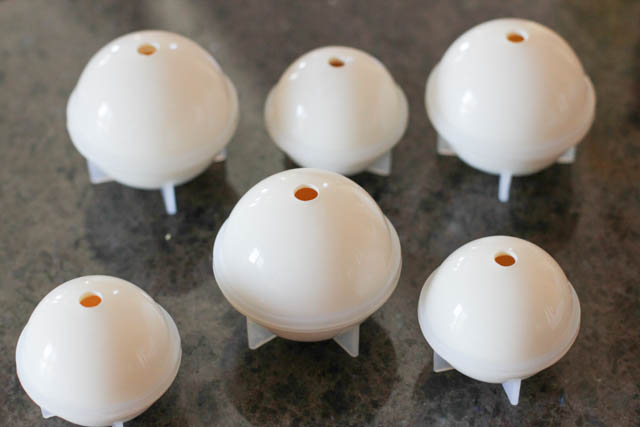
- ball/sphere silicone molds – 3 of each size: 2.5’’ (6.5 cm) and 2’’ (5cm) in diameter
Chocolate Oreo Mousse:
- 100 g white chocolate
- 200 ml whipping cream
- 6 g of unflavored gelatine softened in 70 ml of water
- 3-4 Tbsp finely crushed Oreos
Decorations:
- Hats: 150 g dark chocolate, 3 tsp cocoa butter, black oil-based food colouring, 3-4 medium-sized Oreo cookies, 3-4 mini peanut butter cups, red/cherry liquorice ribbon, a sheet of parchment paper
- Eyes & buttons: 12 dark chocolate callets, a bit of white chocolate for the eye balls
- Nose: tempered white chocolate ( you can save 3 tsp of melted chocolate from the chocolate balls), orange oil-based food colouring
- Scarf: red/cherry liquorice ribbon
Note: All chocolate should be a good-quality baking or couverture chocolate.
Directions
You can read the full instructions below or watch this video tutorial to see how to make the chocolate snowmen:
Making the Chocolate Balls
Melt the white chocolate until it reaches 42° C (107° F). You can use the microwave to melt it 5-10 seconds at a time, stirring it each time.
Then add cocoa butter powder, a teaspoon at a time, and mix it in until it reaches a temperature of 30-32° C (86°-89° F).
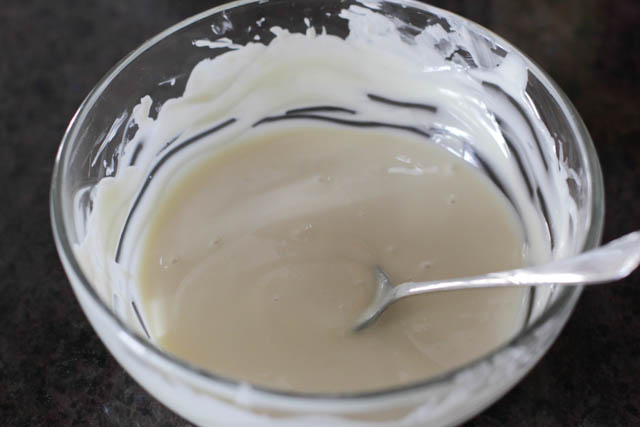
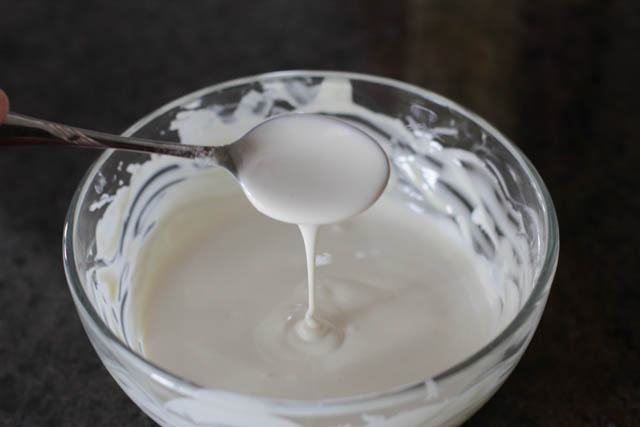
Colour the chocolate using the white oil-based food colouring. The chocolate should have a temperature between 29°C – 30°C (84°F-86°F).
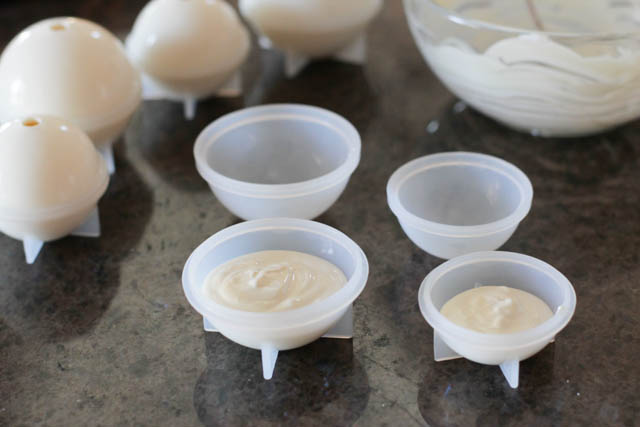
Pour chocolate to fill 2/3 of the base of the silicone sphere. Place the top of the sphere on and start moving the mold around so that the chocolate completely covers the walls of the sphere.
Then, let the excess chocolate drip through the tiny hole on top of the sphere.
Reheat the chocolate a few seconds in the microwave if it cools off too much.
Place the molds in the refrigerator for 2-3 hours. Or if you’re in a rush, you can keep them in the freezer for 20 minutes.
Making the Chocolate Oreo Mousse
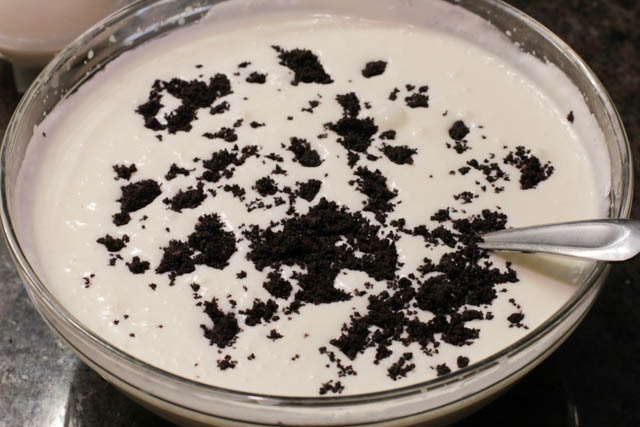
Heat 60 ml whipping cream over medium heat, remove from heat, add the white chocolate and let it sit for 5 minutes. Then stir everything until the mixture is completely mixed and glossy.
While the chocolate is melting, soften the gelatine in cold water for 10 minutes. Melt the gelatine in the microwave a few seconds at a time until all granules are dissolved. You can also melt it over a pot of boiling water. Just place the bowl with gelatine in another bowl with hot water and stir until the gelatin dissolves.
Pour the gelatine over the melted and hot chocolate and stir to combine. Whip the remaining whipping cream (140 ml) with a hand mixer until soft peaks form. Once your chocolate is lukewarm, mix it with the whipped cream using a spoon or spatula. Make sure you’re not overmixing your whipped cream as it will become grainy. Also, if your chocolate is too hot when you pour it over your whipped cream, the mixture will begin to separate and curdle.
Add 2 tablespoons of finely crushed Oreos to the mixture and gently stir it a few times.
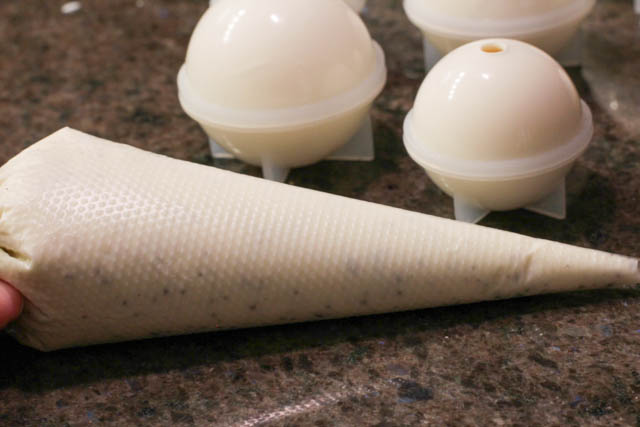
Use a piping bag to fill each chocolate ball with mousse. Refrigerate the filled chocolate balls for a few hours or overnight.
For more step-by-step pictures on how to make chocolate mousse, you can see this triple chocolate mousse post.
Making the Snowmen Hats, Nose, Eyes etc.
Melt the dark chocolate until it reaches 42° C (107° F). You can use the microwave to melt it 5-10 seconds at a time, stirring it each time.
Then add cocoa butter powder, a teaspoon at a time, and mix it in until it reaches a temperature of 30-32° C (86°-89° F).
Colour the chocolate using the black oil-based food colouring.
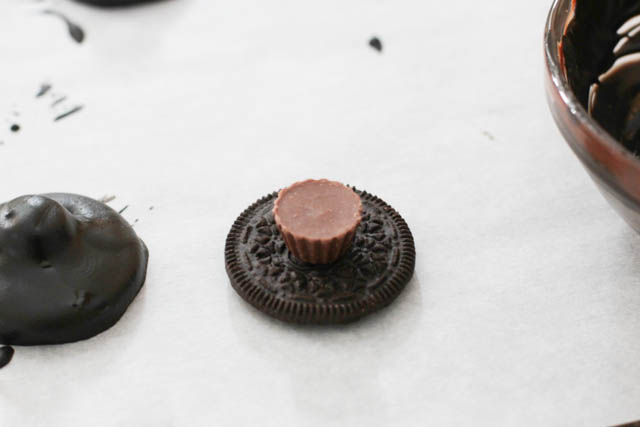
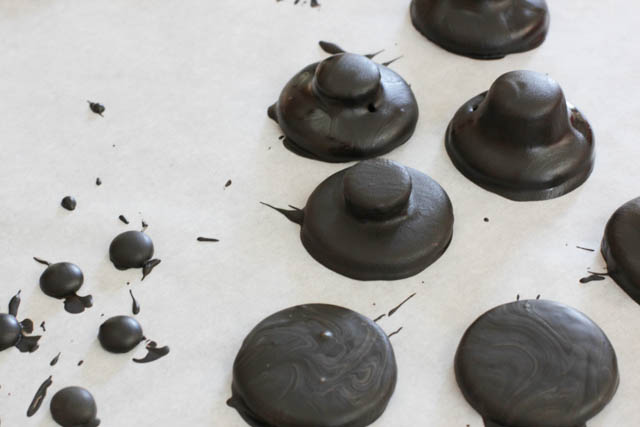
Split the Oreos and remove the filling. Then, on three of the Oreo halves, place a peanut butter cup. You can attach it to the cookie using a bit of melted chocolate.
Then place the Oreo hat on a fork and carefully dip it into the melted chocolate. Tap the fork a bit on the side of the bowl so that the excess chocolate drips off.
Place each chocolate-covered hat/cookie on parchment paper until the chocolate fully hardens.
Cover three more Oreo halves with chocolate in a similar way. These will be used as the base of each snowman when assembling it. You can make some extra hats and bases just in case one of them breaks by accident.
If you’d like to make the eyes and buttons a little darker in colour, you can dip the dark chocolate callets into the black melted chocolate as well. You can leave the eyes black or make some eyeballs and pupils by piping a drop of white chocolate and one of dark chocolate.
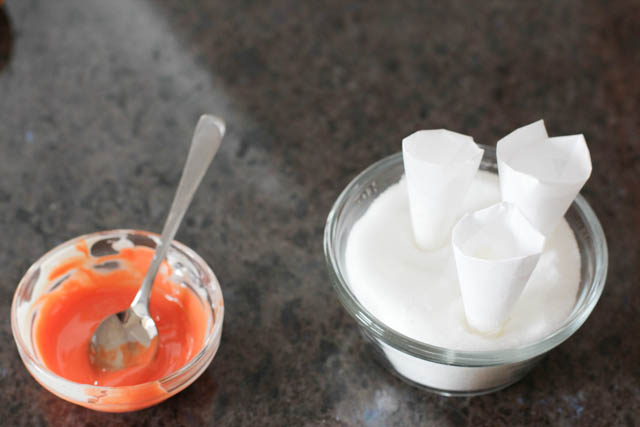
In the meantime, make the snowmen noses. Make 3 tiny cones out of parchment paper. Stick them in a bowl full with sugar so that they maintain their shape. Melt some white chocolate and temper it using cocoa butter, just the way you did when you made the chocolate balls. Or, alternatively, you can reheat the leftover chocolate from when you made the chocolate balls (you should have some left over). Colour the chocolate using the orange oil-based food colouring. Pour 1/2 teaspoon of melted chocolate in each cone. Then, let it sit until the chocolate hardens.
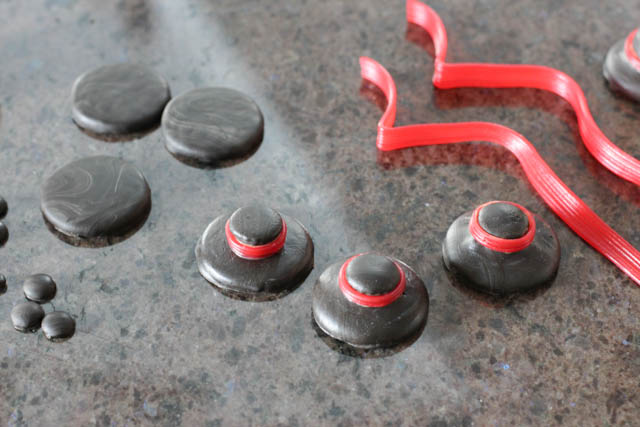
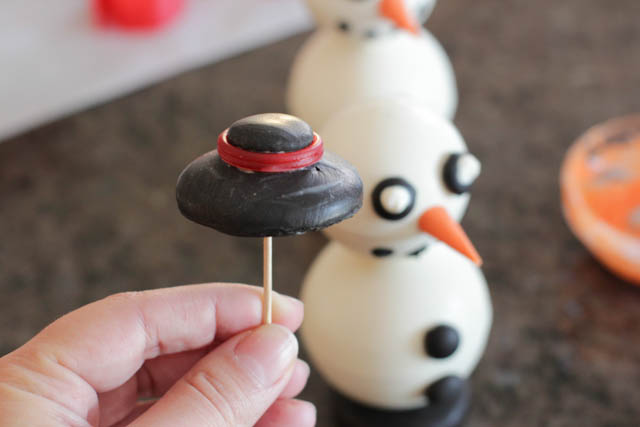
To finish making the hat, cut a thin strip of red/cherry liquorice ribbon. Attach it around the hat dome using a bit of melted chocolate. Place something against the two ends to hold them together and attached to the hat until the chocolate hardens. I used the scissors handles.
Assembling the Chocolate Snowmen
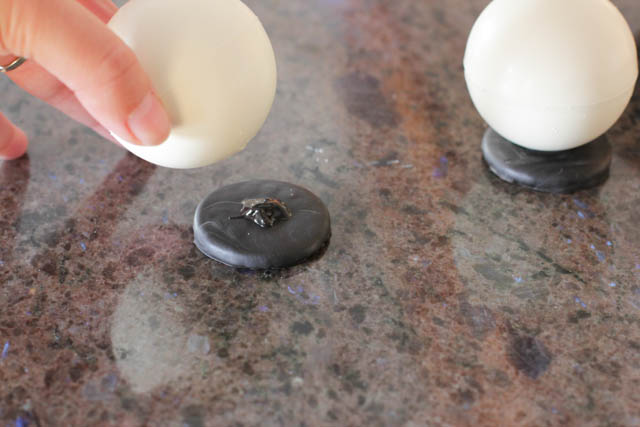
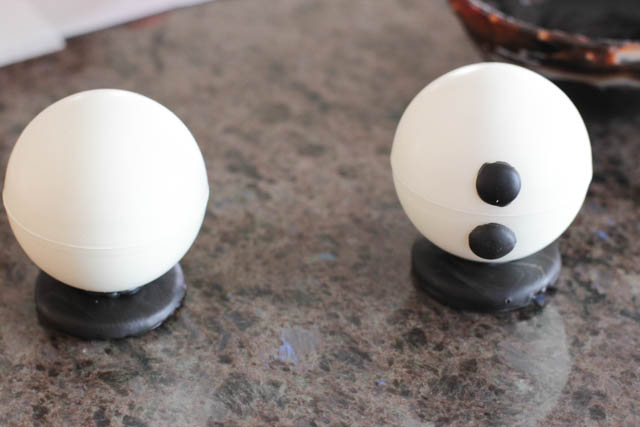
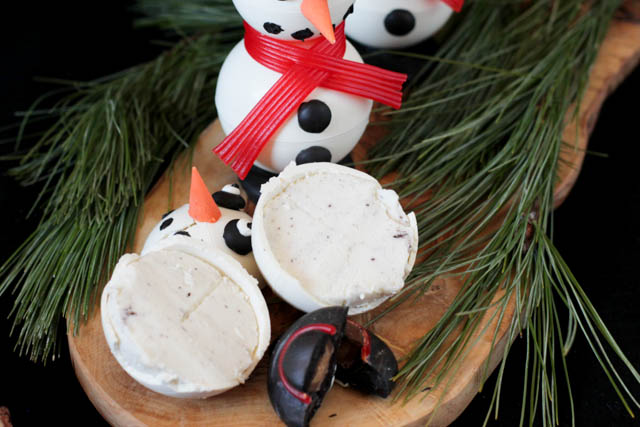
Firstly, carefully release the big 2.5’’ chocolate balls from the silicone molds.
Place a bit of melted chocolate on the Oreo cookie base and attach the chocolate ball to each cookie (with the tiny hole facing down). Refrigerate them for 15-20 minutes.
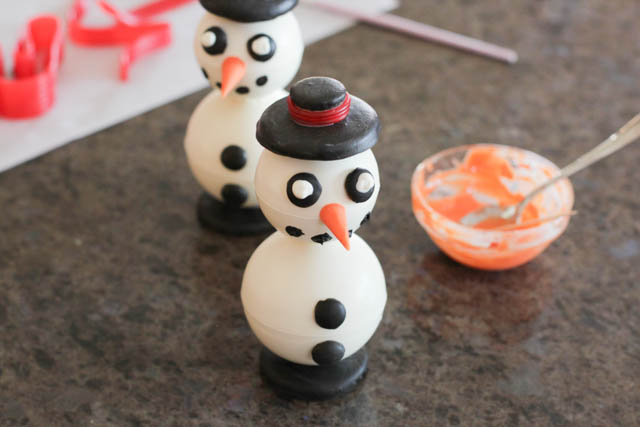
Attach the buttons using a drop of melted chocolate.
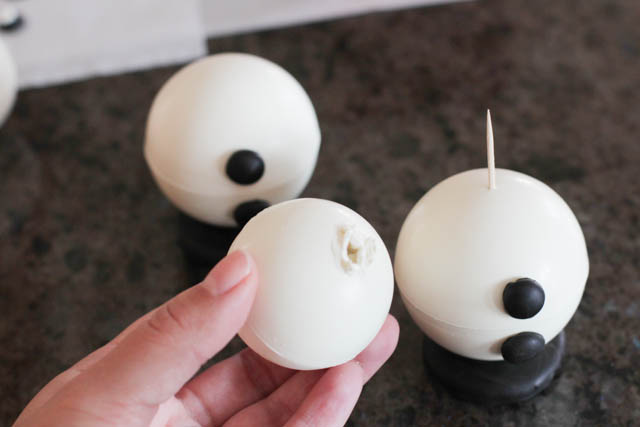
Carefully release the small 2’’ chocolate balls from the silicone molds.
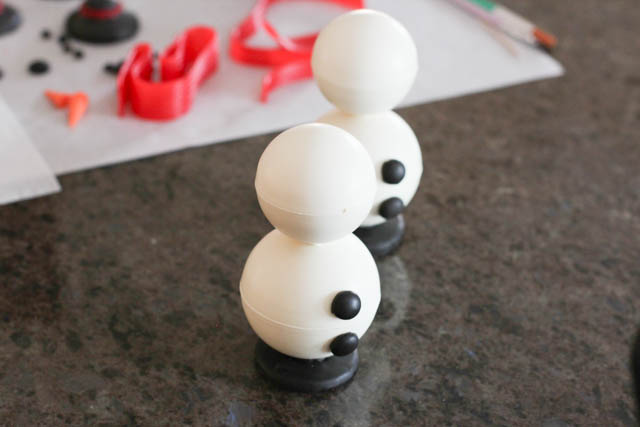
Insert a toothpick halfway in the centre of the big chocolate ball. Attach the small chocolate ball to the big chocolate ball using a bit of melted chocolate.
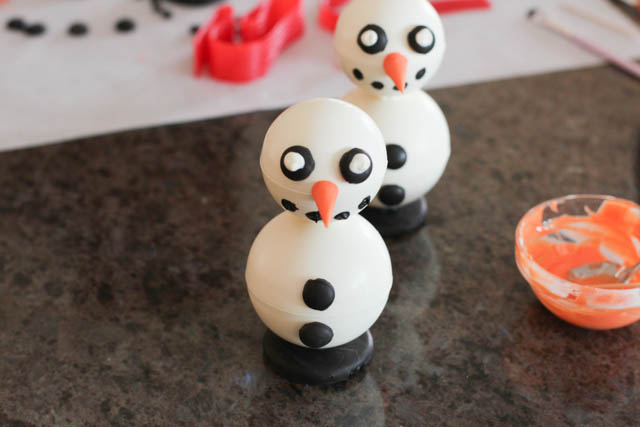
Attach the eyes to the snowman using a bit of melted chocolate. Then, make four dots for the mouth using a tiny brush and black melted chocolate (or you can pipe them).
Attach the nose using a bit of orange melted chocolate.

Make a tiny hole in the bottom of the hat using a toothpick. Then, make a hole, using a toothpick, in the centre of the snowman’s head. Lastly, insert half a toothpick in the hat hole and attach it to the chocolate snowman using a bit of melted chocolate.
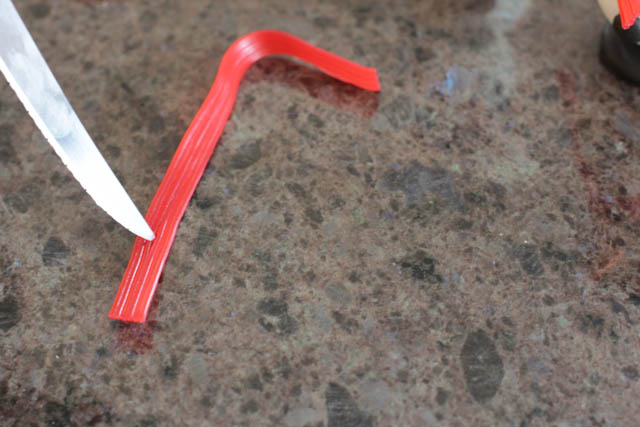
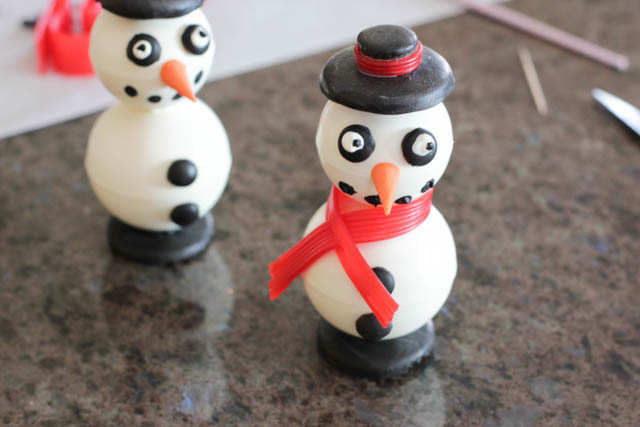
To make the scarf, cut a 6-7’’ long strip of liquorice. Make a slit at one end as shown below. Then, wrap the scarf around the chocolate snowman and pass the other end through the slit you just made. Make some split ends with the scissors.
This post contains Amazon.com affiliate links for products I personally use and love.

