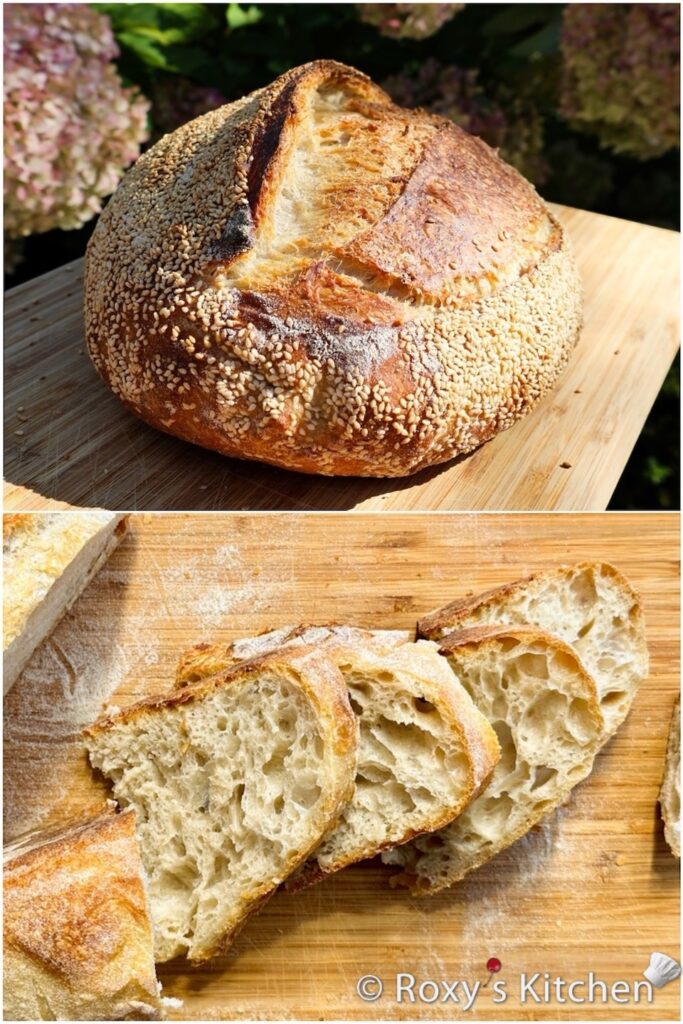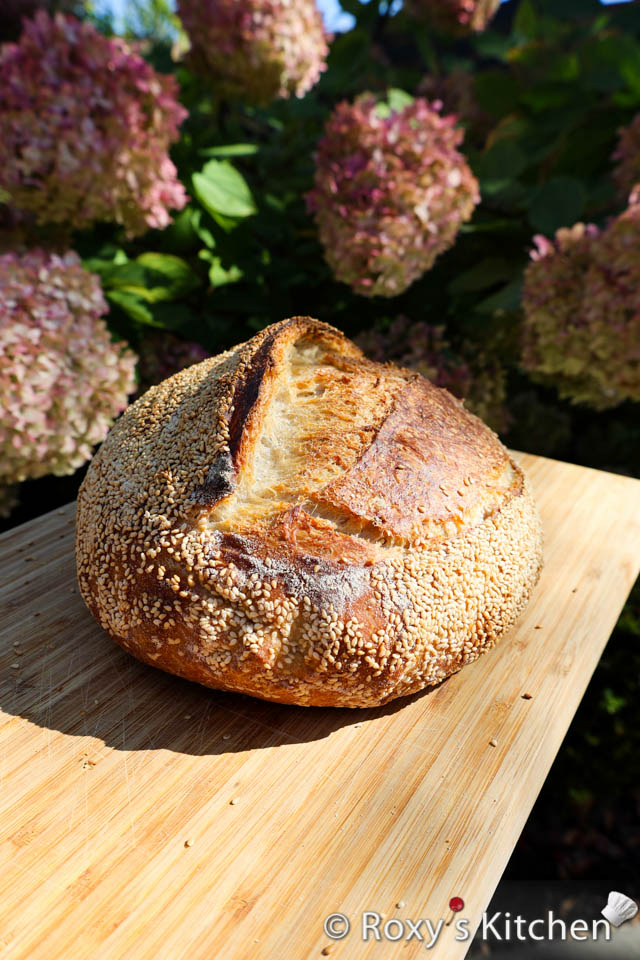
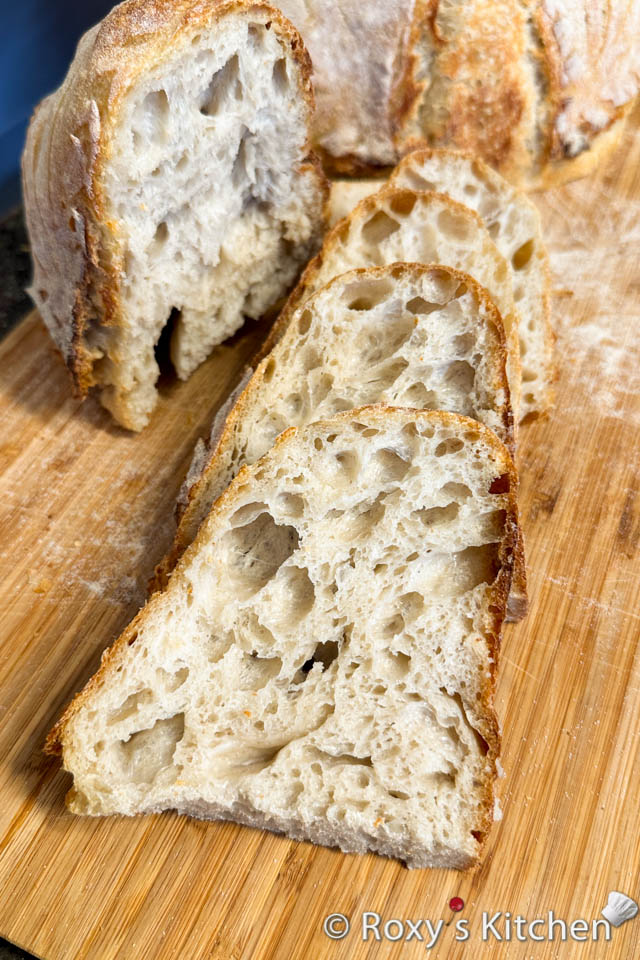
Who doesn’t love a freshly baked loaf of sourdough? Over the past few months, I’ve been handing out sourdough starter to friends and family like candy! So today, I thought it’s only fair to share my go-to sourdough bread recipe with all of you. This is a recipe I make time and time again and it’s so basic and easy that you can’t go wrong with it. Whether you’re new to sourdough or you’ve baked a few loaves already, I promise you’ll love the crispy crust and the soft, airy crumb.
I’ll share with you the basic recipe that’s using just flour, water and salt as well some tips on how to get a nice oven spring and ear to achieve that bakery-style look even if you’re a beginner.
Ingredients (1 loaf)
Levain:
- 20 g sourdough starter* (maintained with a 1:1:1 feeding ratio of starter:rye flour:water)
- 50 g water, measured by weight (filtered or dechlorinated works best)
- 50 g bread flour that you’ll use to make the bread
*see Sourdough Starter Maintenance for more details on how to feed your starter.
Bread:
- 120 g levain (from above)
- 500 g hard white (but unbleached) bread flour* (minimum 12g of protein per 100 g)
- 350 g water, measured by weight (filtered or dechlorinated works best)
- 10 g (2 tsp) salt
- rice flour to dust your proofing basket or bowl lined with a kitchen towel
- sesame seeds (optional)
*I use hard unbleached bread flour. The flour you use for sourdough should have a minimum of 12g of protein per 100 g as this is crucial for the gluten structure, provides strength, elasticity and volume to the dough. Flour with less than 12% protein may not develop enough gluten, leading to a dense, flat loaf with poor structure.
Tools:
- 5-7 litres (5-7 quart) dutch oven or heavy pot with a lid
- proofing basket/banneton or bowl lined with a kitchen towel
- dough whisk (optional)
You will also need a 5-7 liters (5-7 quart) dutch oven or heavy pot with a lid.
Directions
See this video tutorial or read the detailed instruction below:
Prepare the Levain (Night Before)
One prep step is required before making your dough. At night, or 8-10 hours before making the dough, take your starter out of the fridge and prepare a levain by mixing 20 grams of sourdough starter (active or unfed starter is fine) with 50 grams of water and 50 grams of white bread flour until well combined.
Cover loosely and leave at room temperature, until it is bubbly, active, and doubled in size.
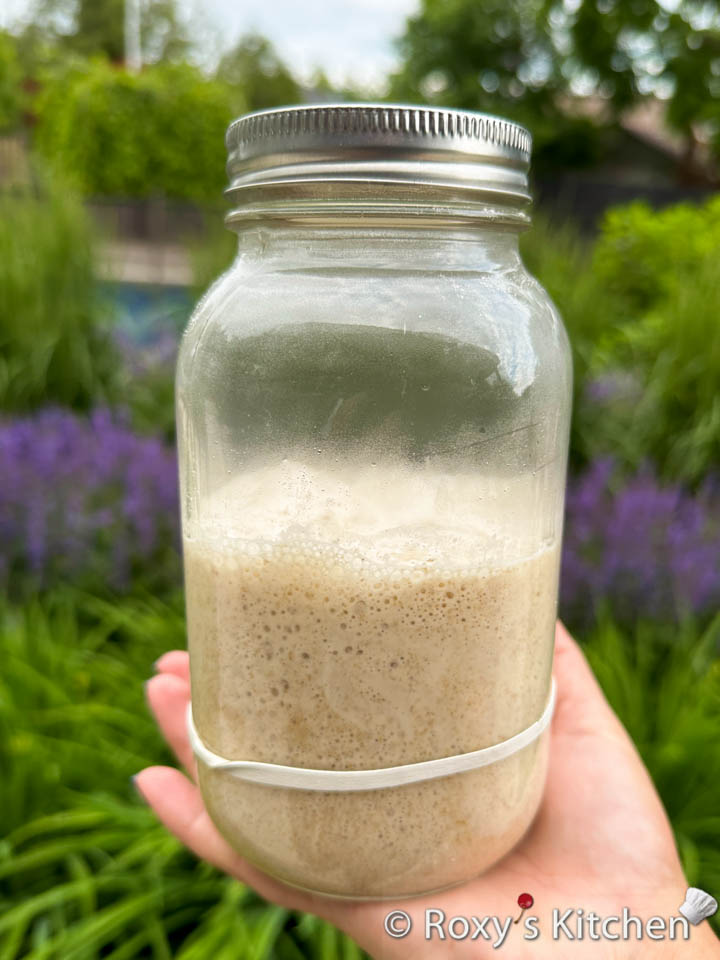
If you want the levain to double in size faster (in 4-6 hours), bring your starter to room temperature before making the levain. Or you can place the levain in the oven with the lights turned on to speed up the fermentation process, but make sure the ambient temperature doesn’t go above 86 °F (30°C).
Mix the Dough
In a large bowl, combine 500 g bread flour and 350 g water. I use hard unbleached bread flour. The flour you use for sourdough should have a minimum of 12g of protein per 100 g as this is crucial for the gluten structure, which provides strength, elasticity and volume to the dough. Flour with less than 12% protein may not develop enough gluten, leading to a dense, flat loaf with poor structure.
Mix until no dry flour remains. If you’re a beginner at working with sourdough, reduce the amount of water to 330 g as a lower hydration dough is easier to work with and less sticky.
Cover the bowl and let the dough rest (autolyse*) for 1 hour. Add 120 g of the prepared levain and 10 g salt to the dough. Mix thoroughly by pinching and folding the dough until all ingredients are fully incorporated.
If preferred, add the salt later on, during the 3rd set of stretch-and-folds. Salt slows down fermentation by inhibiting yeast activity. Delaying its addition allows fermentation to proceed more quickly early on, which can be beneficial in cooler environments or for specific timing. It is also beneficial for high-hydration doughs, as the salt can slightly tighten the gluten network slowing down the hydration process of the flour.
*Autolyse is a simple bread-making technique where you mix only the flour and water in a recipe and let the mixture rest before adding other ingredients like salt, levain (sourdough starter), or yeast. This resting period allows the flour to hydrate fully and begins the development of gluten, the protein network responsible for the dough’s structure. The dough becomes smoother and more elastic without much kneading, reducing manual effort.
Stretch-and-Folds and Bulk Fermentation
Cover the bowl with a damp towel or plastic wrap (or disposable shower caps) and let it rest for 30 minutes.
Next, perform 4-5 sets of stretch-and-folds at 30-minute intervals:
- To stretch and fold, grab one side of the dough, stretch it upwards, and fold it over the dough. Rotate the bowl 90 degrees and repeat until all four sides have been stretched.
- Cover the bowl after each set.
At the beginning, the dough is sticky so always wet your hands before handling it so that it doesn’t stick to your hands. By the last round of stretch-and-folds, you will see the dough transform and become less sticky, bouncy and it will hold its shape better.
If you’ve chosen to add your salt during the 3rd set of stretch-and-folds, mix the salt with a a few drops of water before adding it. This makes it easier to distribute evenly throughout the dough. Sprinkle the dissolved salt solution over the dough. Gently stretch and fold a few times to begin incorporating the salt. Follow up with another 1-2 sets of stretch and folds to ensure the salt is evenly distributed.
Transfer the dough to a clean bowl or container and cover it.
Let the dough bulk ferment until it has increased in size by 50 to 75% (not necessarily doubled):
- Cold Bulk Fermentation: Place the dough in the refrigerator and let it bulk ferment for 12-18 hours. Slower fermentation allows for a more pronounced sourdough tang and a more open crumb. This is also ideal for fitting the bread-making process into a busy schedule, as the dough can ferment overnight while you sleep.
- Room Temperature: Let the dough raise at room temperature for 3-4 hours (on top of the 2 hours during which you did the stretch-and-folds), depending on room temperature (warmer kitchens will ferment faster). This method is perfect if you’re baking on the same day or if you prefer a milder sourdough flavour.
Shape the Dough
Sprinkle rice flour to coat your proofing basket, banneton or a bowl lined with a kitchen towel. Rice flour is better than regular flour because it is naturally gluten-free, which means it doesn’t absorb moisture as easily as regular flour. This helps create a barrier between the dough and the basket, reducing the chance of sticking.
After the bulk fermentation, get your work surface slightly wet and gently turn out the dough. Some bakers lightly flour the surface instead, but I prefer maintaining the dough hydration and not adding extra flour.
If you’re making a double batch of dough (I always do this), cut your dough in half. Then, pre-shape the dough into a round ball by folding the edges toward the centre. Form it into a rough ball shape. Let it rest for 20-30 minutes.
Shape the dough into its final form (e.g., round boule or oval bâtard). Shape the dough using a stretch and fold technique. Gently grab one end of the dough and stretch it up and away from you, then fold it back onto the center of the dough. Form it into a rough ball shape. Use your hands to gently shape it. To do this, cup the sides of the dough and pull the dough towards you, rotating the loaf as you go for a round boule. Tuck the edges of the dough under, creating a smooth and tight surface on top.
For an oval bâtard, you shape it into a log rather than a round loaf in similar way.
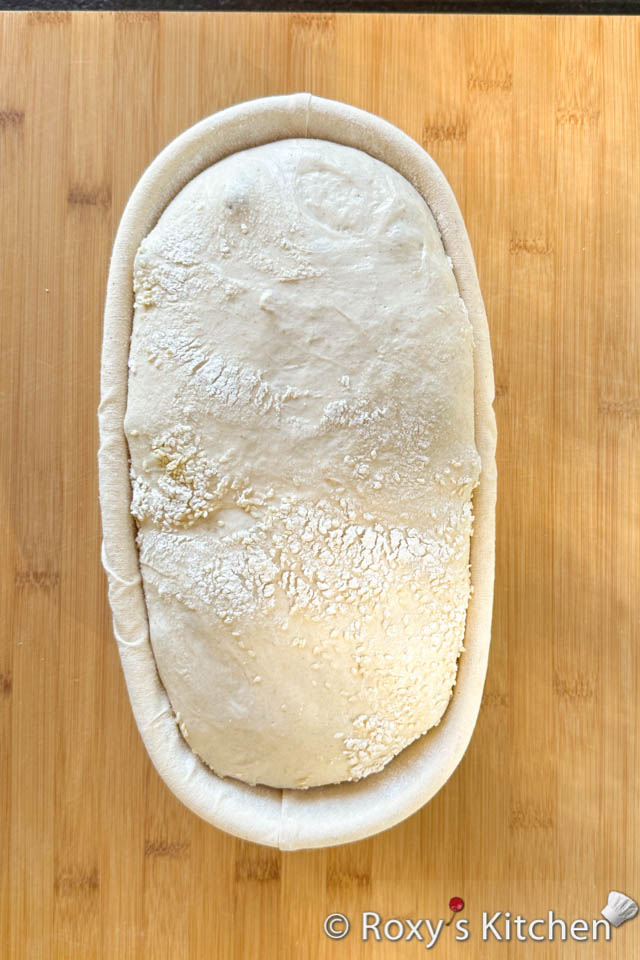
Place the dough seam-side up into your well-floured proofing basket.
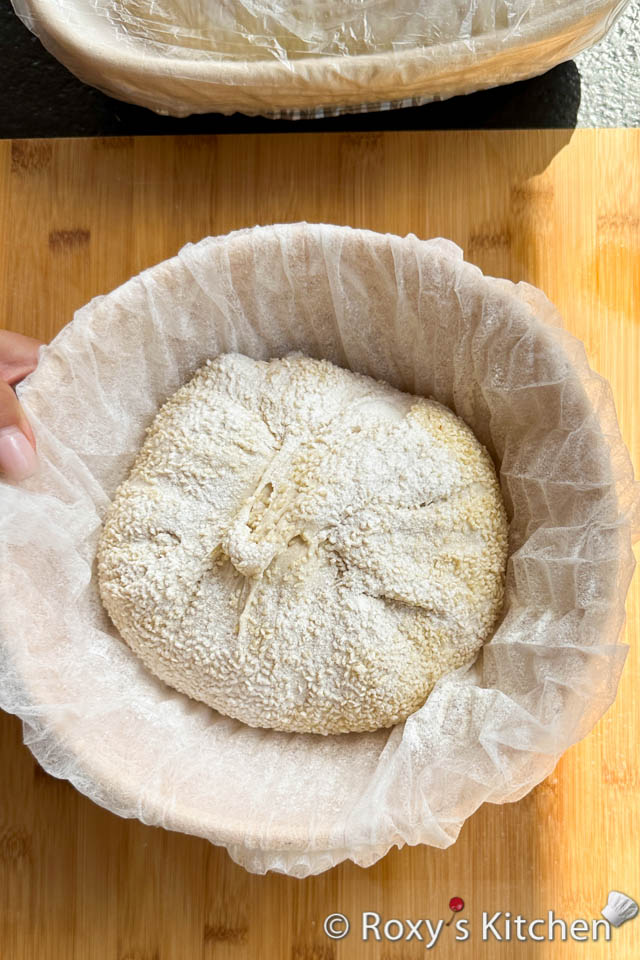
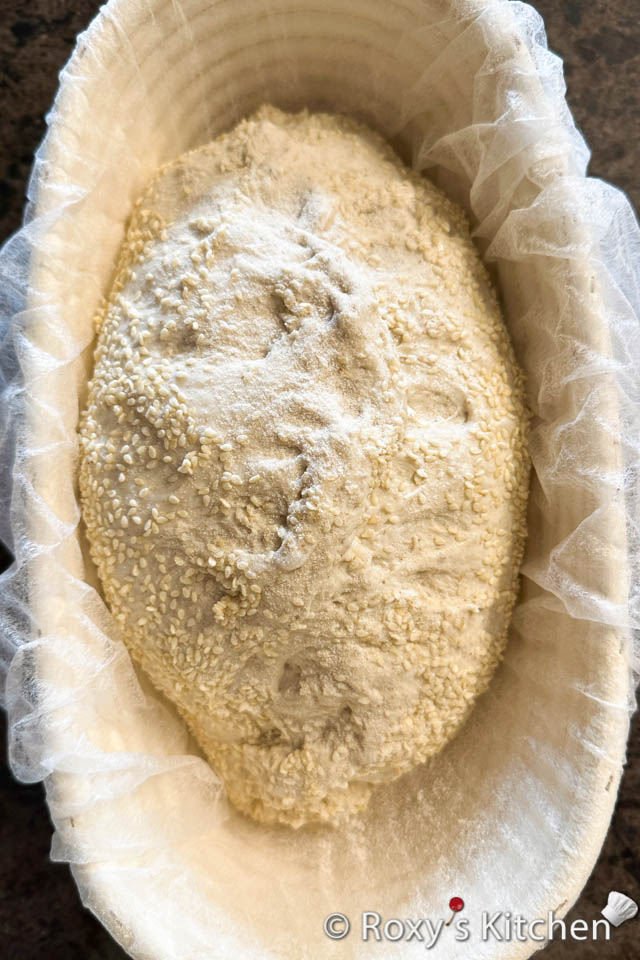
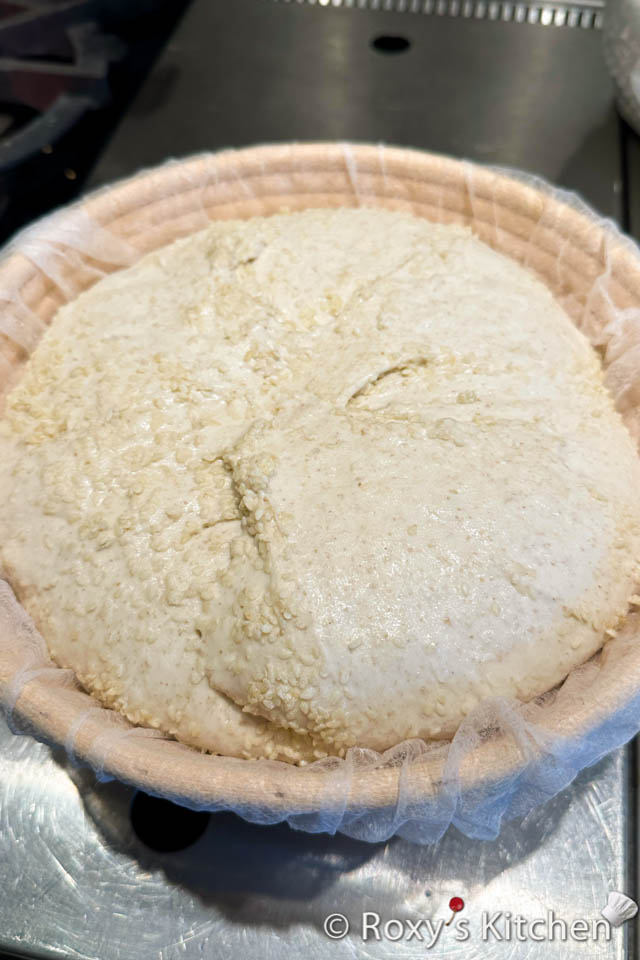
Optionally, you can coat the top of your sourdough loaf with sesame seeds. On a clean plate or shallow bowl, spread an even layer of sesame seeds (white, black, or a mix) to fit the size of your loaf’s surface. Gently lift the shaped dough and carefully press the top side into the sesame seeds. Rock it slightly to ensure the seeds adhere evenly. Flip the dough so the sesame-coated side faces down (the bottom) in the banneton. This will ensure the sesame seeds are on top when you turn the loaf out for baking.
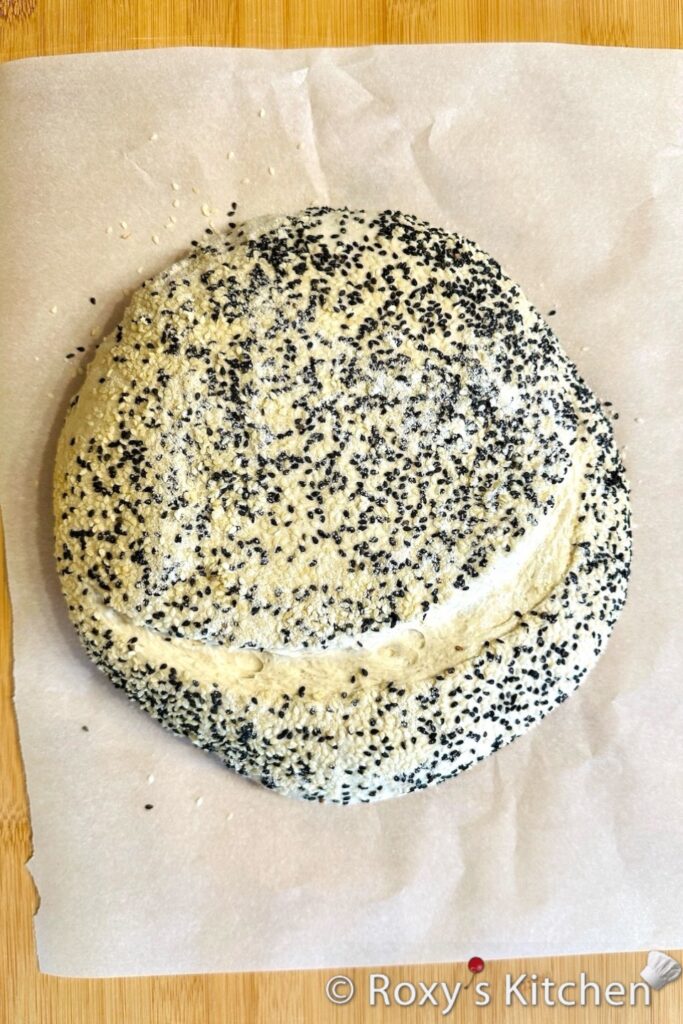
I cover the proofing baskets with disposable shower caps. Let the dough rest for 30 minutes. Then gently grab one end of the dough and stretch it up and away from you, then fold it back onto the centre of the dough. Do this for all sides of the dough. If you don’t let the dough rest, it will spring back once you pull it and you won’t be able to get the sides to stick to each other. This technique creates extra tension in the dough, giving it a nice rise and more open bread crumb once baked.
Final Proof
Sprinkle some rice flour on top. Cover the dough and let it proof at room temperature for 1-2 hours or until it passes the “poke test” (a finger pressed into the dough leaves a slight dent that springs back slowly). If the dough springs back quickly, it’s underproofed. If it springs back very slowly, it’s properly proofed and ready to bake. Finally, if it never springs back, the dough is overproofed.
Alternatively, for better flavour, place the dough in the refrigerator for an overnight cold proof (8-12 hours).
Preheat the Oven and Dutch Oven
Place the Dutch oven (with the lid) in your oven and preheat to 465°F (240°C) for at least 30 minutes before baking.
A Dutch oven pot with a lid is used to bake bread because it creates a moist environment that helps the bread rise and develop a crispy crust. The lid traps steam inside the pot, keeping the dough moist and preventing it from drying out as it bakes. The heavy pot also conducts heat evenly, producing a consistent and thorough bake. Baking bread in a Dutch oven also helps to produce a loaf with a large, round shape, which is not always possible with a standard baking sheet. Additionally, using a Dutch oven pot with a lid allows you to bake bread at high temperatures without the risk of burning the bottom of the loaf.
Bake the Sourdough Bread
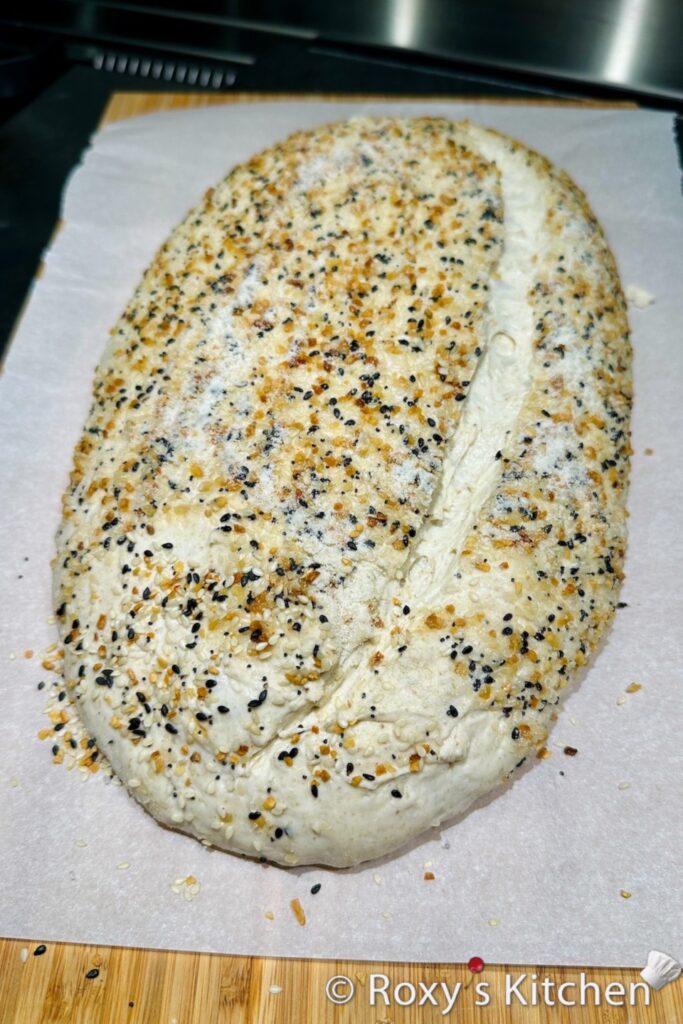
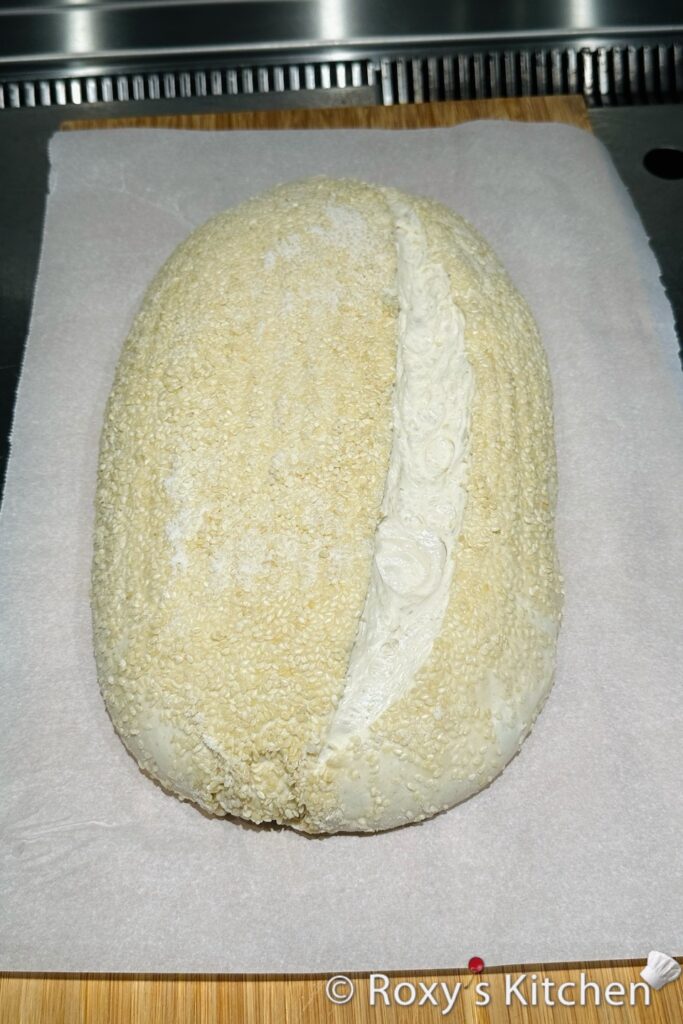
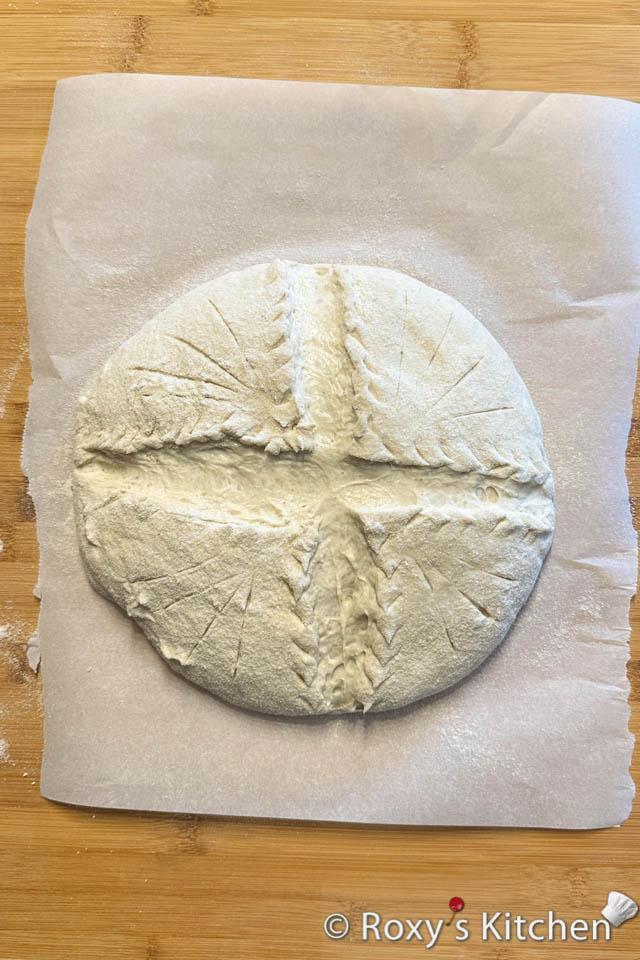
Carefully turn the dough out onto a piece of parchment paper, seam-side down. Brush off any excess rice flour. Don’t worry if your dough is not super firm like you see in most sourdough video recipes. It’s normal for the dough to spread a bit but it’s important to score it very fast and place it in the oven right away.
Score the top of the dough with a sharp knife or blade to allow for controlled expansion during baking. Use a fine-mesh sieve to lightly and evenly sprinkle rice flour over the top of the dough. A thin layer is sufficient; too much can obscure the design. Dusting the surface of your dough with rice flour is an excellent way to make your scored design stand out more after baking. Rice flour remains pale white during baking, while the exposed areas of the dough (from scoring) darken and develop a rich crust colour. This contrast makes the scored patterns more visible and striking.
Using oven mitts, remove the hot Dutch oven from the oven, lift the parchment paper with the dough, and carefully place it inside the hot Dutch oven.
To create extra steam during the baking process, you can add 2-3 ice cubes into your dutch oven, alongside the parchment paper. Steam helps keep the surface of the dough moist during the first part of baking, delaying the hardening of the crust. This allows the bread to expand fully and develop a good rise (oven spring). If you’re using an enamelled dutch oven, I don’t recommend this as you can ruin your dutch oven. Instead, you can use a spray bottle to spritz water directly onto the bread.
Cover with the lid and bake for 25 minutes.
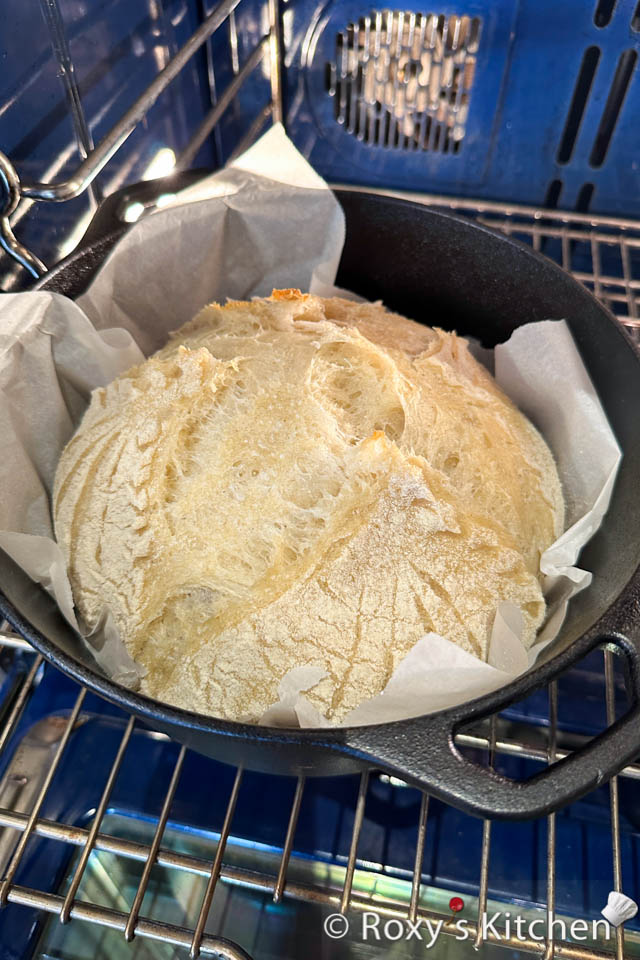
If you prefer a bigger, more pronounced ear, use the 7-minute double score method. That is, after baking the bread for 7 minutes, remove the lid and make a second, deeper score (4-5 mm deep) along the same line of your initial score. Cover the pot with the lid and continue baking for 18 more minutes. This double score method produces clean, dramatic scoring patterns, giving your sourdough a professional, bakery-style look.
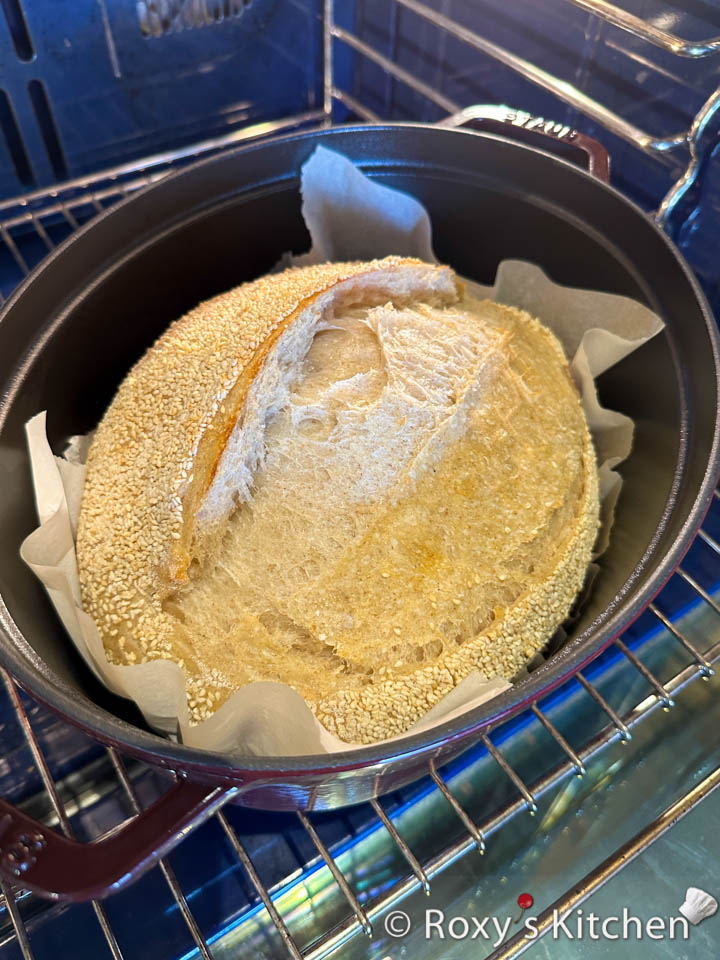
Remove the lid and bake for another 20-25 minutes, or until the crust is deep golden brown and the loaf sounds hollow when tapped on the bottom.
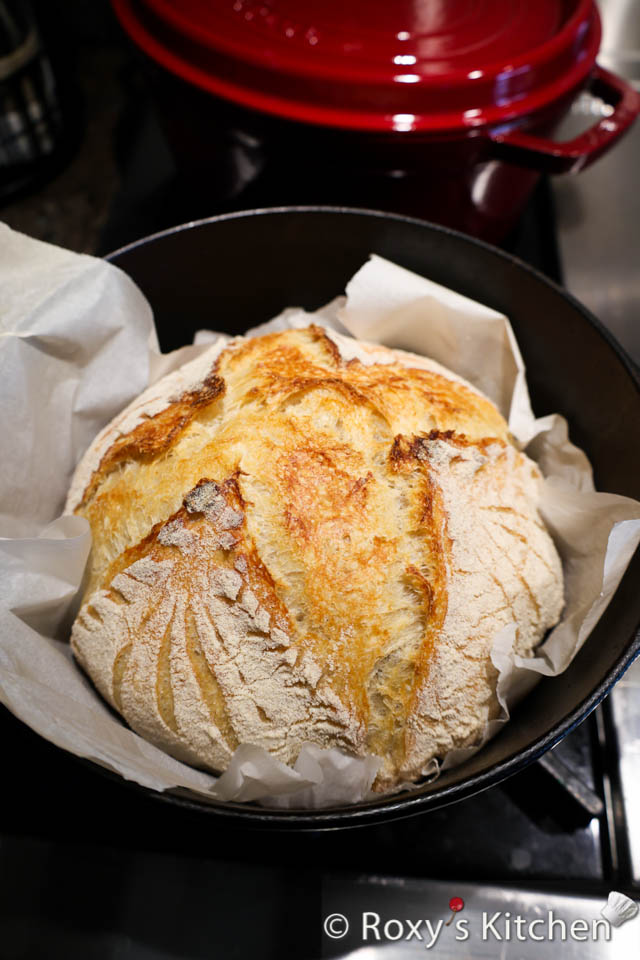
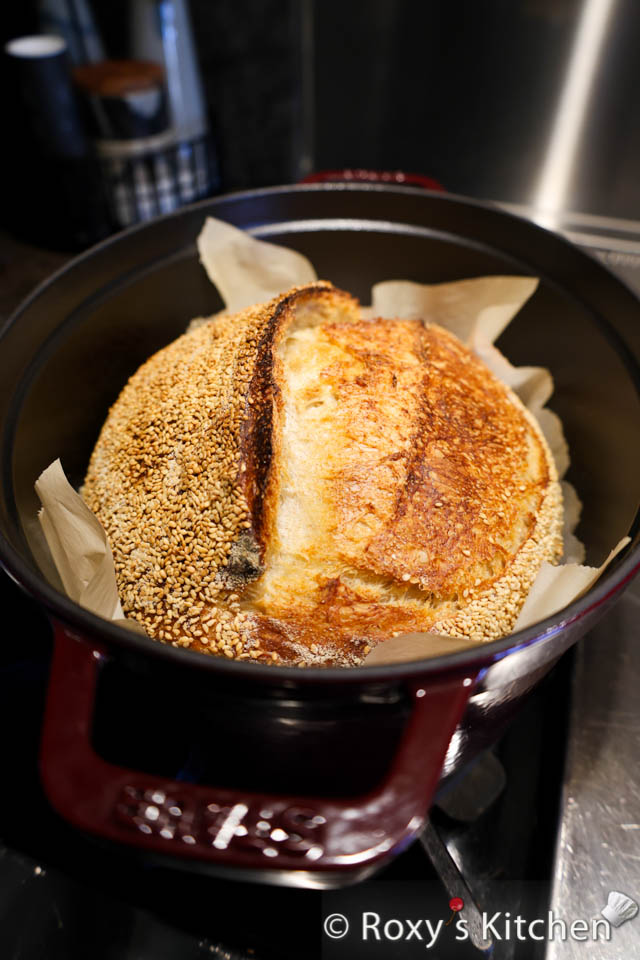
Cool the Sourdough Bread
Carefully transfer the sourdough bread to a wire rack and let it cool completely for at least 1 hour before slicing. Cutting too soon can result in a gummy interior.
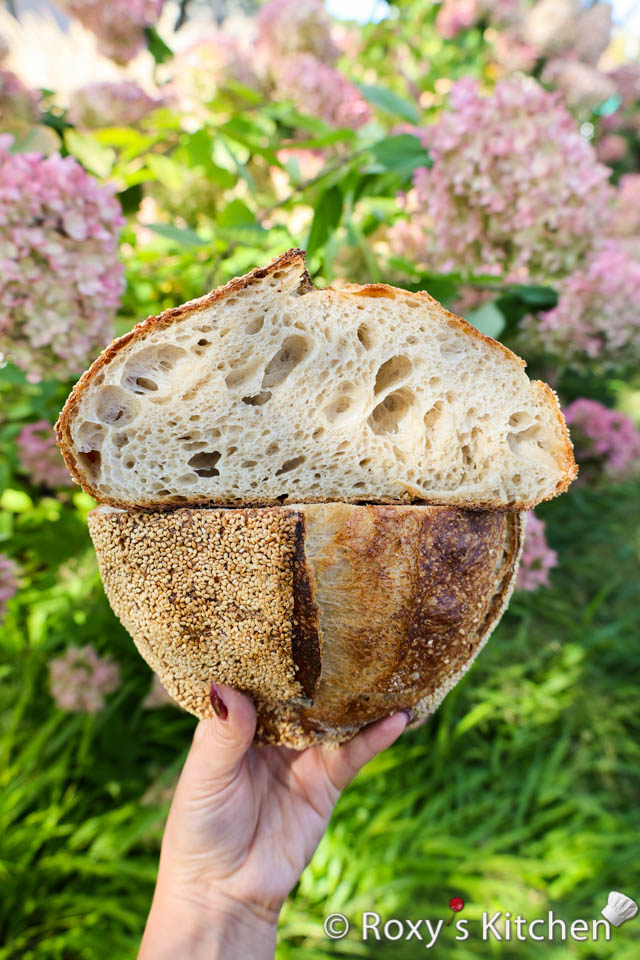
Enjoy your beautifully baked sourdough loaf! The crispy crust and soft, airy crumb make it perfect for any meal.
Note that no bread looks the same, no matter if you follow the same process to make it. Some loves will be better than others so don’t get discouraged if yours doesn’t look like the picture-perfect ones professional bakers show you. I promise it will taste great even if it doesn’t have a big ear!
Sourdough Starter Maintenance
A strong sourdough starter is an active, healthy starter that has a balanced colony of wild yeast and lactic acid bacteria. It ferments reliably, doubles in size after feeding, and has the strength to leaven bread effectively. A strong starter will double (or even triple) in size 4-8 hours after feeding, at room temperature.
Feed your starter with rye (preferred) or whole wheat flour because these flours have more nutrients for the yeast and bacteria.
Refrigerated Maintenance (Feeding Less Frequently)
If you don’t bake often, store your starter in the refrigerator and feed it weekly. This slows down fermentation. I bake bread once a week so this is my preferred method of maintaining my starter.
To feed it, remove the starter from the fridge once a week. Add equal parts (by weight) of flour, water and starter into a clean container or jar. Example: If you have 30g of starter, add 30g of rye flour and 30g of water. Mix thoroughly until combined and smooth. This will give you 90g of starter in total. So every time you feed 30g of starter, you can discard the remaining 60g.
I typically use most of the discard to make the two loaves of bread every week so there is barely any waste. If you don’t make bread, you can save the discard for recipes like pancakes or crackers (or just throw it away).
Loosely cover the container (with a lid or plastic wrap) to allow airflow but prevent contaminants.
Daily Feeding Instructions (Room Temperature Maintenance)
If you keep your starter at room temperature, you need to feed it daily. Follow the same process as above by adding equal parts (by weight) of rye flour, water and starter. Mix thoroughly until combined and smooth. Loosely cover the container (with a lid or plastic wrap) to allow airflow but prevent contaminants. Let it sit at room temperature for 4-8 hours until it bubbles and rises.
Tips for Success
- Ratios: A 1:1:1 feeding ratio (starter:flour:water) is standard but can vary slightly based on hydration preferences.
- Warm Environment: Starters thrive at 70-75°F (21-24°C). Cooler environments may slow activity.
- Consistency: Keep feeding times regular (daily for room temp or weekly for fridge storage).
- Healthy Starter Signs: A healthy starter smells tangy, has bubbles, and doubles in size after feeding.
- Troubleshooting: If your starter develops liquid (“hooch”) on top, it’s hungry. Stir the hooch in or pour it off before feeding.
With consistent feeding, your sourdough starter will remain active and ready for baking!

